St. Albans Tile Cleaning

St. Albans Tile Cleaning

Welcome to my Work History archive where you will find examples of the cleaning and renovation of tiles carried out in St. Albans.

Neglected Sandstone Patio Restoration St Albans

Full Restoration of a Neglected Sandstone Patio in St Albans

Earlier this year a customer from St Albans was in touch about their Sandstone patio which as you can see was looking neglected and worse for wear. The forecast was for a heat wave and so they were keen to get the patio cleaned up and available for use.

We are based in St Albans so it wasn’t long before I was able to pop over survey the stone and discuss its renovation. It turns out the patio was laid 10-12 years ago but over that time the original grouting had slowly broke down resulting in weeds growing up and around the stone, black mould spots had also begun to appear.

Sandstone Patio Before Cleaning St Albans Sandstone Patio Before Cleaning St Albans

I worked out a price for the cleaning and sealing the sandstone including replacing the pointing with a modern durable resin-based product that is more resilient than sand and cement that was used before. I was confident the job would be completed in a day and after accepting the quote a date was set for our return, dependant on the weather.

Deep Cleaning a Sandstone Patio in St Albans

Rain as it turned out was not a concern as we had weeks of dry weather, some very high temperatures and a drought declared. The bigger concern was ensuring the team remained hydrated during the work which makes a change.

Work started with the removal of all the old grouting and deep routed weeds. Much of the grout was already cracked and loose so came out very easily, the rest had to be raked out or carefully chipped out with a chisel. Care was taken not to mark the paving and the whole lot then swept into a pile and bagged up for disposal. Once the grout had been removed a weed killer was sprayed into the gaps.

Next the Sandstone patio was sprayed with Tile Doctor Pro-Clean and left to soak into the stone for a good ten minutes. The patio was then scrubbed in with a black pad fitted to a rotary machine. Once the whole patio was cleaned in this fashion it was rinsed off with a hose and extracted with a wet vacuum where possible.

The next step was to deal with the Black Spots by applying a specialist cleaning product decanted into a low-pressure spray bottle. This is sprayed onto to stone where it impregnates the sandstone and breaks down the staining. The product needs to be left on for a long time for best results and then once the black spot has disappeared the patio is rinsed with water.

Sandstone Patio After Cleaning Before Repointing St Albans

Sealing a Sandstone Patio in St Albans

The patio was left to dry off overnight which given the high temperatures we were experiencing at the time probably didn’t take long. It was certainly dry by the next morning.

To bring out the natural colours in the Sandstone it was then sealed with Tile Doctor Colour Grow which is an impregnating sealer. Impregnators soak into the stone occupying the pores and ensuring dirt and liquids remain on the surface where they can be easily rinsed away.

The last step was to repoint the stone using a buff-coloured resin bonded pointing compound that matched well with the patio. This completed the renovation and ensured the patio was completely sealed and any water would run off.

The job took two Tile Doctor technicians two days to complete and I think you will agree they managed to completely transform the patio which now looks like a new installation.

Sandstone Patio After Cleaning Grouting and Sealing St Albans Sandstone Patio After Cleaning Grouting and Sealing St Albans

For aftercare its worth remembering that the stone has been sealed so it’s important to use a neutral ph cleaning product such as Tile Doctor Neutral Tile Cleaner that won’t damage the sealer. Anything stronger will erode the sealer over time prematurely removing the protection it provides.


Professional Renovation of a Neglected Sandstone Patio in Herefordshire

Full Restoration of a Neglected Sandstone Patio in St Albans Read More »
Bathroom Deep Clean and Re-grout in St.Albans

Bathroom Deep Clean and Re-grout in St.Albans

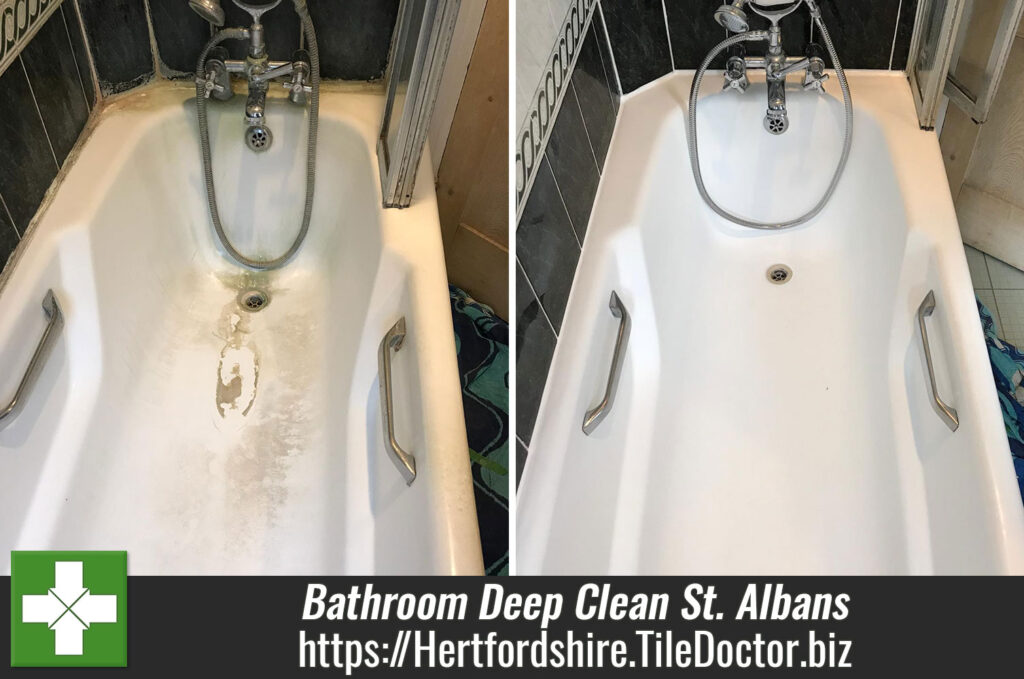
The photographs on this page were taken at a property in St. Albans, Hertfordshire or Verulamium as it was known in Roman times. St. Albans is roughly 20 miles north-west of central London and a popular choice for commuters who work in London. The owners were fed up with the discoloured grouting and their bathroom looking tired and had tried lots of products on the market to get the grout looking clean. The results had been disappointing, and they were starting to despair.

St Albans Bath Tile Grout Before Renovation
They contacted me to see if I could help and after visiting the property I recommended deep cleaning the Ceramic tile and grout and then removing and re-grouting those areas that were badly stained. I explained that this would take one day to complete and by using a series of products we would soon have the bathroom looking more pleasing. Happy with the quote which was far less expensive than installing a new bathroom I scheduled the work in for an agreed date.

St Albans Bath Tile Grout Before Renovation

Deep Cleaning and Re-grouting a Tiled Bathroom

We started out by preparing the area with protective sheets and tape to threshold edges. This was then followed by giving the tile and especially the grout a deep clean using Tile Doctor Oxy-Gel and aa steam cleaner to get the grout as clean as possible. Oxy-Gel is a strong alkaline gel cleaner and degreaser which works well on vertical surfaces where a long dwell time is required. Being a gel, it stays in place allowing it to really get to work on the dirt making it an ideal choice for this situation.

The top layer of grout is porous and, as a result, it easily absorbs grease, dirt and limescale. Grout between wall-tiles, particularly in damp areas like bathrooms, will become dirty and unattractive and if the ventilation is inadequate Mould and Mildew can develop. The grout was scrubbed with Oxy-Gel several times to get it as clean as possible and then rinsed off with water.

At this stage we were able to identify all those areas of grout that were badly stained and we set about carefully removing the old grout using a special tool. This work takes a bit of time, but we felt it was the best solution in this instance

Next, using a craft blade we carefully removed all the old silicone sealant, so it could be replaced later. This was followed by re-grouting using a white grout to match the existing.

St Albans Bath Tile Grout After Renovation
Whilst the grout was drying the final step was to replace the silicone sealant around the bath edge with fresh sealant. We always use high quality mould resistant silicone for this as we don’t want any call backs later when the sealant goes mouldy or water leaks through.

After making some final checks and ensuing excess grout was polished off the tiles the bathroom transformation was complete. Even I was amazed at how much cleaner and tidier the bathroom now looked. The important thing was the customer who was equally impressed and left the following comment on our Tile Doctor feedback system.

‘Excellent and friendly service – would recommend to others’

St Albans Bath Tile Grout After Renovation
 

Bathroom Deep Clean and Re-Grout in Hertfordshire

Bathroom Deep Clean and Re-grout in St.Albans Read More »

Ceramic Tiled Bathroom Refresh in St Albans

Ceramic Tiled Bathroom Refresh in St Albans

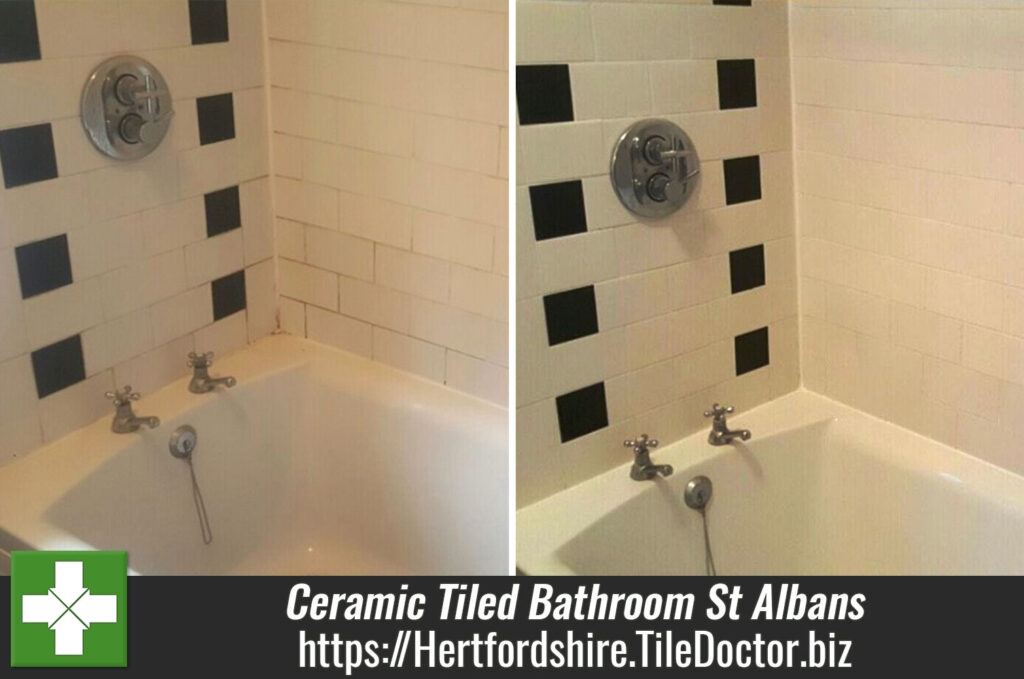
This was a small family bathroom at a house in St Albans with white ceramic glazed tiles and what was once white grout. The grout was now stained and proving difficult to keep clean, additionally the silicone seal between the tile and the bathtub was perishing. The bathroom needed cleaning and restoring to give it a new lease of life as well as making it easier to maintain for the busy family.

Bathroom Tiles Before Cleaning St Albans
Were actually based in St Albans so always a pleasure to pop round and meet fellow residents. The city dates to the Romans when it was known as Verulamium and these days its popular with commuters working in London.

Cleaning a Ceramic Bathroom Tile and Grout

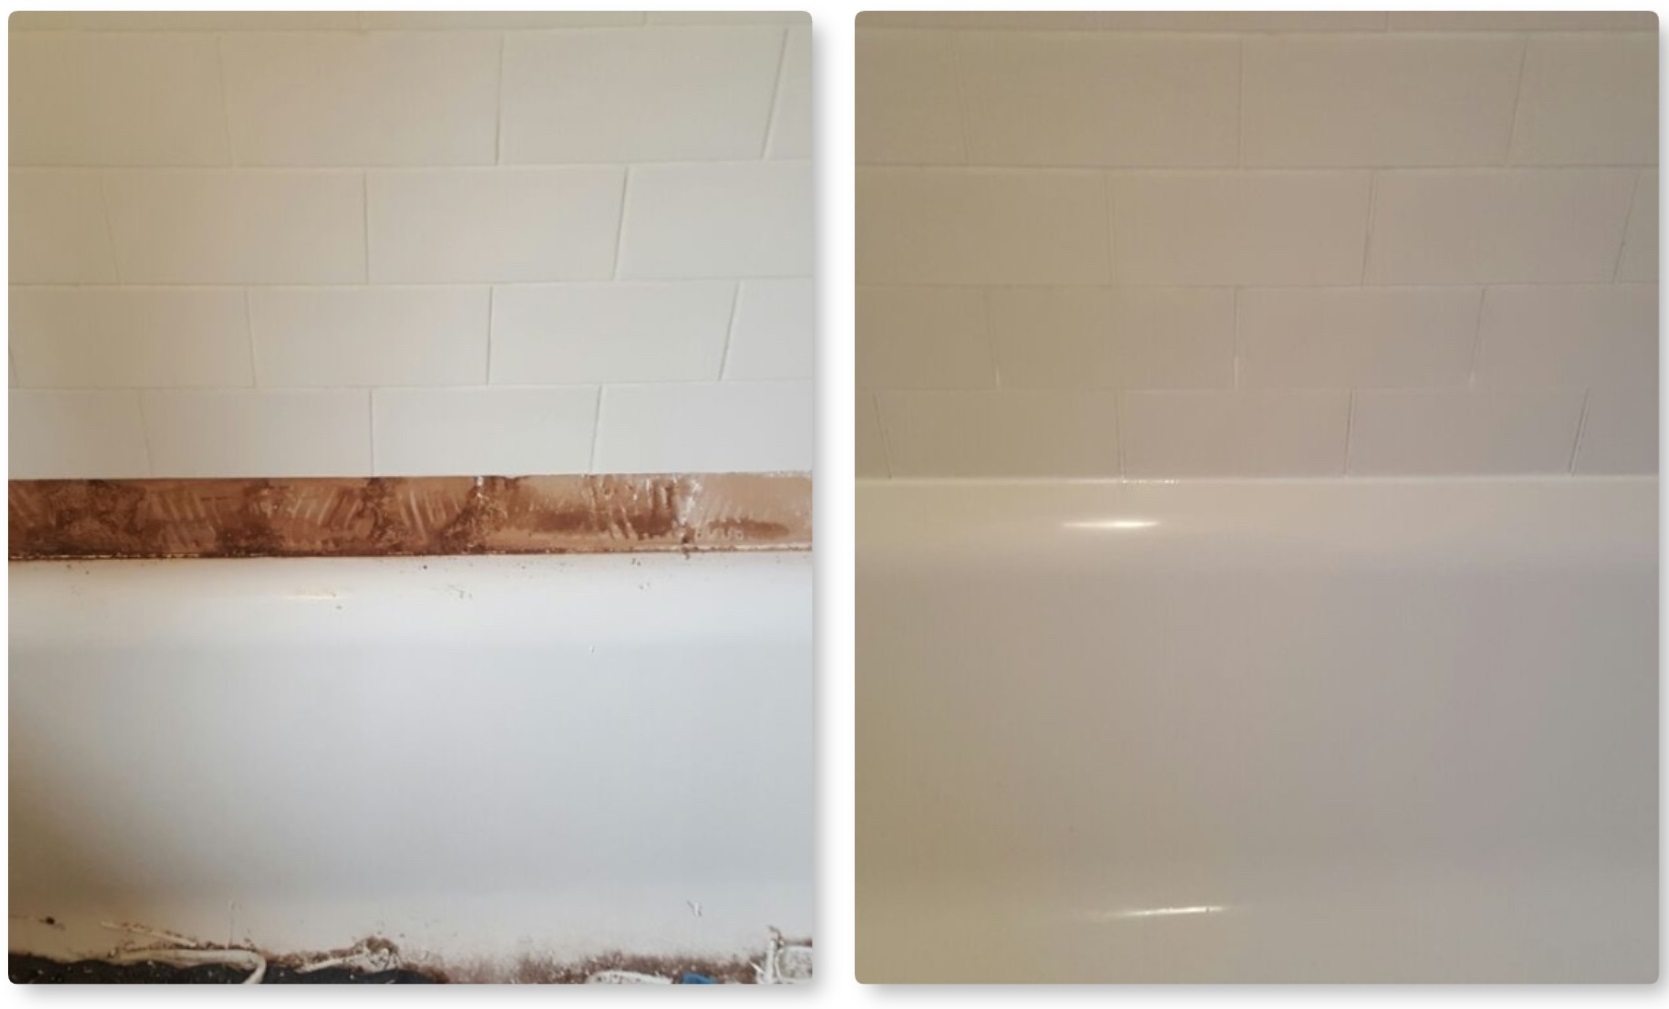
On arrival I inspected the tiles around the bath and could see they were going to be problematic, the silicone sealant was starting to perish, and I was concerned that the bottom row may be not be watertight. I like to do a job right the first time round so I decided the best thing to do would be to remove the row around the bathroom edge, clean them up and refit them with fresh adhesive, grout and reseal with silicone.

With that in mind my first job was to give the ceramic tile and grout a deep clean by spaying on Tile Doctor Aqua-Pro and then scrubbing it in with polypropylene brushes and pads. This product is designed for the regular cleaning of bathroom tiles as is Tile Doctor Duo-Clean which is a stronger product that can tackle mould as well. The tile and grout were then given a high-pressure steam clean using a special machine we usually use on floor tiles and then let to dry off over lunch.

Ensuring a Tight Bath Seal

After lunch the old silicone was stripped off between the bathtub and wall tile and this was followed by the careful removal of the bottom row of ceramic tiles. This is done by removing the grout first with an oscillating hand tool and then carefully prising the tiles off the wall without damaging them.

Bathroom Tiles Replacement St Albans
The old adhesive was then scrapped off the exposed area to prepare the wall for re-tiling and the tiles were re-installed with fresh. Once the adhesive and gone off the tiles were re-grouted and the grout left to dry before applying a fresh silicone sealant between the tile and bathtub. During the various drying phases, the ceramic bathroom tiles were buffed using a soft white buffing pad to give them an as new appearance.

Bathroom Tiles After Cleaning St Albans
The job was completed in one day and the bathroom now looks like it was recently installed.

Rejuvenating Ceramic Bathroom Tiles and Grout in Hertfordshire

Ceramic Tiled Bathroom Refresh in St Albans Read More »
St Albans Slate Floor Renovation

St Albans Slate Floor Renovation

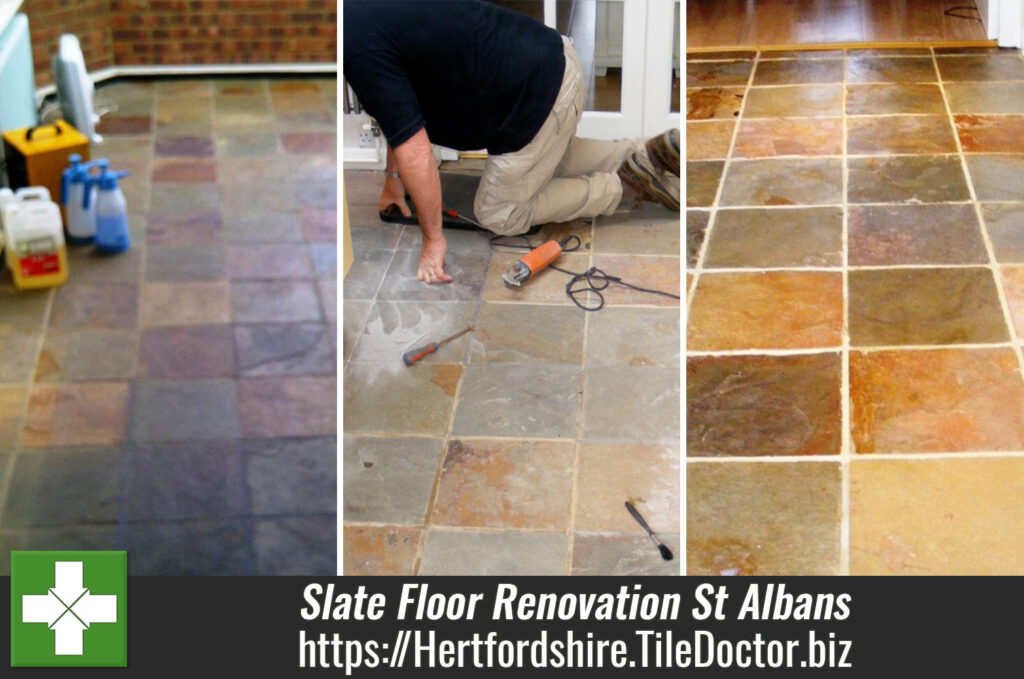
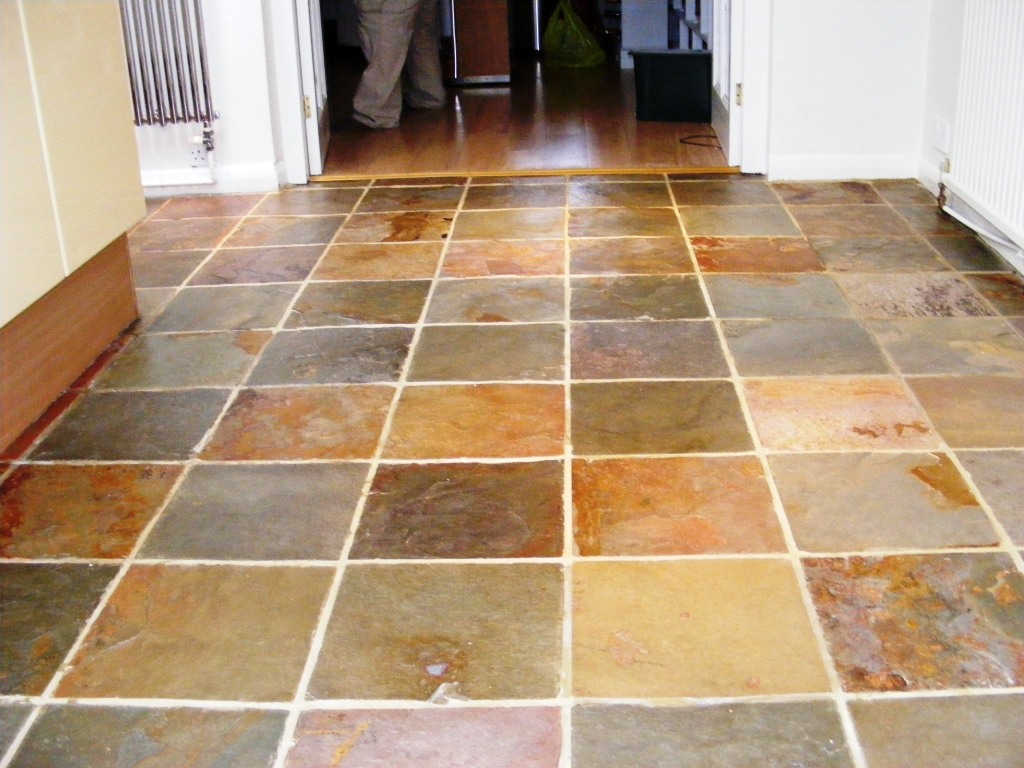
The Slate floor in the kitchen and conservatory of a house in St. Albans was laid around five to six years old and now required deep cleaning and re-sealing. Previously a grout repair had been carried out but unfortunately after the initial clean the grout applied was the wrong colour and needed to be replaced.

Slate floor before restoration

Cleaning the Slate Floor

The Slate floor was pre-cleaned using a diluted solution of Tile Doctor Pro-Clean mixed with Nanotech Ultra-Clean scrubbed with a buffing machines fitted with a polypropylene brush running at a slow speed. The dirty solution was removed using a wet vacuum, floor rinsed with clean water and left to dry.

It’s not a good idea to apply new sealer on top of a different product so it was necessary to ensure all the old sealer had been completely removed. Sealers are by nature stubborn to remove so it was necessary to apply Remove & Go (a product designed for the removal of sealers) which we left to dwell on the surface for an hour. Often a strong solution of Pro-Clean is sufficient but not in this case.

The dirty solution was removed with the wet vacuum and rinsed with water to remove any residues and neutralise the floor.

Removing Grout

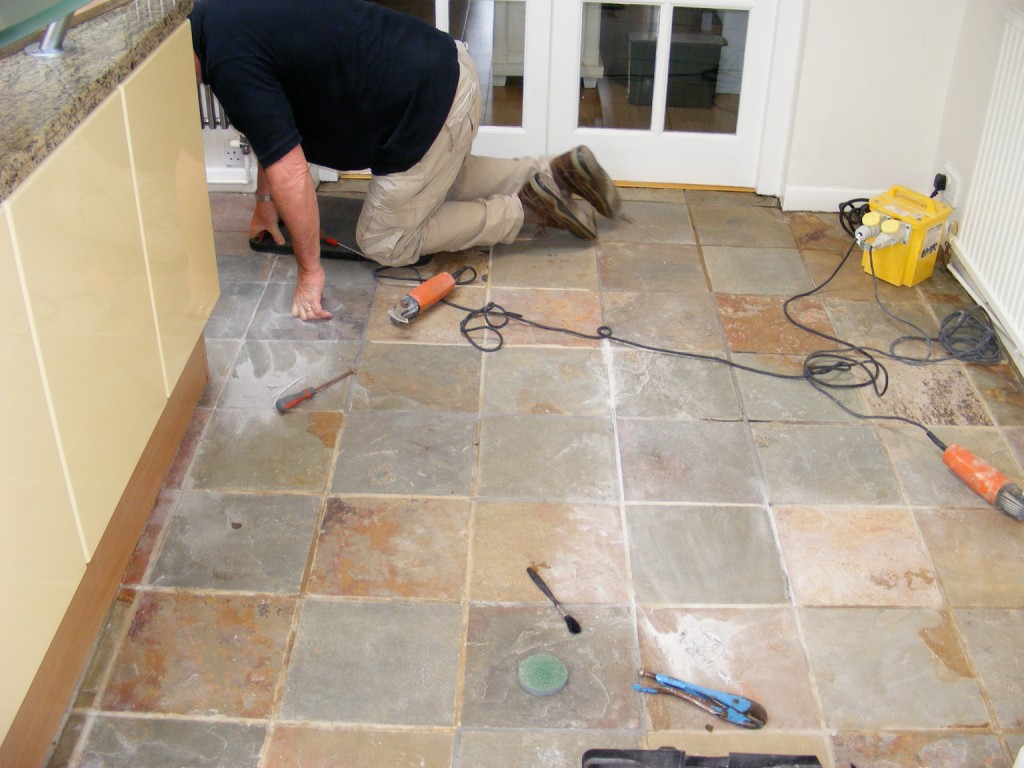
To remove the grout we used a specialist “Oscillating Grout Tool”, if there was a large area to do we would normally recommend the user of an epoxy Grout Colourant however there wasn’t a great deal to remove so it was quicker to cut out the offending Grey grout and replace with a matching sandstone.

Grout removal and repair Cutting out with an Oscillating grout tool

Sealing the Slate Floor

We sealed the floor with a single coat of Tile Doctor Colour Grow which really helps bring out the deep colour from the slate. To finish and build up the lustre and richness of the colour we then applied seven coats of Seal & Go.

Finished Slate floor with new grout
All of the job took two full days and was ready for soft foot traffic after two hours of completion and fully dry in 24 hours. For maintenance we recommended the use of Tile Doctor Neutral Cleaner, diluted 1:30 with water and applied with a microfibre flat mop, rinse with water and then remove with a clean microfibre flat mop.

The customer was very pleased with the results and left the following comment:

We are delighted with the results achieved by the Tile Doctor on our slate floor. It looks like we have laid a completely new floor in our kitchen and conservatory! Rob was a true professional and we would thoroughly recommend the Tile Doctor to anyone considering using their services

Ms. S. Hiller, St Albans, Hertfordshire


Slate Floor Renovation in St. Albans

St Albans Slate Floor Renovation Read More »

Cleaning Mexican Terracotta Tiles, St Albans

Cleaning Mexican Terracotta Tiles, St Albans

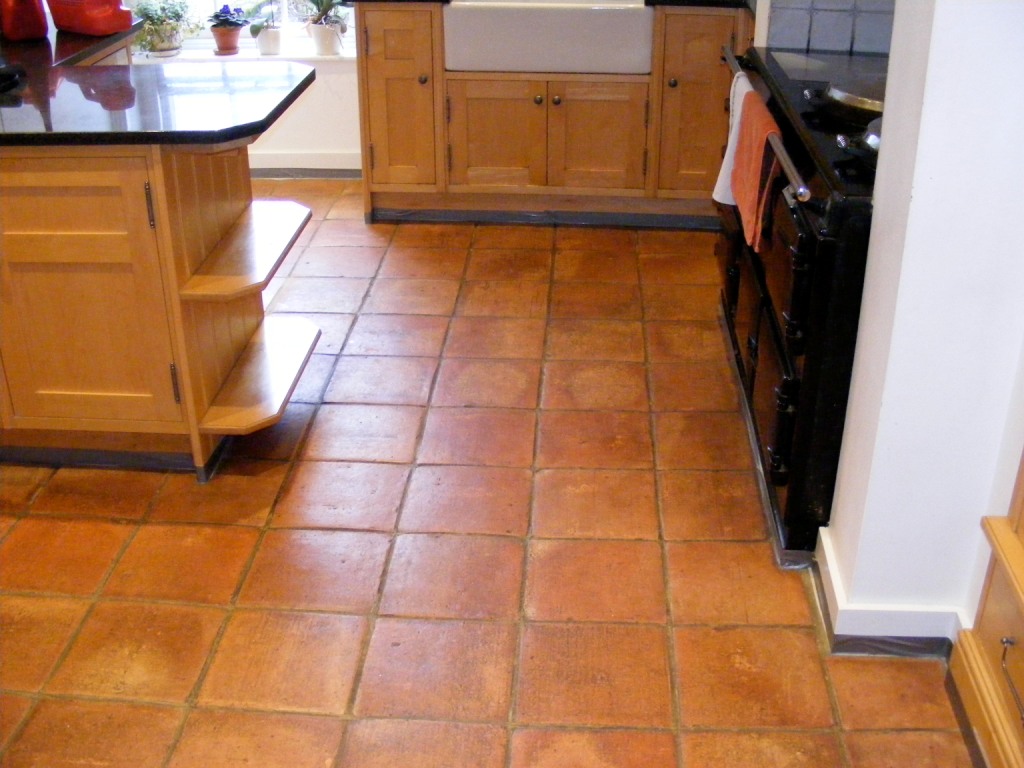
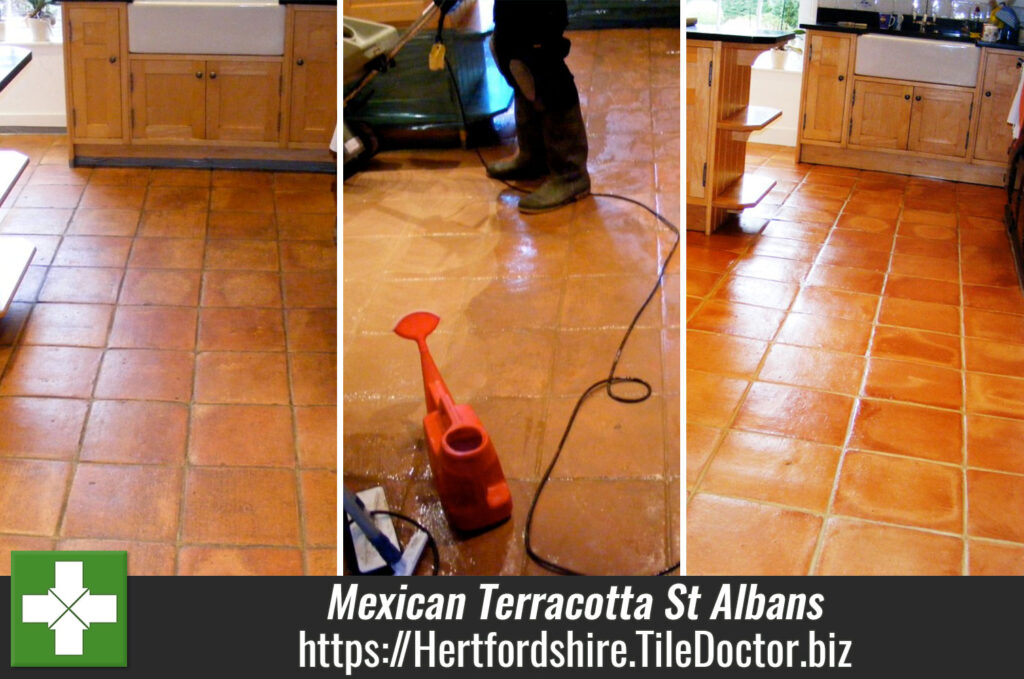
Mexican Terracotta tiled floor laid several years ago in the kitchen of a property in Wheathampstead near St Albans. It had originally been laid and sealed in the classic method with a wax and was becoming increasingly impossible to clean.

Mexican Terracotta before prepped for cleaning

Cleaning Mexican Terracotta Tiles

We started the cleaning process using a solution of Tile Doctor Pro-Clean in order to remove excess dirt and soil from the surface of the tile. This was followed by the application of Tile Doctor Remove and Go combined 50/50 with NanoTech Ultra Clean agitated with a brush fitted to a scrubbing machine running at slow speed. This worked to breakdown and remove the remaining wax sealer returning the Mexican Terracotta back to its original condition. The resulting solution was rinsed off with water and a cleaned with Neutral Tile cleaner followed by two further water rinses. A wet vacuum comes in very useful at this point for removing the liquids from the floor.

Mexican Terracotta Cleaning and wax removal Mexican Terracotta After cleaning ready for sealing

Sealing Mexican Terracotta Tiles

We left the floor to dry and returned some days later to seal. We started this process with a single coat of Tile Doctor Colour Grow which really helps to bring out the colour in the tile followed by six to seven coats of Tile Doctor Seal and Go. Terracotta is by its nature a very porous tile and so it’s not unusual for it to need seven coats.

Cleaned and Sealed Mexican Terracotta floor

Cleaning Mexican Terracotta Tiles in St. Albans

Cleaning Mexican Terracotta Tiles, St Albans Read More »

=================================

Hertfordshire Tile Doctor

================================= Read More »

Scroll to Top