Work History

Robert-Voyce-Hertfordshire-Tile-Doctor

Welcome to my Work History archive where you will find detailed examples of Tile, Grout and Stone Cleaning and renovation work carried out within Hertfordshire.

Victorian Tiled Hallway Floor Restoration Ware

Victorian Tiled Hallway Reconfigured and Fully Restored in Ware

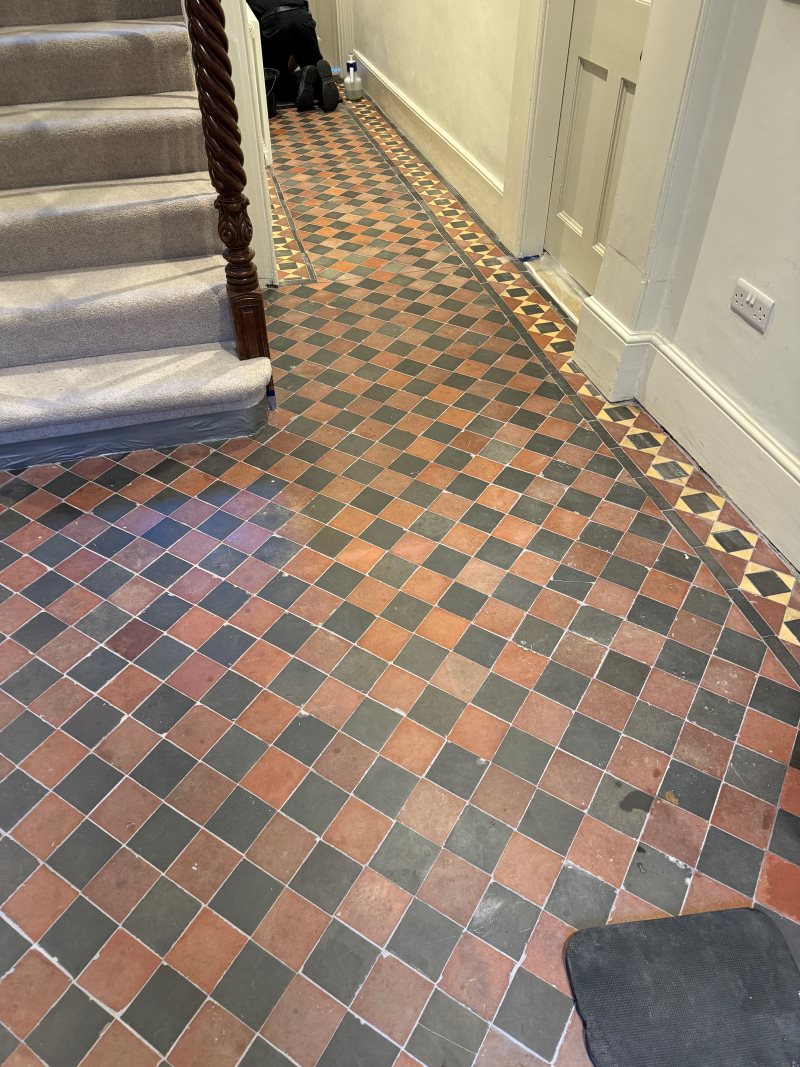
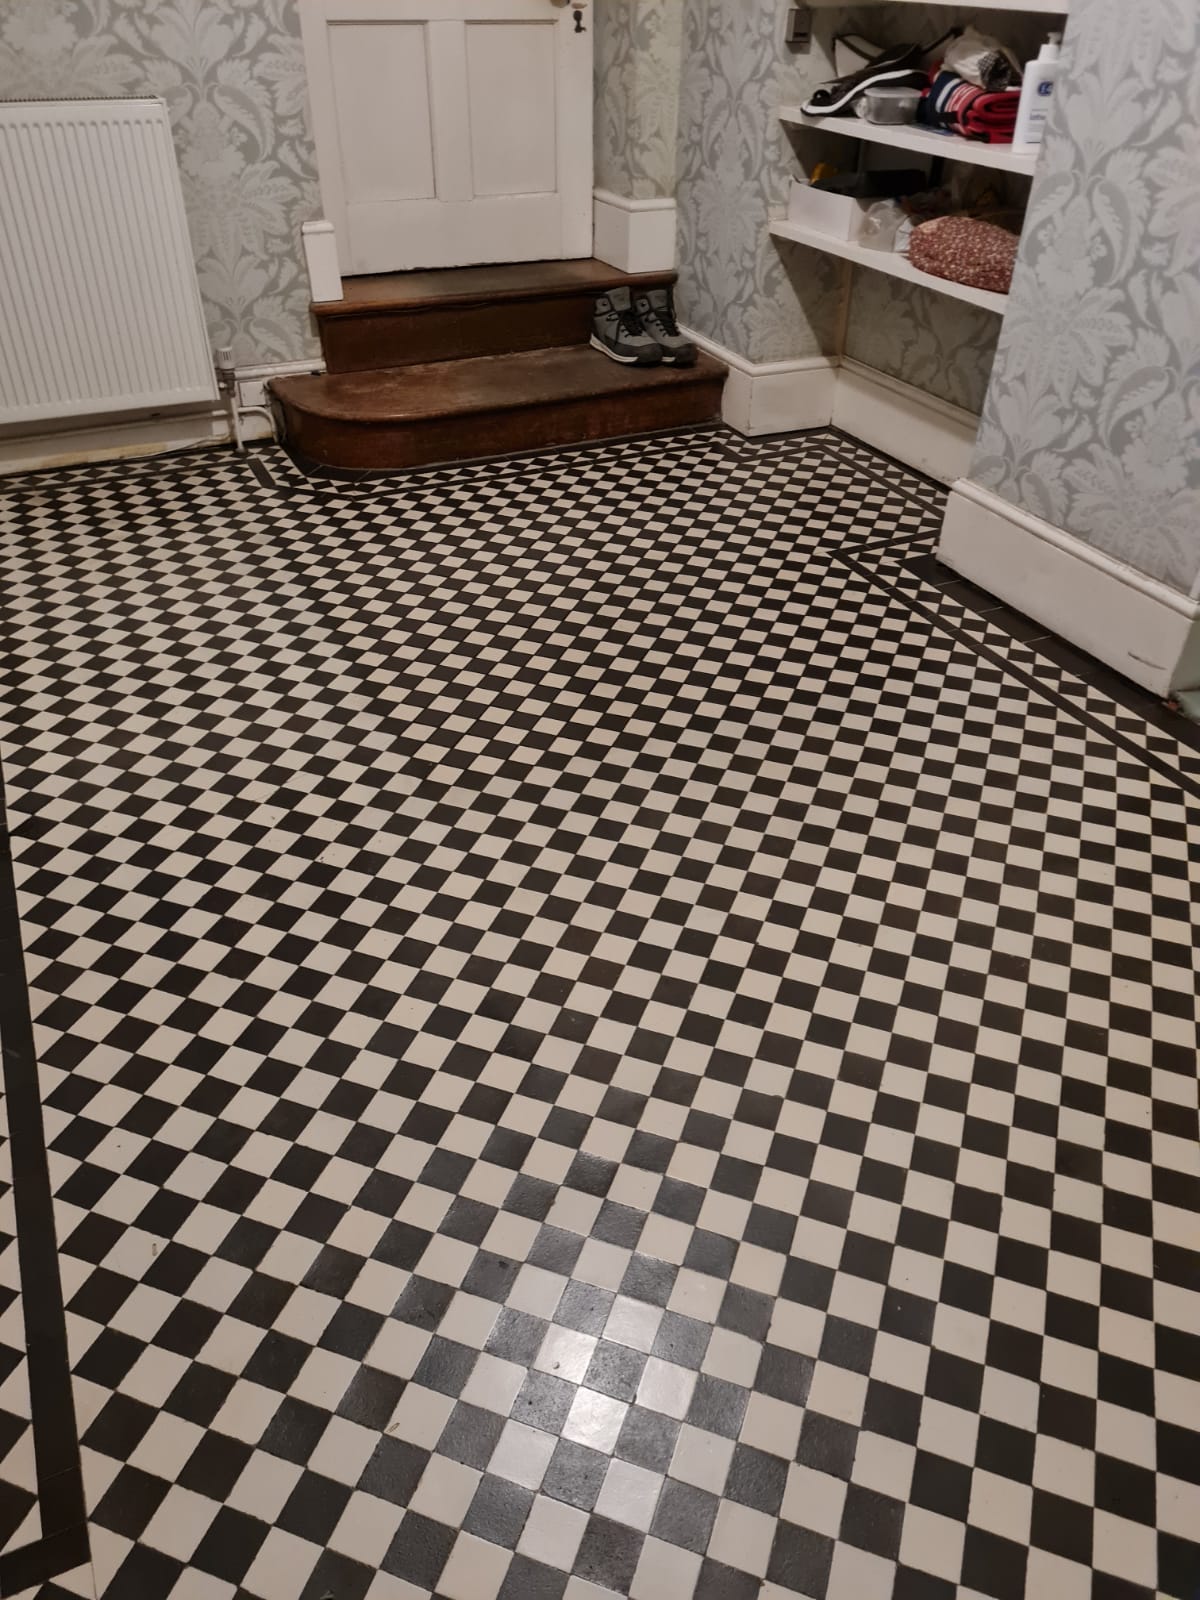
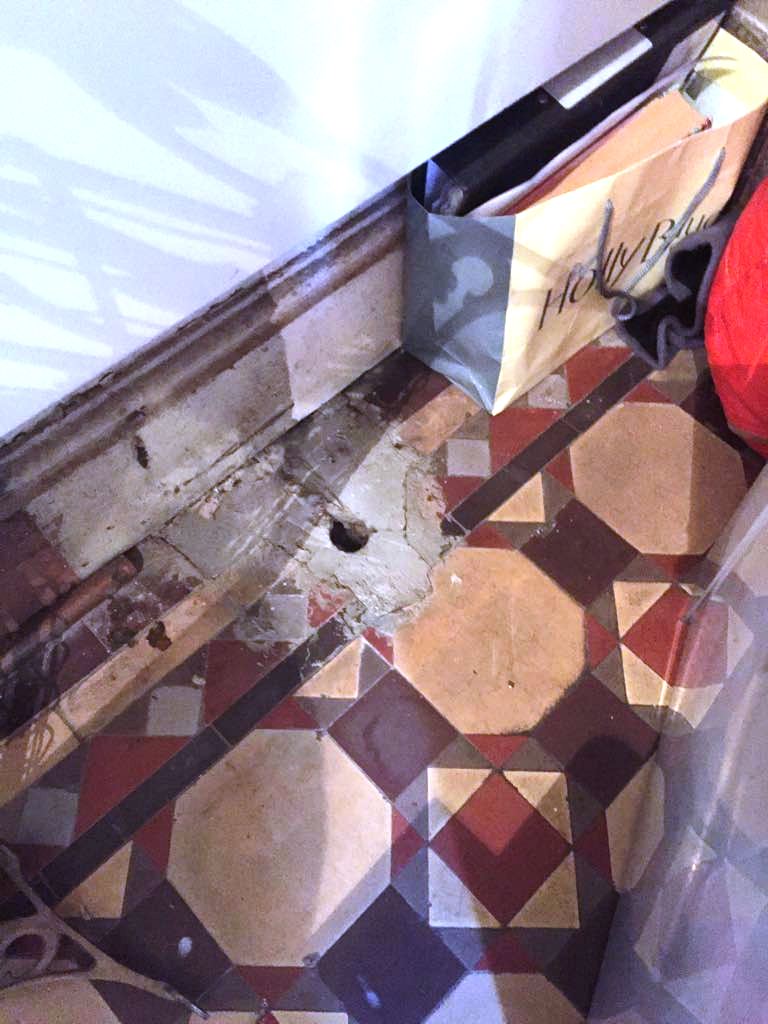
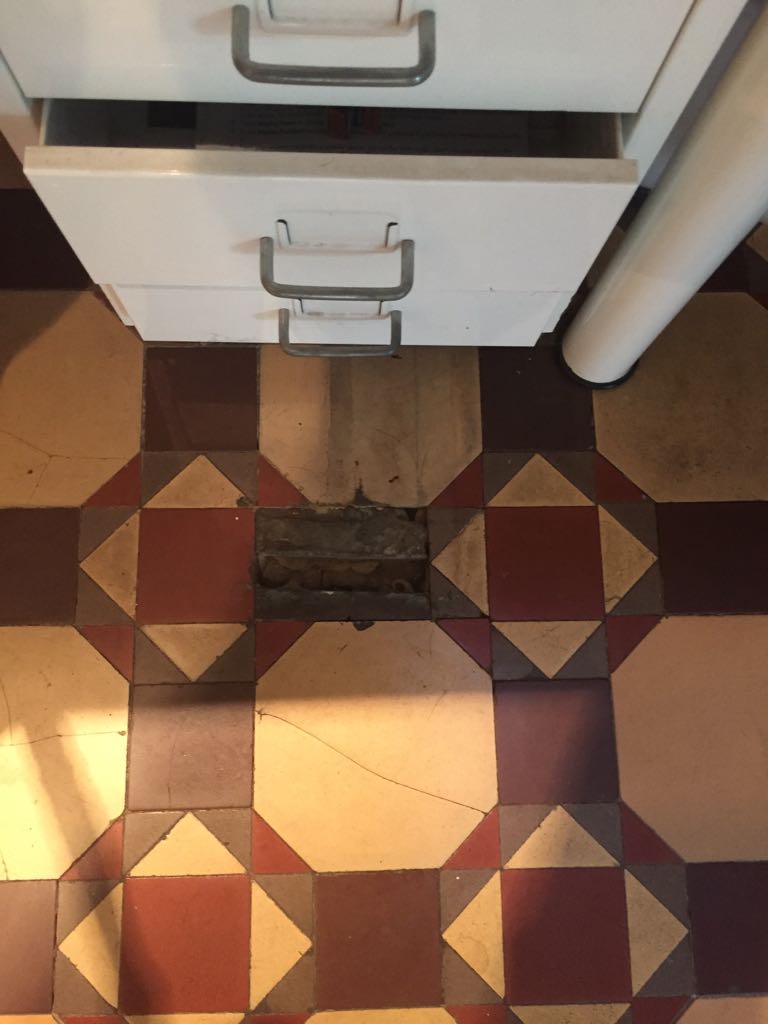
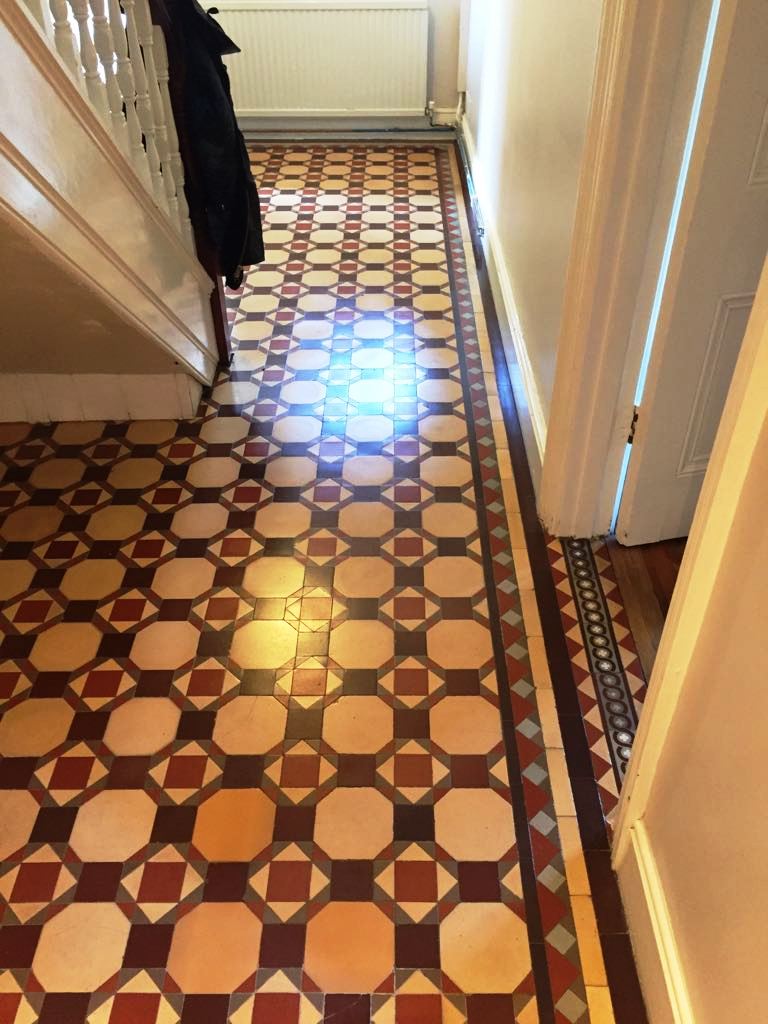
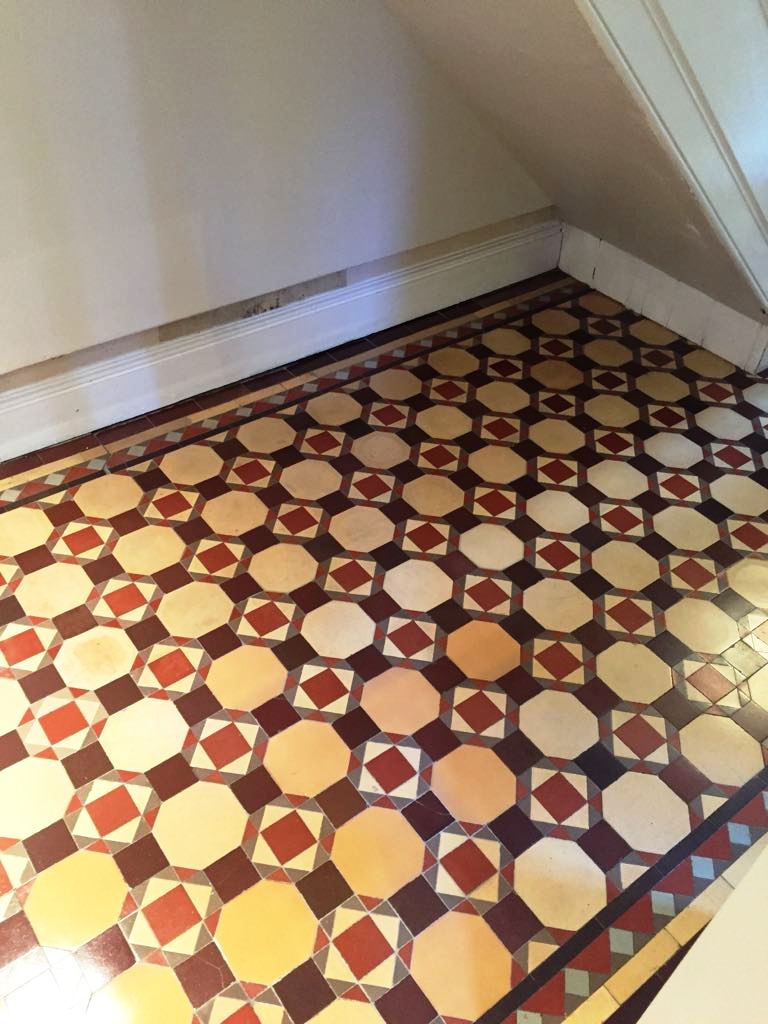
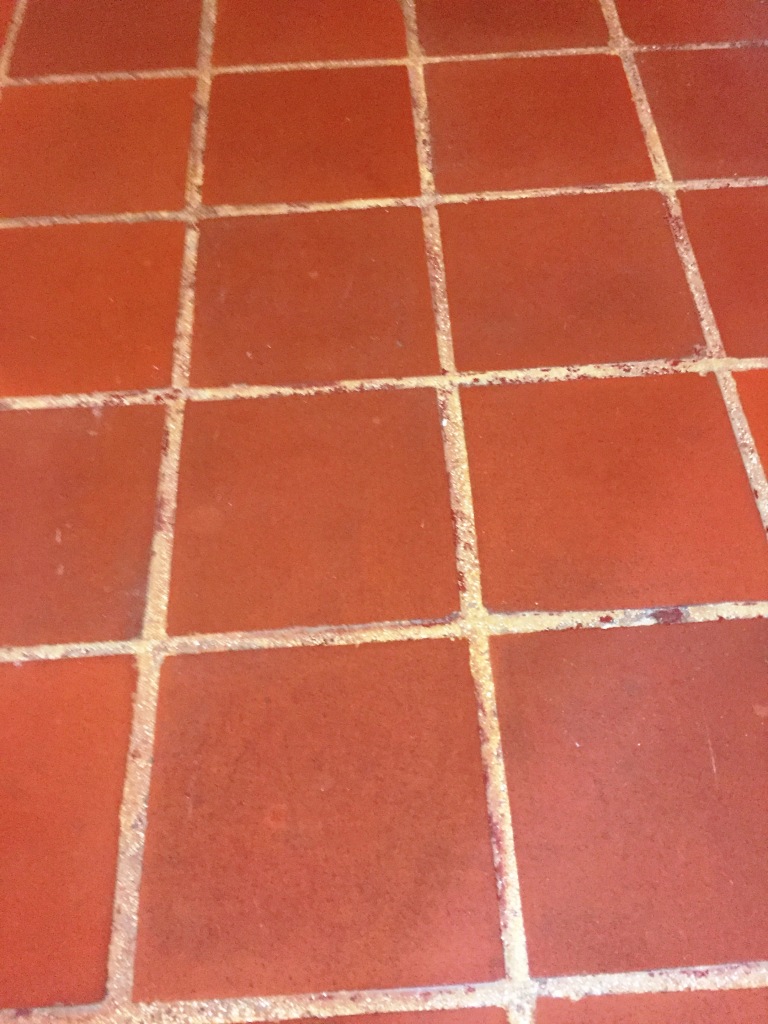
Pictures below are from a Victorian tiled floor we recently reconfigured and renovated at a property in the town of Ware near Hertford. The floor had been covered in Vinyl for many years and underneath was the Victorian tiled floor and a section of Quarry tiles at the bottom of the stairs. Parts of the floor had also been dug up at some point in its long history and back filled with concrete, so it was now in quite a state. The owners were now keen to renovate the entire floor to create one consistent Victorian tiled hallway.

Victorian Tiled Hallway Before Restoration Ware Victorian Tiled Hallway Before Restoration Ware

To do the restoration the section of Quarry tiles would need to be removed, the concrete backfill would need to be dug up and then the subfloor would then need to be levelled so it could then be re-tiled with matching Victorian replacements. During that process the whole floor would need to be deep cleaned and then sealed. It would be a big job, but we like a challenge and more than confident it could be achieved to a good standard.

Happy with our quote the customer booked us in to do the work and we agreed a date for our return.

Cleaning and Repairing a Victorian Tiled Hallway Floor

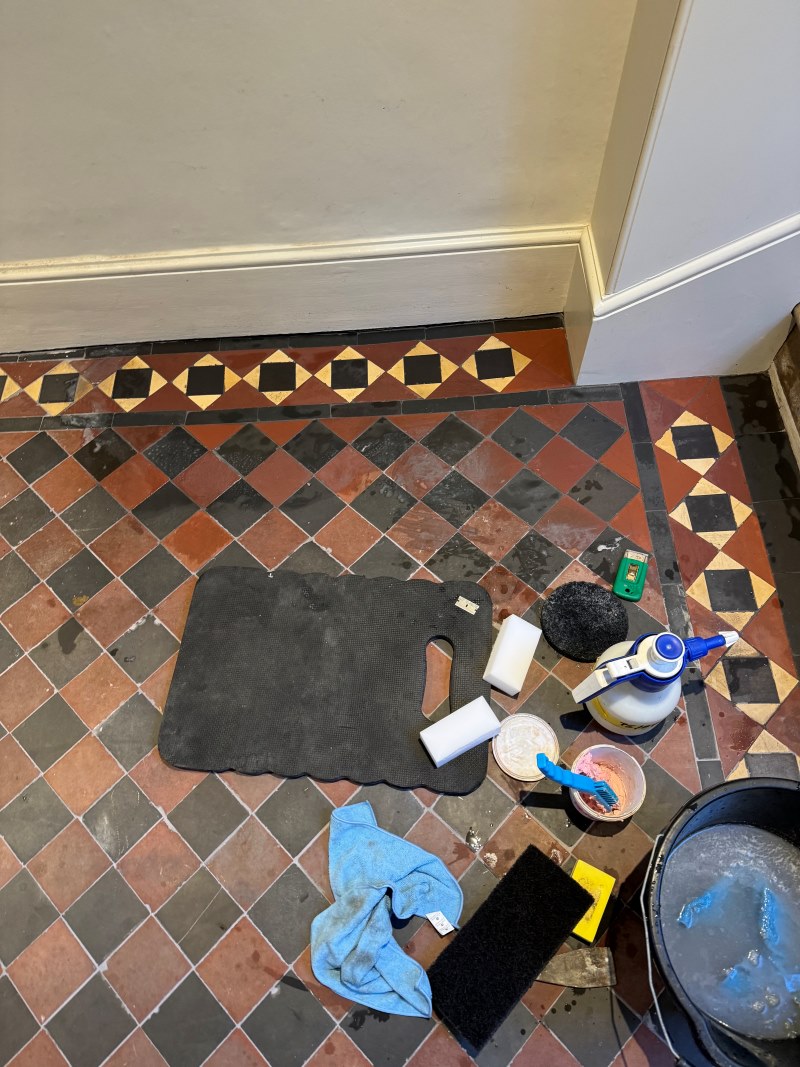
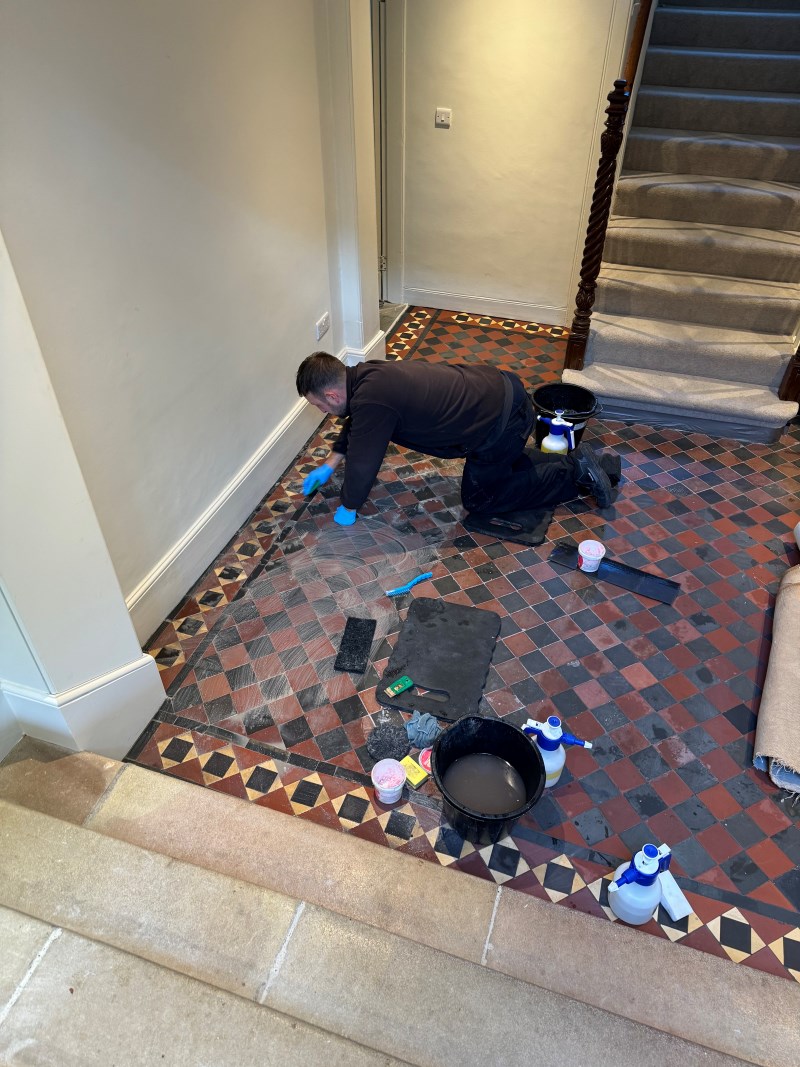
First, we carried out a deep clean on the existing floor tiles using Tile Doctor Pro-Clean and Tile Doctor Remove and Go. We agitated the combined cleaning solutions using polypropylene floor pads fitted to a rotary machine and hand cleaned the grout using stiff brushes. The cleaning process lifts the dirt and old sealers out of the tiles which was removed using a wet vacuum. The tiles were rinsed with water to remove further dirt and further cleaned with steam to lift staining out of the tile.

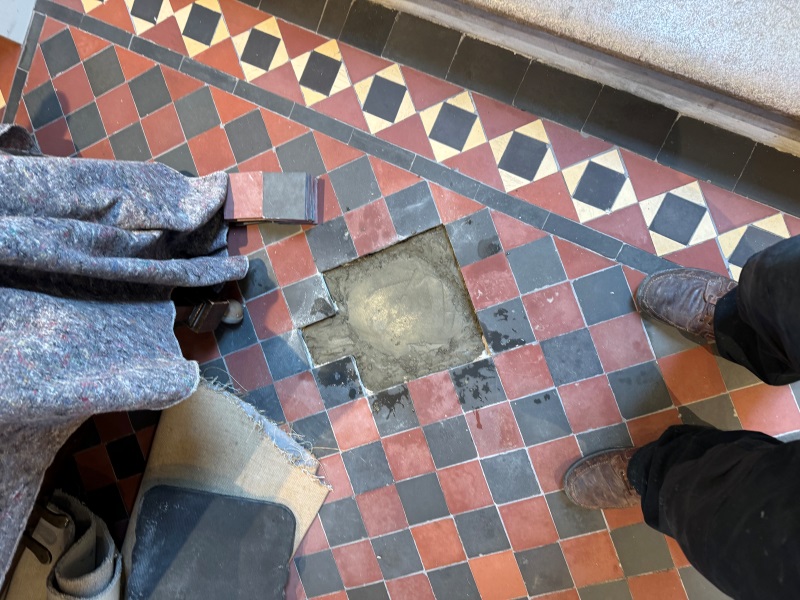
The next step was to remove the concrete backfill out of the floor and border edges. These areas were carefully chased out to remove the concrete, and the immediate surround tiles carefully lifted.

We then carefully removed the existing quarry tiles and border tiles in the entrance area. The surrounding tiles were also carefully removed so that we could get back to a level where we can consistently follow on the floor pattern. A new subbase was then laid in preparation for the new tiles.

Victorian Tiled Hallway During Restoration Ware Victorian Tiled Hallway During Restoration Ware

When relaying replacement tiles into an existing pattern, it is important to ensure the configuration is consistent with the existing geometric floor pattern. To achieve this, we use set squares and spirit levels to ensure the pattern is aligned and level. It is also important to note that the new Victorian tiles are approx. 1.5mm smaller than the original Victorian tiles. We applied this to the large area at the base of the steps. The repairs also included realigning and relaying the door thresholds off the hallway and repairing and relaying three to four damaged sections.

Finally, we worked out the spacing for the border tiles and around the entrance steps.

Victorian Tiled Hallway During Restoration Ware Victorian Tiled Hallway During Restoration Ware

We then regrouted in mid grey to all newly laid areas. We cleaned off the grout haze using Tile Doctor Acid Gel and buffed.

Sealing a Victorian Tiled Hallway Floor

To seal the floor, we first used a consolidator primer seal, Tile Doctor Colour Grow, followed by five applications of a protective acrylic wax seal Tile Doctor Seal and Go, which gave the floor a rich satin finish.

Victorian Tiled Hallway After Restoration Ware

The work took five days to complete. Following the completion of the floor we have advised the customer to maintain the tiles using Tile Doctor Neutral Cleaner which has a neutral pH and so will not impact the sealer.

Victorian Tiled Hallway After Restoration Ware


Restoration of a Victorian Tiled Hallway in Hertfordshire

Victorian Tiled Hallway Reconfigured and Fully Restored in Ware Read More »

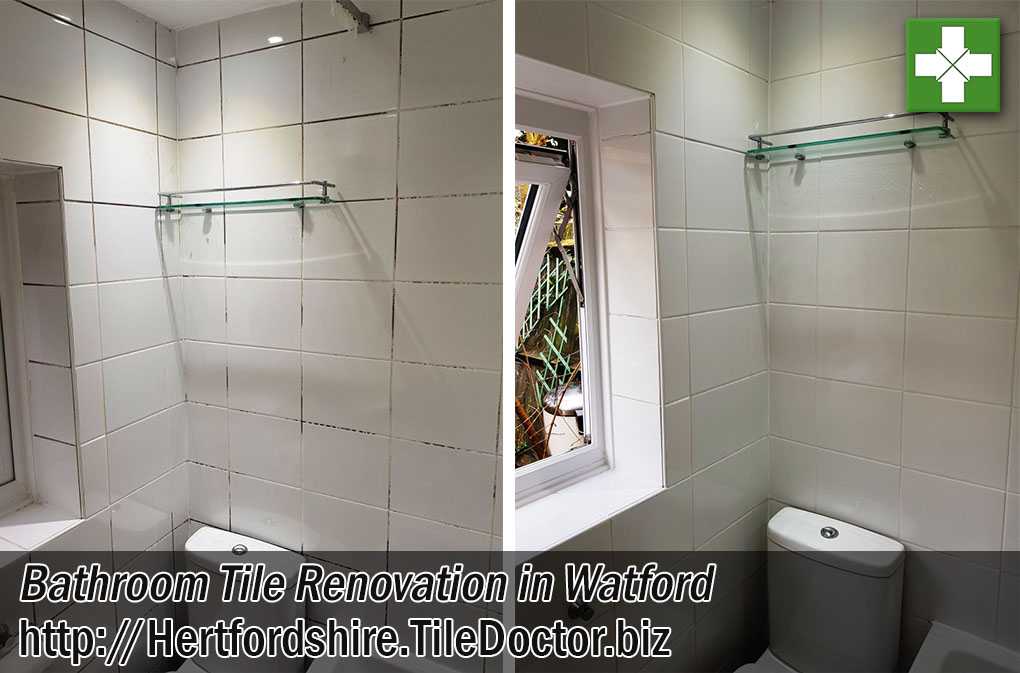
Ceramic Bathroom Grout Before After Cleaning Watford

Ceramic Wall Tile and Grout Renovated in a Watford Bathroom

Our client in Watford, Hertfordshire had a fully Ceramic tiled bathroom which was now in need of a deep clean. The tiles themselves were in good physical condition but the grout and silicone sealant were stained black with mould in places and generally not looking very attractive.

Bathroom Ceramic Wall Tiles Before Cleaning Watford Bathroom Ceramic Wall Tiles Before Cleaning Watford

I visited the property to survey the problem and offer a solution. The tiles were indeed looking grubby but with white ceramic tiling the mould stained grout particularly stood out. Mould loves a moist warm environment so the only way to cure it in the long term is to significantly improve ventilation. It can be removed with the right products however, so I explained the cleaning process, agreed a price for the work and booked in a convenient time to do the renovation.

Cleaning a Ceramic Tiled Bathroom

We prepared the areas with protective sheets and tape to threshold edges then applied a specialist double action cleaning product called Tile Doctor Duo Clean. The product is spayed onto the tile and grout, left for five minutes and then scrubbed in using small polypropylene tile pads and detail brushes.

Duo clean is especially formulated to clean grout and remove mould and so an ideal choice for this situation. Working in sections the tile and grout were thoroughly scrubbed and then rinsed off with water to remove the dirt and mould that was released. The tiles were then inspected, and the process carried out a second time. For stubborn areas we used steam to really lift the ingrained dirt out of the grout.

Ceramic tiles have a glazed surface which is very easy to clean so our main focus was the grout which being cementitious does attract dirt and allow mould to get a hold.

Replacing Silicone Sealant in a Ceramic Tiled Bathroom

Last step was to replace the silicone sealant between the bath and tile. This is best removed with a sharp knife taking care not to damage to scratch the bath itself.

After removing all the old silicone, the bath was filled with water so it would adopt the right shape before being resealed. We then reapplied silicone to the bath and wall corner joints using white mould resistant silicone. This is a precise job which can easily look awful if not carried out correctly. Thankfully we have plenty of experience and this job took just one day to complete.
To finish the tile and grout were sprayed with Tile Doctor wall tile & grout sealer which comes in a convenient aerosol spray. The excess was wiped off the tile, as I mentioned before ceramic tiles are glazed so won’t hold a sealer, but the grout will benefit from it.

Bathroom Ceramic Wall Tiles After Cleaning Watford Bathroom Ceramic Wall Tiles After Cleaning Watford

As you can see from the pictures the bathroom now looked as good as new, clean and tidy. The client was very happy with the outcome and now wasn’t embarrassed to let guests use his bathroom.

To maintain the ceramic bathroom tiles, we recommended the use of Tile Doctor Aqua-Pro tile cleaner which is ideal for maintaining porcelain/ceramic bathroom wall tiles. Aqua-Pro is an effective pH neutral tile and grout cleaner which is designed for everyday use in bathrooms. The neutral formula helps to eliminates soap scum build-up and hard water deposits which are all too common. It has a lovely fresh lemon scent which leaves the room smelling clean and fresh. It will help to prevent the discolouration they had previously experienced.


Professional Bathroom Grout Cleaning in Hertfordshire

Ceramic Wall Tile and Grout Renovated in a Watford Bathroom Read More »

Porcelain Bathroom Tile Floor Before After Cleaning Stevenage

Removing Grout Haze from Black Porcelain Bathroom Tiles, Stevenage

A builder in Stevenage contacted us about cleaning up a Grout Haze problem in a bathroom that they had recently tiled. Ideally grout should be polished off the tile after installation as getting grout off the surface of tiles once it has dried can be difficult. It’s actually a common problem often referred to as Grout Haze or Grout Smears that ruins the look of the tile. To remove it you need to use an acidic product, but acids can cause damage, so you need to be careful. In fact, my customer had read several horror stories on-line where brick acid and other strong chemicals had been used to clean up tiles so had decided to call us in and have it done professionally rather than attempt to do it themselves.

Black Porcelain Bathroom Floor Before Cleaning Stevenage Black Porcelain Bathroom Floor Before Cleaning Stevenage

The tiling work had been carried out in the ensuite of a house in Stevenage as part of larger renovation project they were involved in and being a Black porcelain tile the grout smears were very obvious as you can see form the photographs on this page.

Cleaning a Porcelain Tiled Ensuite Floor

To remove the grout smears we used Tile Doctor Grout Clean-Up which is an acidic product available from Tile Doctor which penetrates beneath the surface and was specifically created for the removal of grout smears. It can also be used to remove efflorescence which are those white salt deposits that you often see on brickwork. We have used this product on numerous occasions on many different tile installations, so we were confident it would work well on the black porcelain.

We began by applying Tile Doctor Grout Clean-Up to the tiles with a sponge and then scrubbing it into each individual tile as we went. The tiles are then rinsed with water, inspected and cleaned again if required. I should mention that being an acid-based product, it is advisable to wear rubber gloves and eye protection and ensure any areas not requiring treatment are well covered and protected.

Black Porcelain Bathroom Floor During Cleaning Stevenage Black Porcelain Bathroom Floor During Cleaning Stevenage

Once done a second rinse was carried out and the resulting residue was removed with a wet vacuum before leaving the tiles to dry off.

This process was carried out throughout the bathroom and to both the floor and wall tiles. The room was quite large, so the job took most of the day to complete, working methodically around each area. Once the areas were dry, you could see that the grout haze was no longer there.

Black Porcelain Bathroom Floor After Cleaning Stevenage Black Porcelain Bathroom Floor After Cleaning Stevenage

The room was soon left looking much more presentable for the new owners who I’m sure would not have been impressed with the way it looked before. The builders were grateful that we had been able to get the tiles looking pristine and the room looking as good as new. Before leaving we discussed with them the best course of action on future projects to avoid the same problem and recommended the use of Tile Doctor Aqua-Pro as a general maintenance cleaner.


Professional Removal of Grout Smears from Black Porcelain Tiles in Hertfordshire

Removing Grout Haze from Black Porcelain Bathroom Tiles, Stevenage Read More »

Limescale Stained Slate Tiles Before After Renovation Stevenage Hertfordshire

Restoring a Limescale Stained Slate Tiled Ensuite in Stevenage

Our client contacted Tile Doctor as they were having problems cleaning their Slate tiled ensuite bathroom. We visited the property in nearby Stevenage, a London commuter town which is between Letchworth Garden City and Welwyn Garden City. The bathroom had been fitted some time ago, but due to the hard water in the area, there had been a large build up of limescale. The dark slate tiles showed this up even more.

Slate Tiled Bathroom EnSuite Stevenage Before Cleaning

My client had tried numerous household products on the tiles, but nothing was shifting the heavy build up. I discussed with them what Tile Doctor could do and completed a small demonstration. They were surprised how easily we were able to improve the tiles. We agreed a price and a timescale and booked the work in for a few weeks’ time.

Cleaning and Restoring a Slate Tiled Ensuite Bathroom

The ensuite shower required intensive cleaning to the shower walls and floor where excessive limescale was present so we got to work cleaning with Tile Doctor Oxy-Gel, this is a strong alkaline based cleaner and degreaser, it is a gel so it works well on vertical surfaces where a long dwell time is required to break down dirt, grime, soap scum, oil based products. We left the product on the surface for approximately 10 minutes, removing all previous sealers and dirt. The residue was rinsed off and followed this up with a second clean using Tile Doctor Grout Clean-Up.

Grout Clean-Up is an acidic product designed to remove mineral deposits however you need to be careful with some types of stone as it can etch the surface if used incorrectly. To apply the product was diluted with water in a spray bottle and sprayed on to the wall tiles where it was scrubbed in and then rinsed off. The process was then repeated on the floor rinsing down thoroughly afterwards with water.

Sealing a Slate Tiled Ensuite Bathroom

Once the slate was clean and dry we proceeded to cut out the existing silicone sealant which was equally stained and was beyond cleaning. This is a slow job and care needs to be taken not to scratch the tiles. It is important to ensure all the old silicone is removed so there is a nice clean surface to reapply the new. This also gave the shower area more time to dry out.

We tested with the moisture meter to ensure the shower area was fully dry and then applied the sealer. We chose to apply three coats of Tile Doctor Colour Grow, this is an impregnating sealer that works by occupying the pores in the stone, so dirt can’t become ingrained there, its also a colour enhancing sealer that provides durable protection. We applied the coats then lightly buffed off the excess with a soft cloth and allowed the slate to dry. The following day we returned to re-silicone all the edges and joints.

Slate Tiled Bathroom EnSuite Stevenage After Cleaning

We recommended to the customer to use a mild solution of Tile Doctor Stone Soap as a maintenance cleaner for the slate. The client was very happy with the result and could see that cleaning with the appropriate product would ensure the ensuite bathroom continued to look good. The whole job took a day and a half to complete.


Professional Restoration of Slate Tiled Ensuite Bathroom in Hertfordshire

Restoring a Limescale Stained Slate Tiled Ensuite in Stevenage Read More »

Edwardian Hallway Before and After Restoration Harpenden

Edwardian Tiled Hallway Rebuilt and Restored in Harpenden

The owners of this property in Harpenden asked us to come and clean and reseal their Edwardian Tiled hallway floor and return it to its’ former glory whilst carrying out a few minor repairs to missing, broken and cracked tiles around the edge.

On visiting the property at this popular commuter town within the St Albans district, it was clear the floor was looking a little neglected and in need of some care and attention. They were keen to retain this feature of their Edwardian property. We discussed what could be done to restore the floor and the client was given a quote and a timescale for the work. They were happy to go ahead.

Edwardian Hallway Before Rebuild Harpenden Edwardian Hallway Before Rebuild Harpenden

Cleaning and Repairing an Edwardian Tiled Hallway Floor

The first step was to give the floor a deep clean with a strong dilution of Tile Doctor Pro-Clean. This product is designed for use on Tile, Stone and Grout and when used in a strong dilution can strip away any old sealers without harming the tile itself. The product is left to dwell on the tiles for short time and then scrubbed in using a rotary brush. We then rinsed with water to remove the slurry produced and using a wet vacuum we removed the residue.

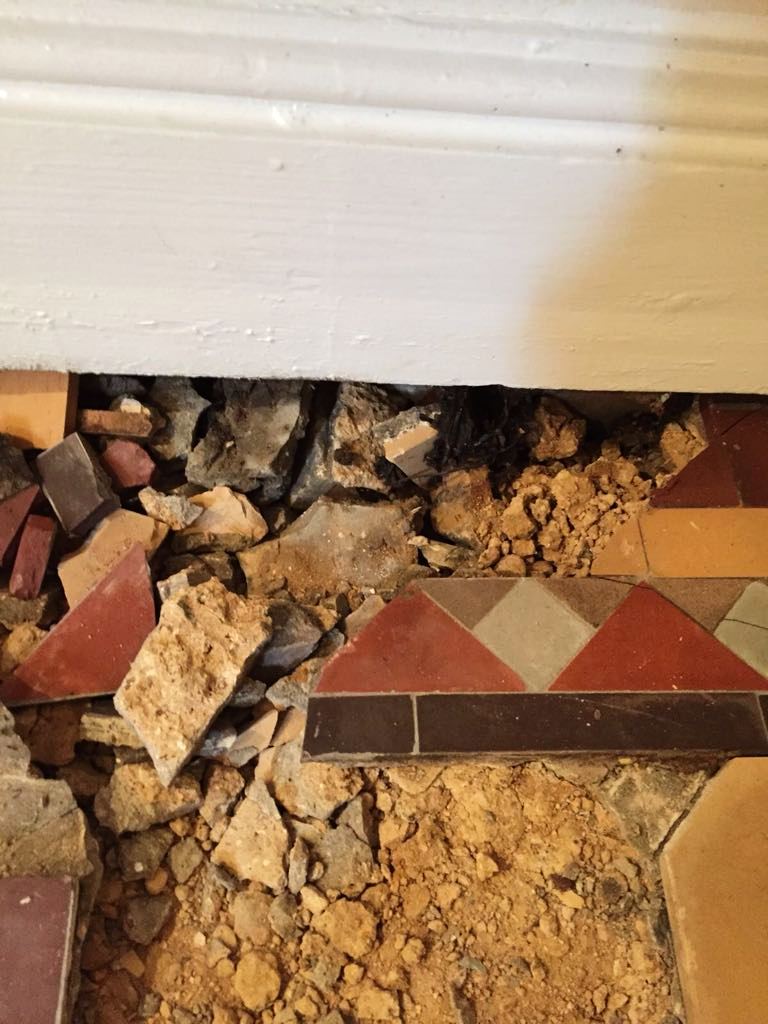
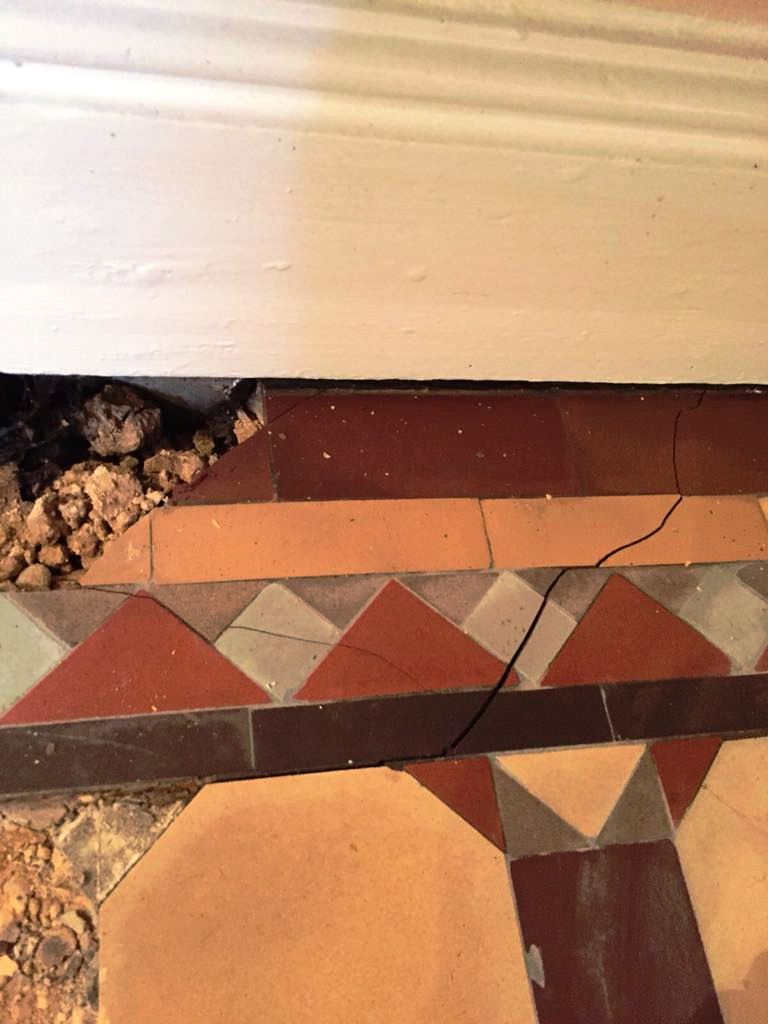
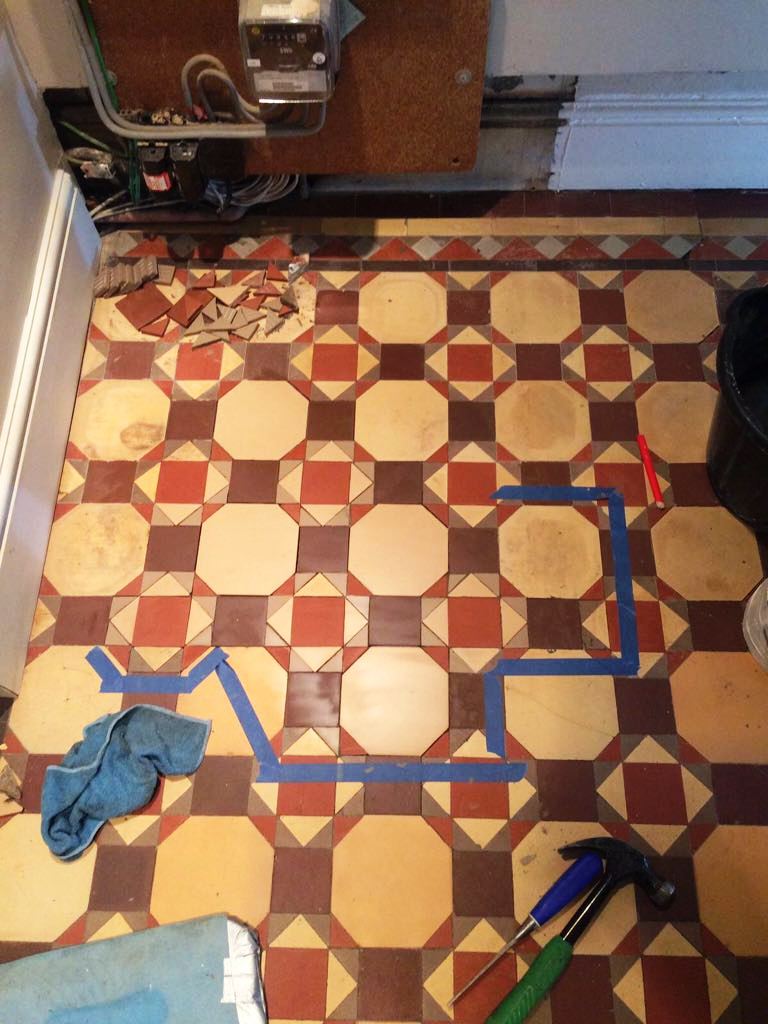
Once this was finished and with the floor looking cleaner the next step was to tackle the cracks in a few of the tiles under the stairs. This is when we discovered that the floor had become loose. When removing some of the broken tiles adjacent to the skirting we discovered a whole section of floor, about 1/3 of sqm had become loose and dropped slightly.

Edwardian Hallway During Rebuild Harpenden Edwardian Hallway During Rebuild Harpenden

The client was concerned with this setback and wasn’t sure what we would be able to do. However, the need not have worried, we have come across this situation before! To tackle the problem, we carefully excavated the area and re built the sub floor below the tiles in concrete. We then levelled the floor in preparation for tiling. Luckily, we were able to salvage the existing tiles and they were individually cleaned using a diamond wet cutter before being re-laid into the original pattern.

Edwardian Hallway During Rebuild Harpenden

Sealing an Edwardian Tiled Hallway Floor

With the original tiles laid back down clean and the flooring rebuilt under the stairs we re-grouted the floor before we were ready to apply a protective sealer. Before doing that however the floor needed to be dry, so we left it to dry off fully overnight.

Returning the following morning, we checked with a moisture meter that the floor was dry, which it was. Firstly, we applied a primer seal using Tile Doctor Colour Grow which is an impregnating sealer to protect the tiles and enhance their colour. Once the first coat of sealer was dry it was followed by five coats of Tile Doctor Seal & Go which adds further protection and leaves a glorious sheen.

Edwardian Hallway After Rebuild Harpenden Edwardian Hallway After Rebuild Harpenden

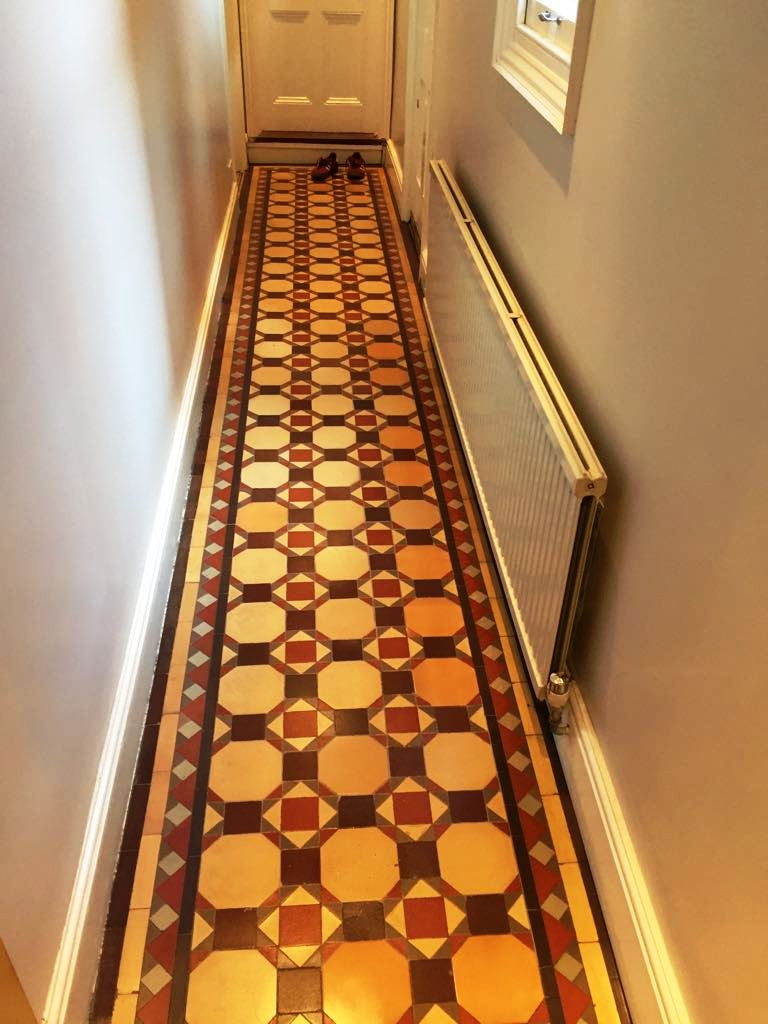
The floor looks amazing and the client was over the moon with the end result. It far exceeded their expectations particularly after finding an area of the floor had collapsed.

Edwardian Hallway After Rebuild Harpenden


Restoration of an Edwardian Tiled Hallway in Hertfordshire

Edwardian Tiled Hallway Rebuilt and Restored in Harpenden Read More »

Stained Quarry Tiles Before After Renovation Hitchin

Stained Quarry Tiled Hallway Floor Restored in Hitchin

Details below of a small Quarry Tiled floor we deep cleaned which included a lobby and adjacent toilet. The property was located in Hitchin which is a market town in North Hertfordshire it is notable for St. Mary’s Church, which is remarkably large for a town of its size.

Quarry Tiled Entrance Lobby Restoration Hitchin Before Cleaning

The tiles were in good physical condition, but were looking a little tired, they just needed a good clean and seal. Also, if you look closely at the photographs you will see the grout was stained with the remains of some red paint which needed to be removed.

Quarry Tiled Entrance Lobby Restoration Hitchin Before Cleaning Showing Paint Staining

They had tried some household solutions but had not managed to remove the marks and the floor had lost its’ sheen. We discussed the process, agreed a price and I arranged a date to return and carry out the work.

Quarry Tiled Entrance Lobby Restoration Hitchin Before Cleaning

On our return our first task was to prepare the areas with protective tape to threshold edges surrounding the floor, adjacent doors and anywhere that we didn’t want our solutions to touch.

The paint stains were spot treated using a strong dilution of Tile Doctor Remove and Go which was scrubbed into the grout by hand. This is a multi-purpose stripper made with a long dwell-time to remove most coatings and sealers, but particularly good on paints. It is also the perfect product to draw out ingrained stains and remove any heavy grease build-up.

Then the tiles and grout were cleaned using Tile Doctor Pro-Clean, this one is a concentrated, multi-purpose high-alkaline cleaner, stripper and degreaser. Dependent on the needs of the tiles we dilute it to suit. We usually dilute with 3 to 5 parts water to use as a very effective cleaner that removes grease, from areas that have been neglected or subjected to heavy use. Alternatively, and as in this situation, we diluted with 2 parts water to strip the synthetic and acrylic waxes that had built up on the floor over the years.

The entrance and porch were then wet vacuumed, and the water rinsed, then allowed to dry off overnight ahead of the sealing process the following day.

Sealing a Quarry Tiled Hallway Floor

On returning to the property the following day, I used a moisture meter to ensure the floor was completely dry and ready for the next stage. Once satisfied I started to apply a single coat of Tile Doctor Colour Grow this is an impregnating sealer which is applied to protect the tiles and offers a durable surface whilst enhancing their natural colour. Finally, to complete, this was followed by three coats of Seal and Go to add a lasting protective seal and a low sheen durable finish.

Quarry Tiled Entrance Lobby Restoration Hitchin After Cleaning

The client was very happy with the completed floor, it had brightened up the whole area, particularly the downstairs cloakroom. She was also pleased it was now going to be easier to maintain and keep clean and she had finally got rid of the offending red paint!

Quarry Tiled Entrance Lobby Restoration Hitchin After Cleaning


Professional Restoration of Quarry Tiled Hallway in Hertfordshire

Stained Quarry Tiled Hallway Floor Restored in Hitchin Read More »

Travertine Tiled Floor Before and After Honing Welwyn Garden City

Travertine Tiled Floor Diamond Honed in Welwyn Garden City

The Travertine tiled floor of this kitchen/family room in at a house in Welwyn Garden City, Hertfordshire needed some care and attention. As one of the busiest rooms of this family house, this floor had been ingrained with dirt from frequent foot traffic and required some minor repairs.

Travertine is a natural stone material that has unique features and colouring that no other stone can offer. The distinctive natural designs and patterns found within Travertine make it very popular as a flooring material. Nowadays it is also often used as bathroom wall tiles and table tops. Travertine’s durability makes it ideal for residential installations however like all-natural stone it does need regular maintenance to keep it looking good.

Travertine Floor Before Cleaning Welwyn Garden City
After discussing the floor with the owner over the phone I arranged a visit in-order to get a better look at the stone and to work out the best method for cleaning it. After inspecting the Travertine tiles, I concluded that the best way to restore the floor would be to use a set of diamond encrusted burnishing pads to hone and refine the surface of the stone floor and recover the original polished appearance.

Cleaning and Repairing a Travertine Tiled Floor

This is the process that we followed to bring back the natural lustre of the Travertine floor.
* The door thresholds, skirtings, doors, kitchen fronts and plinths were protected with tape and furniture was relocated to other rooms as required.
* A strong dilution of Tile Doctor Pro-Clean was mopped onto the floor and allowed to dwell for around 15 minutes. The cleaning solution was then worked into the tile and grout using a rotary floor machine fitted with a black scrubbing pad. We used finer detail pads and brushes for the trickier bits around the edges and also the grout lines.
* The soiled cleaning solution was extracted off the floor with a wet vacuum and the floor rinsed thoroughly with water.
* Once the floor had dried we carried out infill repairs with Limestone coloured grouts and stone resin.

Honing the Travertine Tiles with Burnishing Pads

Following the initial clean we started with the five-stage diamond honing process using a set of Burnishing Pads. Lubricated with water this process uses a coarse pad to cut back through the tile to remove the etch marks and ingrained dirt, then by applying a series of finer grades of diamond pads it brings back a shinier finish. The pads are encrusted with industrial diamonds of different grades which are hard enough to polish the stone.

We also used hand-held burnishing blocks in the tight corners and along the edges to ensure the whole floor was treated. The floor is rinsed with water between each stage and the resultant slurry is removed with a wet vacuum.

Sealing a Travertine Tiled Kitchen and Family room Floor

We returned the following day. After ensuring the floor was clean and fully dry we moved on to the sealing process, the sealant ensures the floor has a nice durable finish and is protected from staining and ingrained dirt.

When it comes to sealing Travertine I usually recommend an impregnating product called Tile Doctor Colour Grow which enhances the natural brown shades in the tile however the customer wanted the tiles to have a natural look to them so only one coats of Colour Grow was applied and this was followed by two coats of Tile Doctor Ultra Seal which gives the stone a natural finish.

Travertine Floor After Cleaning Welwyn Garden City
The completed floor now looks clean and fresh and a big improvement on how the stone and grout it looked when I first arrived. The family were very happy with the result and the new sealer will make the floor much more manageable going forward.


Restoring a Travertine Tiled Kitchen and Family room Floor in Hertfordshire

Travertine Tiled Floor Diamond Honed in Welwyn Garden City Read More »

Bathroom Deep Clean and Re-grout in St.Albans

Bathroom Deep Clean and Re-grout in St.Albans

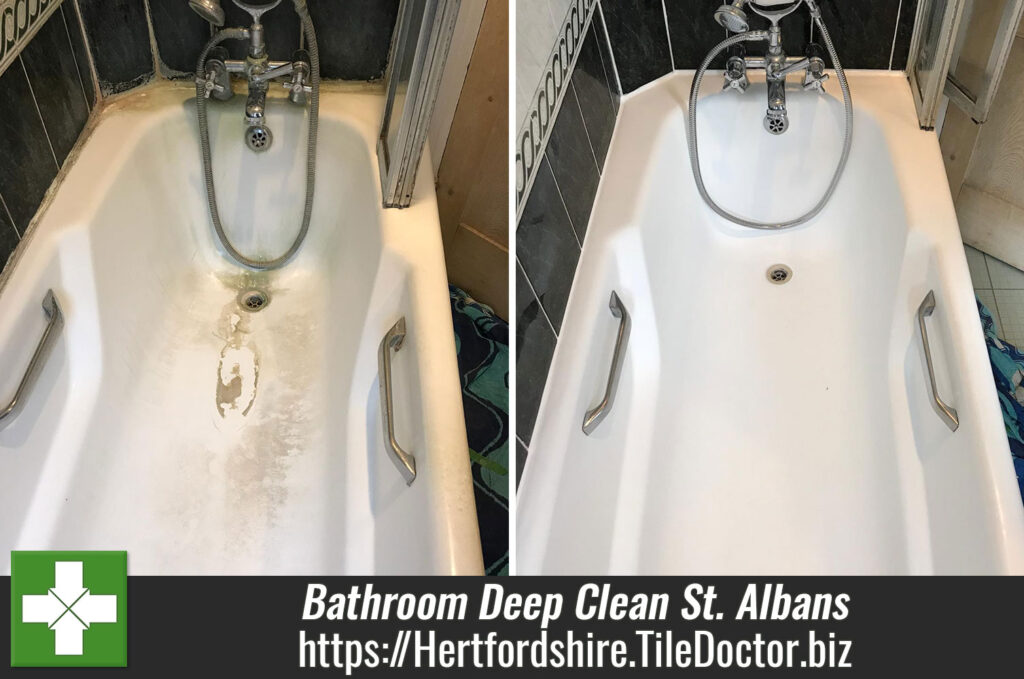
The photographs on this page were taken at a property in St. Albans, Hertfordshire or Verulamium as it was known in Roman times. St. Albans is roughly 20 miles north-west of central London and a popular choice for commuters who work in London. The owners were fed up with the discoloured grouting and their bathroom looking tired and had tried lots of products on the market to get the grout looking clean. The results had been disappointing, and they were starting to despair.

St Albans Bath Tile Grout Before Renovation
They contacted me to see if I could help and after visiting the property I recommended deep cleaning the Ceramic tile and grout and then removing and re-grouting those areas that were badly stained. I explained that this would take one day to complete and by using a series of products we would soon have the bathroom looking more pleasing. Happy with the quote which was far less expensive than installing a new bathroom I scheduled the work in for an agreed date.

St Albans Bath Tile Grout Before Renovation

Deep Cleaning and Re-grouting a Tiled Bathroom

We started out by preparing the area with protective sheets and tape to threshold edges. This was then followed by giving the tile and especially the grout a deep clean using Tile Doctor Oxy-Gel and aa steam cleaner to get the grout as clean as possible. Oxy-Gel is a strong alkaline gel cleaner and degreaser which works well on vertical surfaces where a long dwell time is required. Being a gel, it stays in place allowing it to really get to work on the dirt making it an ideal choice for this situation.

The top layer of grout is porous and, as a result, it easily absorbs grease, dirt and limescale. Grout between wall-tiles, particularly in damp areas like bathrooms, will become dirty and unattractive and if the ventilation is inadequate Mould and Mildew can develop. The grout was scrubbed with Oxy-Gel several times to get it as clean as possible and then rinsed off with water.

At this stage we were able to identify all those areas of grout that were badly stained and we set about carefully removing the old grout using a special tool. This work takes a bit of time, but we felt it was the best solution in this instance

Next, using a craft blade we carefully removed all the old silicone sealant, so it could be replaced later. This was followed by re-grouting using a white grout to match the existing.

St Albans Bath Tile Grout After Renovation
Whilst the grout was drying the final step was to replace the silicone sealant around the bath edge with fresh sealant. We always use high quality mould resistant silicone for this as we don’t want any call backs later when the sealant goes mouldy or water leaks through.

After making some final checks and ensuing excess grout was polished off the tiles the bathroom transformation was complete. Even I was amazed at how much cleaner and tidier the bathroom now looked. The important thing was the customer who was equally impressed and left the following comment on our Tile Doctor feedback system.

‘Excellent and friendly service – would recommend to others’

St Albans Bath Tile Grout After Renovation
 

Bathroom Deep Clean and Re-Grout in Hertfordshire

Bathroom Deep Clean and Re-grout in St.Albans Read More »

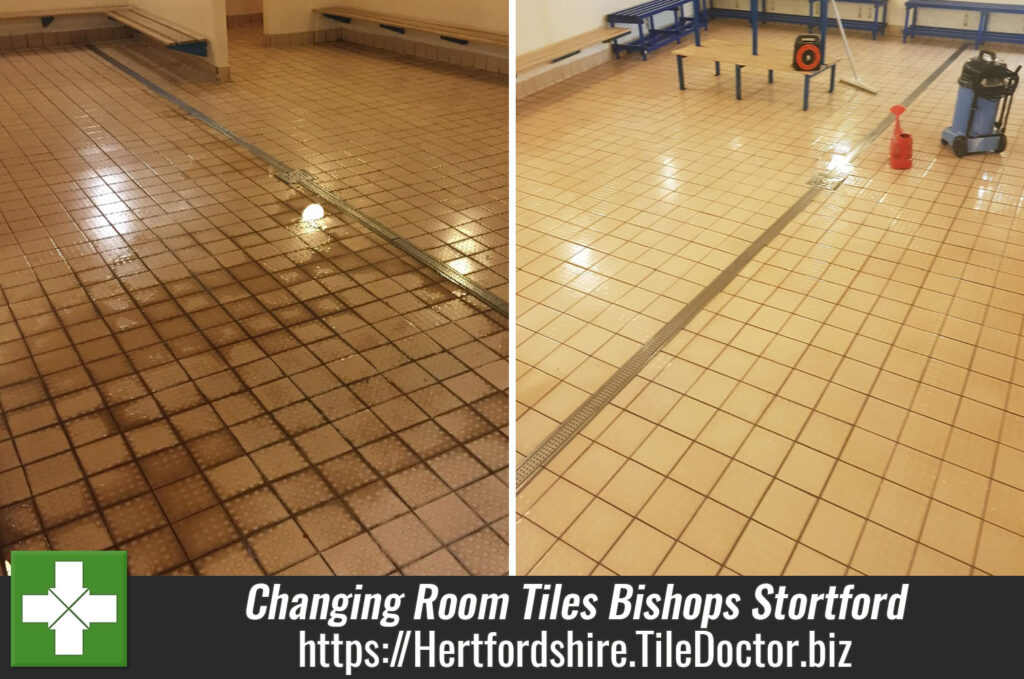
Deep Cleaning Changing Room Tiles at a Bishops Stortford Swimming Pool

Deep Cleaning Changing Room Tiles at a Bishops Stortford Swimming Pool

The management team of a swimming pool located in the historic market town of Bishops Stortford asked us to pay them a visit recently to see what could be done to improve the appearance of the ceramic tiles in their changing rooms. We usually find commercial buildings rely on their own cleaning teams and so we are used to only getting called in when they have been struggling to resolve an issue. In this case the floor tiles in the changing room were anti-slip ceramics which due to their rough texture are very popular in wet areas such as these.

Grubby Ceramic Before Cleaning at Bishop Stortford Changing Rooms
The rough texture of the tile is excellent increasing grip in wet areas however they are also excellent at trapping dirt and over time this problem had become progressively worse until it started to become very noticeable and not in keeping with the high level of hygiene they wanted to project. Tasked with resolving the problem and given the large area to cover we sent a team of two over to give the tiles a deep clean

Deep Cleaning Anti-Slip Ceramic Changing Room Floor Tiles

Working in sections, our first task was to apply a strong dilution of Tile Doctor HBU to the dry tile surface and allow to dwell for 30-45 minutes. HBU stands for Heavy Build-Up and this product uses tiny Nano sized abrasive particles to lift out deeply ingrained dirt from tile. After allowing the product to soak in it to the dirt it was then agitated with a slow speed 110v orbital rotary scrubbing machines fitted with 3m polypropylene cleaning pads. We use a 110v machine through an isolating transformer to provide maximum electrical safety when working in wet areas.

The grout lines and other areas that were difficult to reach with the machine were then scrubbed manually and then left to dwell for a further 30 minutes whilst we continued working in another section. The floor was then given another scrub and the now dirty cleaning solution was rinsed off the floor with water and then extracted with a 110v wet vacuum.

Grubby Ceramic During Cleaning at Bishop Stortford Changing Rooms

Deep Cleaning Ceramic Changing Room Wall Tiles

With the floors looking much cleaner from the deep clean the next step was to apply a similar process to the white ceramic wall tiles where the grout was also looking grubby. Tile Doctor Oxy-Gel works best on wall tiles, it’s a strong tile and grout cleaning product that comes in a gel form which sticks well to vertical surfaces allowing it to dwell and work on the dirt longer.

Grubby Ceramic During Cleaning at Bishop Stortford Changing Rooms
It’s a similar process in that you apply the cleaning product, allow it to dwell and then scrub it into the surface; this work had to be done by hand using stiff brushes. Once done the tiles were rinsed and then treated to a steam clean and machine buffed with a six-inch soft white buffing pad fitted to a handheld buffer.

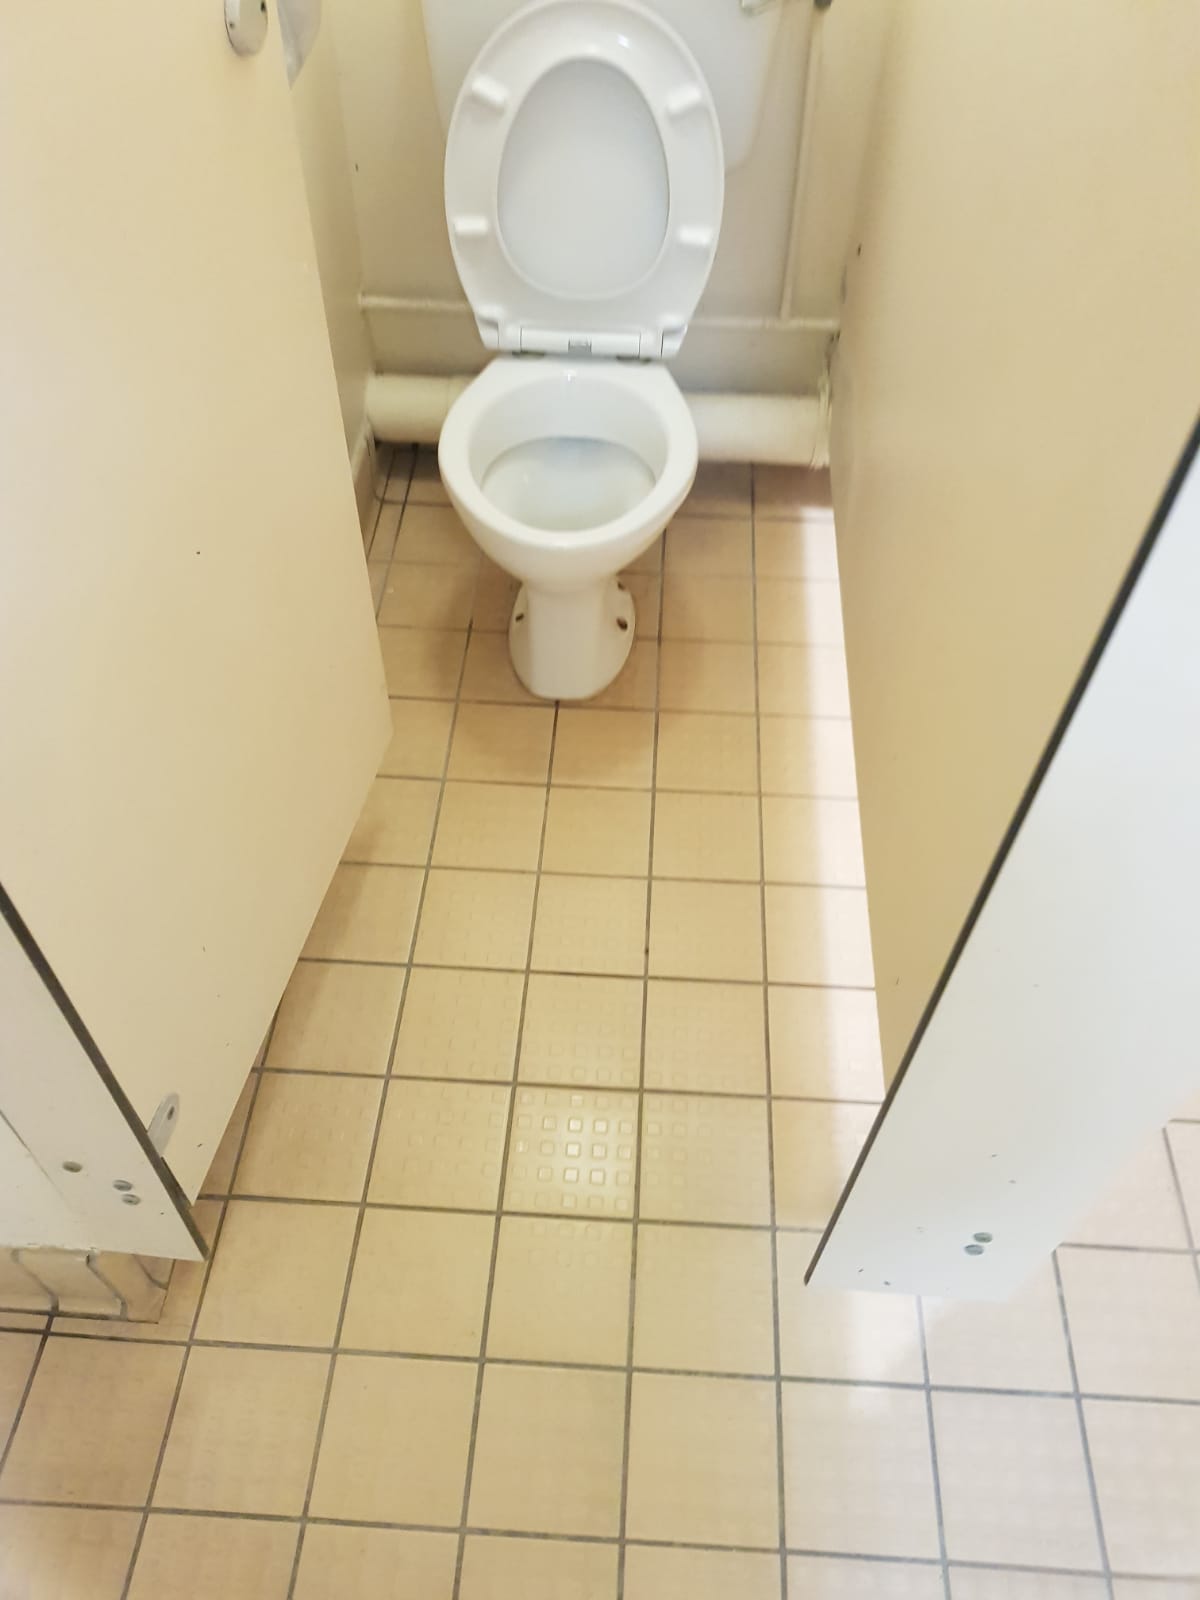
The tiles in the toilet stalls were also given similar attention using a combination of the processes above.

Grubby Ceramic After Cleaning at Bishop Stortford Changing Rooms
The whole job took two days and the tiles now look far cleaner and give the changing room a far more appealing and hygienic look. Naturally our client was extremely happy with the result.

Grubby Ceramic After Cleaning at Bishop Stortford Changing Rooms
 

Commercial Ceramic Tile Cleaning in Hertfordshire

Deep Cleaning Changing Room Tiles at a Bishops Stortford Swimming Pool Read More »

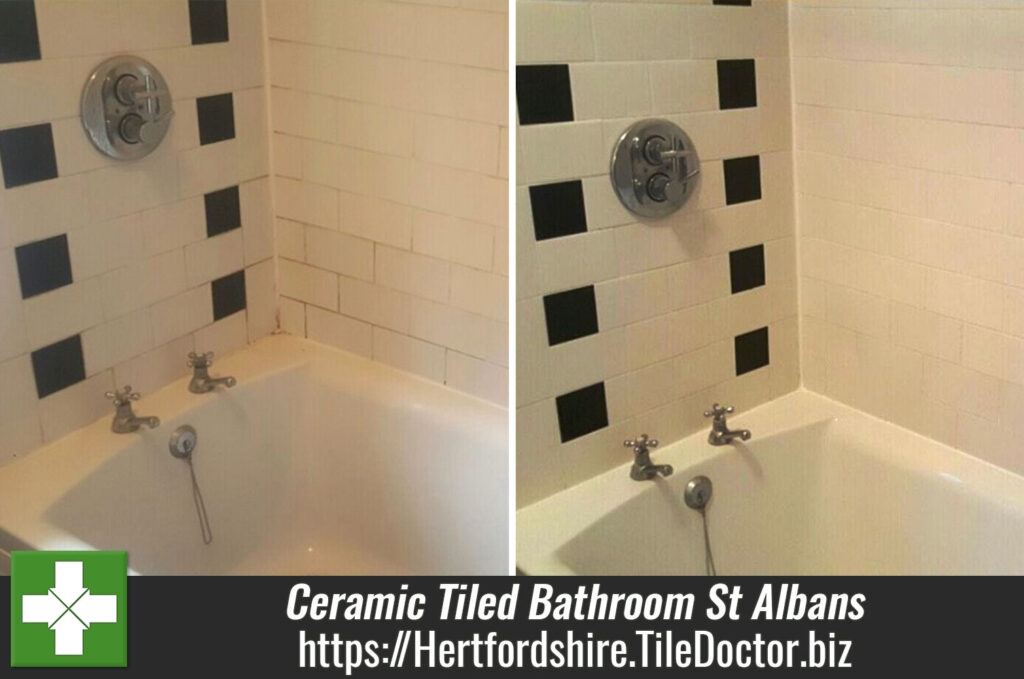
Ceramic Tiled Bathroom Refresh in St Albans

Ceramic Tiled Bathroom Refresh in St Albans

This was a small family bathroom at a house in St Albans with white ceramic glazed tiles and what was once white grout. The grout was now stained and proving difficult to keep clean, additionally the silicone seal between the tile and the bathtub was perishing. The bathroom needed cleaning and restoring to give it a new lease of life as well as making it easier to maintain for the busy family.

Bathroom Tiles Before Cleaning St Albans
Were actually based in St Albans so always a pleasure to pop round and meet fellow residents. The city dates to the Romans when it was known as Verulamium and these days its popular with commuters working in London.

Cleaning a Ceramic Bathroom Tile and Grout

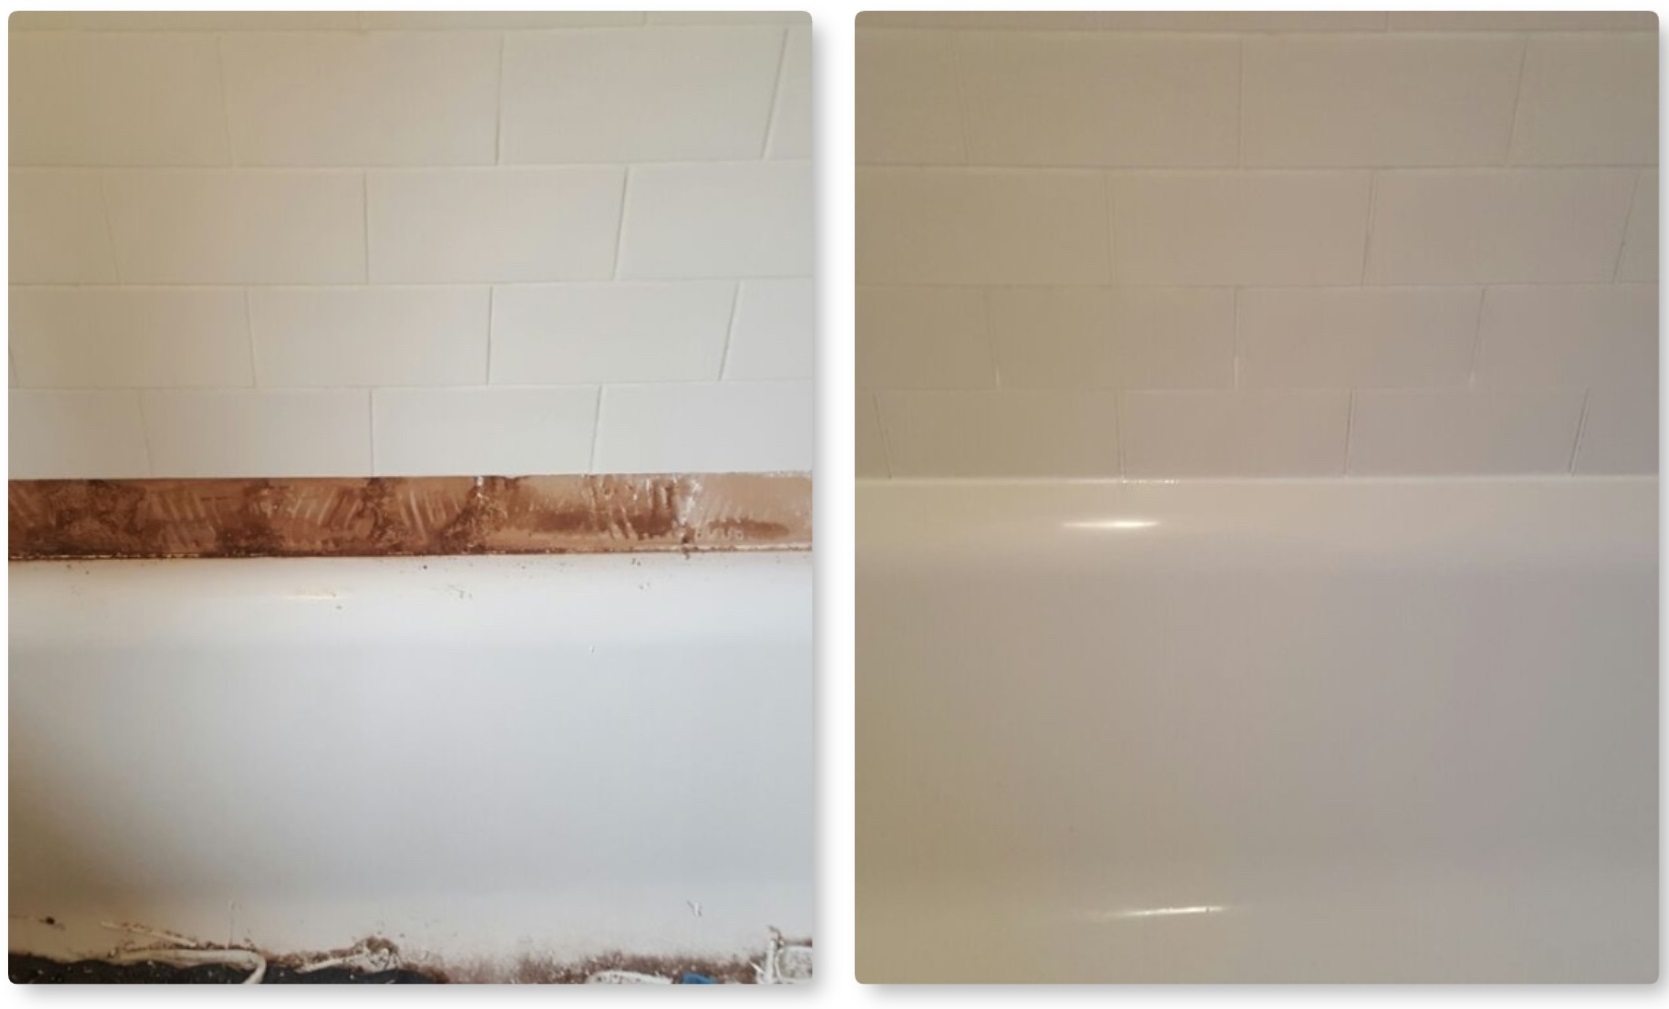
On arrival I inspected the tiles around the bath and could see they were going to be problematic, the silicone sealant was starting to perish, and I was concerned that the bottom row may be not be watertight. I like to do a job right the first time round so I decided the best thing to do would be to remove the row around the bathroom edge, clean them up and refit them with fresh adhesive, grout and reseal with silicone.

With that in mind my first job was to give the ceramic tile and grout a deep clean by spaying on Tile Doctor Aqua-Pro and then scrubbing it in with polypropylene brushes and pads. This product is designed for the regular cleaning of bathroom tiles as is Tile Doctor Duo-Clean which is a stronger product that can tackle mould as well. The tile and grout were then given a high-pressure steam clean using a special machine we usually use on floor tiles and then let to dry off over lunch.

Ensuring a Tight Bath Seal

After lunch the old silicone was stripped off between the bathtub and wall tile and this was followed by the careful removal of the bottom row of ceramic tiles. This is done by removing the grout first with an oscillating hand tool and then carefully prising the tiles off the wall without damaging them.

Bathroom Tiles Replacement St Albans
The old adhesive was then scrapped off the exposed area to prepare the wall for re-tiling and the tiles were re-installed with fresh. Once the adhesive and gone off the tiles were re-grouted and the grout left to dry before applying a fresh silicone sealant between the tile and bathtub. During the various drying phases, the ceramic bathroom tiles were buffed using a soft white buffing pad to give them an as new appearance.

Bathroom Tiles After Cleaning St Albans
The job was completed in one day and the bathroom now looks like it was recently installed.

Rejuvenating Ceramic Bathroom Tiles and Grout in Hertfordshire

Ceramic Tiled Bathroom Refresh in St Albans Read More »

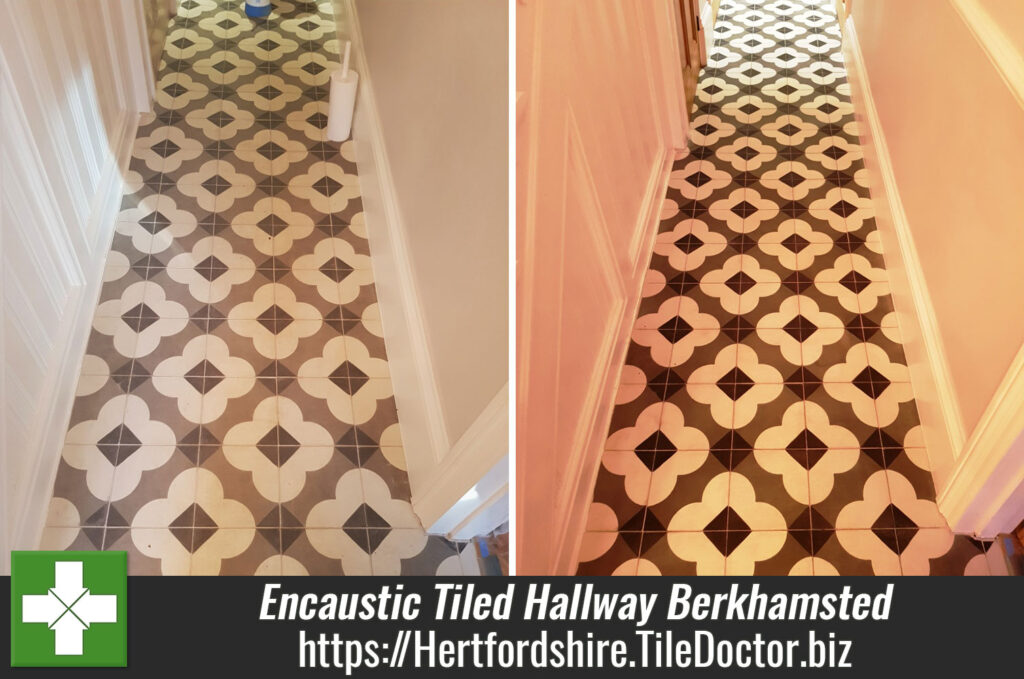
Dull Encaustic Tiled Hallway Floor Renovated in Berkhamsted

Dull Encaustic Tiled Hallway Floor Renovated in Berkhamsted

I had an enquiry from a client in the London commuter town of Berkhamsted who had a beautiful Encaustic tiled floor in their hallway which was in need of cleaning. Encaustic tiles are made from layers of cement that are hydraulically compressed to make a very hardwearing surface that can then be decorated. The result is an easy to clean hardwearing surface that is ideal for high traffic areas such as hallways.

Encaustic Tiled Hallway Before Cleaning Berkhamstead
Encaustic tiles however are micro-porous so do need to be sealed to prevent dirt from becoming ingrained in the tiny holes. The tiles at this property in Berkhamsted had been sealed at some point in the past but over the years the sealer had worn down lettering dirt enter the pores making it difficult to clean effectively. The floor now required a deep clean and seal to bring back the life into this artistic floor pattern.

Encaustic Tiled Floor Cleaning

We first removed what was left of the old sealer and ground in dirt using a coarse 400 grit Red burnishing pad attached to a rotary floor buffer. The burnishing pads we use are encrusted with industrial diamond and are applied using water for lubrication, once the pad has been run over all the tiles the floor is rinsed with more water which is then extracted with a wet vacuum to remove the slurry that is generated.

The coarse pad was the followed by a medium 800 grit burnishing pad which is the first step in restoring the appearance of the tiles and is applied and rinsed off using the same process as the 400 grit. The 800 grit pads is followed by the 1500 grit pad which is the second step In restoring the appearance of the tile. Again, the pad is applied with water to lubricate and the floor given a good rinse afterwards.

The next step was to get the grout clean which was done by applying Tile Doctor Pro-Clean which was left for ten minutes before being scrubbed in by hand with a narrow stiff brush. The floor was then given yet another rinse and then dried with the wet vacuum to remove the dirt that was generated from the grout.

The last step in the cleaning process was to run over the floor with a very fine 3000 grit pad, this last pad is the final step in restoring the appearance of the tile and is applied dry with only a little water that is sprayed on using a technique we like to call spray burnishing.

Encaustic Tiled Floor Sealing

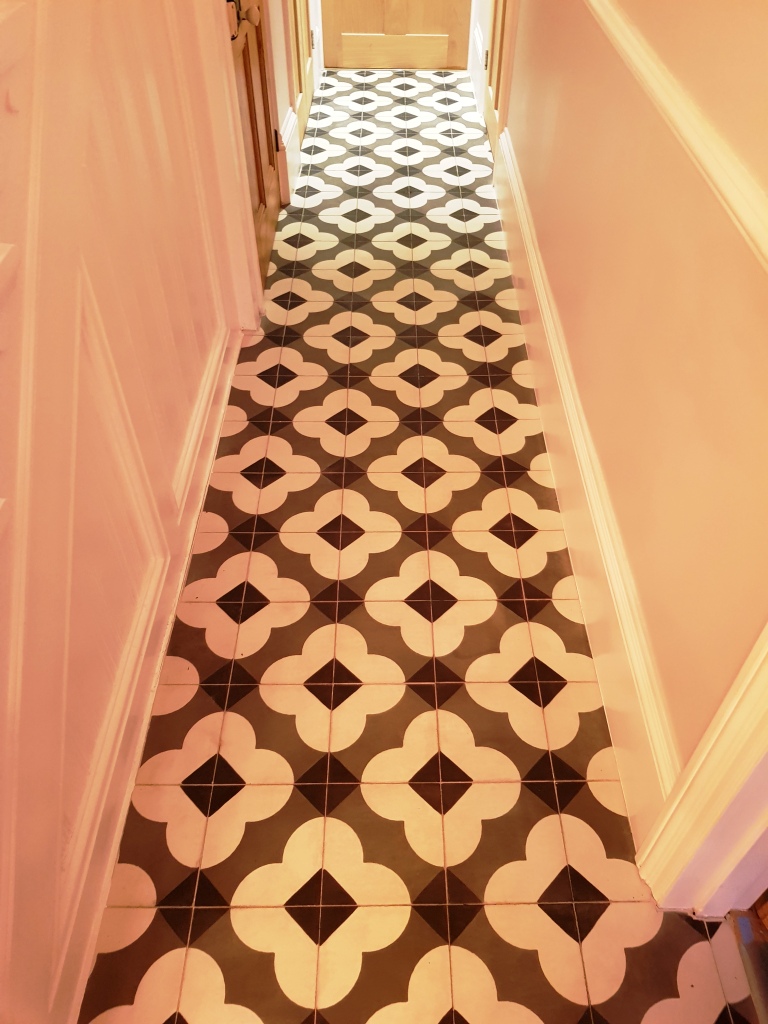
Once the floor was dry it was sealed using two coats of Tile Doctor Colour Grow which is an impregnating sealer that seeps into the pores of the tile protecting it from within. This sealer has the added advantage of enhancing the existing colours in the tile improving its overall appearance. The overall process worked incredibly well and made a huge difference to the floor as you can see in the final photograph.

Encaustic Tiled Hallway After Cleaning Berkhamstead
To keep Encaustic floor tiles in first class condition I recommend the use of the Tile Doctor Neutral Tile cleaner which being pH neutral does not reduce the life of the sealer and is ideal for the cleaning of all types of sealed floors. The product comes in a concentrated form, so I recommend it’s used in a mild 1-30 dilution spray applied and wiped over with a microfibre flat mop, then buffed dry.

Encaustic Tiled Hallway Floor Renovation in Hertfordshire

Dull Encaustic Tiled Hallway Floor Renovated in Berkhamsted Read More »

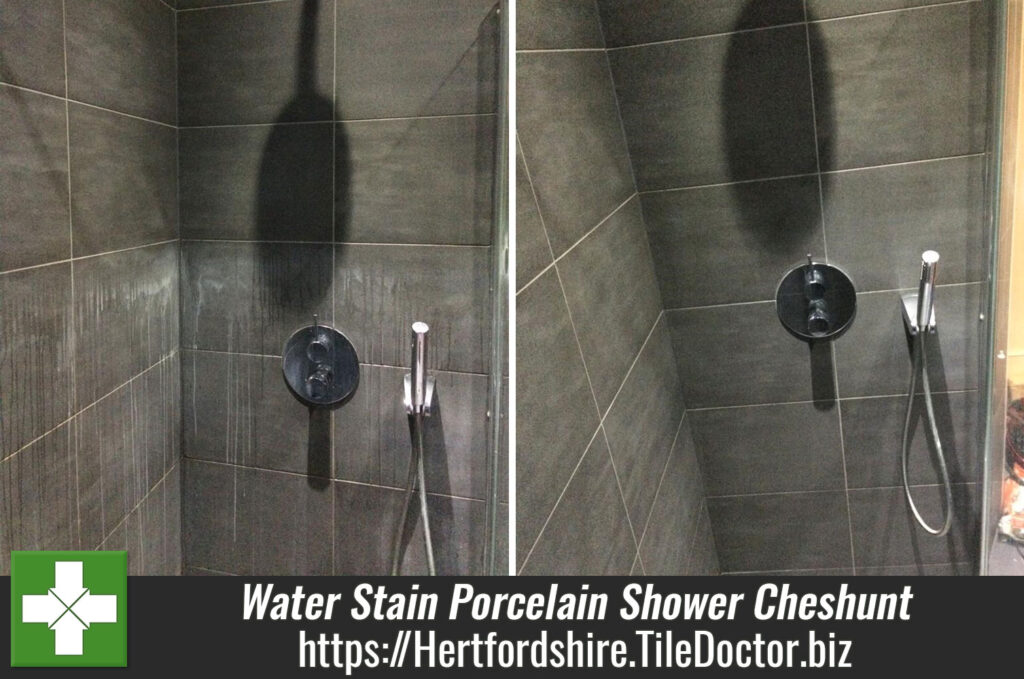
Removing Hard Water Staining on Porcelain Shower Tiles in Cheshunt

Removing Hard Water Staining on Porcelain Shower Tiles in Cheshunt

Photographs below of a Porcelain tiled shower that had been installed at a house in Cheshunt the year before. The tiles were actually dark grey textured porcelain tile but hard water in the area had left very noticeable water stains and limescale deposits that were proving hard to remove with general cleaning.

Stained Black Porcelain Shower Tile Cheshunt Before Cleaning
Hardwater is basically water with a high mineral content which are historically recognised as being good for you, however it’s not so good for the bathroom where the minerals are left behind when the water evaporates.

On the initial visit to survey the tiles we ran a test clean on a small area to ensure we could return the tile back to its as new condition. All went well, and the customer booked us in to return later to complete the work.

Removing Limescale from Porcelain Shower Tiles

Work began by giving the shower tiles an initial clean with Tile Doctor Aqua-Pro which was worked into grout lines with detail brushes and a burnishing pad for the tile surface. This process removed all the Limescale and water marks.

A second clean was then carried out with Tile Doctor Duo-Clean which is a fast-effective double action cleaning solution that can remove mould and blackspots from grout and silicone. The solution was sprayed on the shower room floor and walls and left to soak in before being worked in with a stiff brush.

Stained Black Porcelain Shower Tile Cheshunt During Cleaning
The shower tiles were then rinsed with a steam cleaner to remove any trace of product and then buff the tiles with a hand-held white buffing pad to bring up their appearance.

To give it a neat waterproof finish we stripped out the old silicone sealant from around the base of the shower and replaced with new mould resistant silicone.

The shower took a whole day to complete but I think you will agree has been transformed by the process.

Stained Black Porcelain Shower Tile Cheshunt After Cleaning

Reducing the Impact of Hard Water

To minimise the impact of hard water some shower units will keep the shower running at a gradually decreasing temperature immediately after use. This has the effect of rinsing off the deposits before evaporation has chance to occur. Personally, we recommended you spray the shower tiles with Tile Doctor Aqua-Pro after use, this product is a bathroom tile cleaner that is ideal for the regular cleaning of all types of internal porcelain/ceramic bathroom/wet room tiles. Apply by lightly spraying a dilution of the cleaner and wipe over then water rinse and dry buff to finish.

Hard Water Staining Removal on Porcelain Shower Tiles

Removing Hard Water Staining on Porcelain Shower Tiles in Cheshunt Read More »

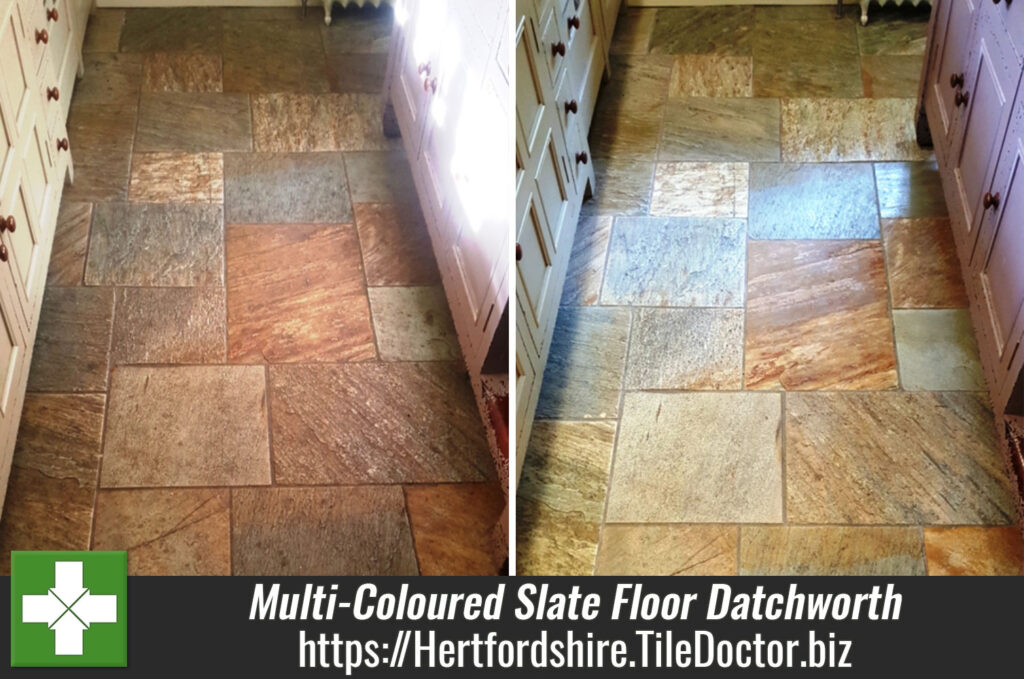
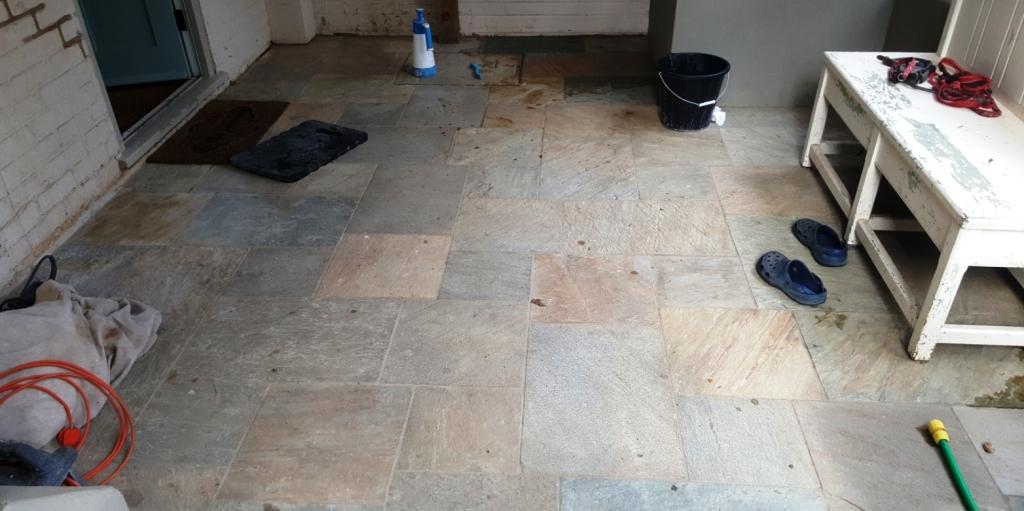
Lacklustre Multi-Coloured Slate Tiled Floor Transformed in Datchworth

Lacklustre Multi-Coloured Slate Tiled Floor Transformed in Datchworth

Slate is a very popular choice for floor tiles due to it being hard wearing with a relatively low porosity making it more stain resistant. Some property owners opt for darker Slate, while others prefer wonderful multi-coloured Slate, such as that used in this kitchen in Datchworth, a small village in between the towns of Herford, Stevenage and Welwyn Garden City.

Multi Coloured Sawn Slate Play Room Floor Datchworth Before Cleaning
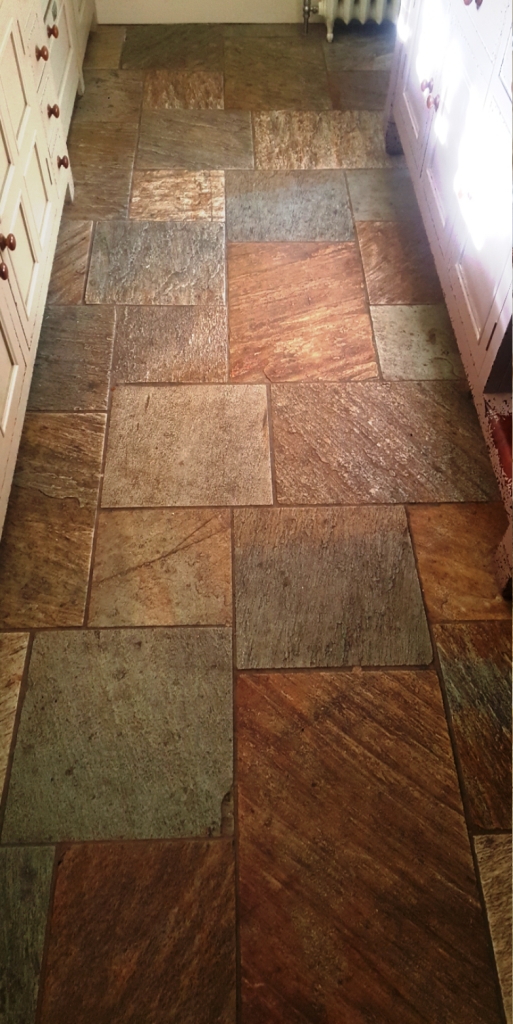
What can be said for certain is that no-one likes a dull looking and dirty floor! Unfortunately, Slate tiles can easily lose their lustre if not treated to routine maintenance. This customer felt that her Slate tiles, which covered the kitchen, utility room and a child’s playroom, were well overdue a refresh. Here’s what we did.

Cleaning a Slate Tiled Kitchen and Utility Room

We followed our tried-and-tested process for restoring the natural lustre and appearance of Slate tiles.

To begin, we removed any old sealant on the tiles using Tile Doctor Remove & Go, which is both a coatings stripper and cleaning product. The product was applied liberally across the floor and worked into the tiles using a buffing machine fitted with a black buffing pad. Hand-held brushes were used to tackle the fine grout lines. This process removed old sealers and gave the tile and grout an initial clean.

Multi-Coloured Sawn Slate Kitchen Floor Datchworth Before Cleaning Multi-Coloured Sawn Slate Utility Floor Datchworth Before Cleaning

Next, we applied Tile Doctor Pro-Clean, which is our industrial strength tile and grout cleaner which was scrubbed into the Tile and Grout as before to remove remaining ingrained dirt. The resultant slurry was promptly removed using a wet vacuum.

To complete the cleaning process, we steam cleaned the Slate to remove any further residue trapped in the pores of the stone and any trace of cleaning product. The floor was then left to dry off overnight so it would be ready for sealing in the morning.

Sealing a Slate Tiled Kitchen and Utility Room

Upon returning to the property, we ran some quick damp tests, since even a small quantity of moisture can cloud the sealant and damage its performance. Thankfully, the tiles proved dry and we were able to seal the Slate using three applications of Tile Doctor Colour Grow.

This impregnating sealer helps to enrich the natural colours in the stone, while offering a natural-looking matte finish and robust protection. Between each application of sealant, we machine-buffed the surface of the floor to help dry the stone naturally while maintaining the matte finish.

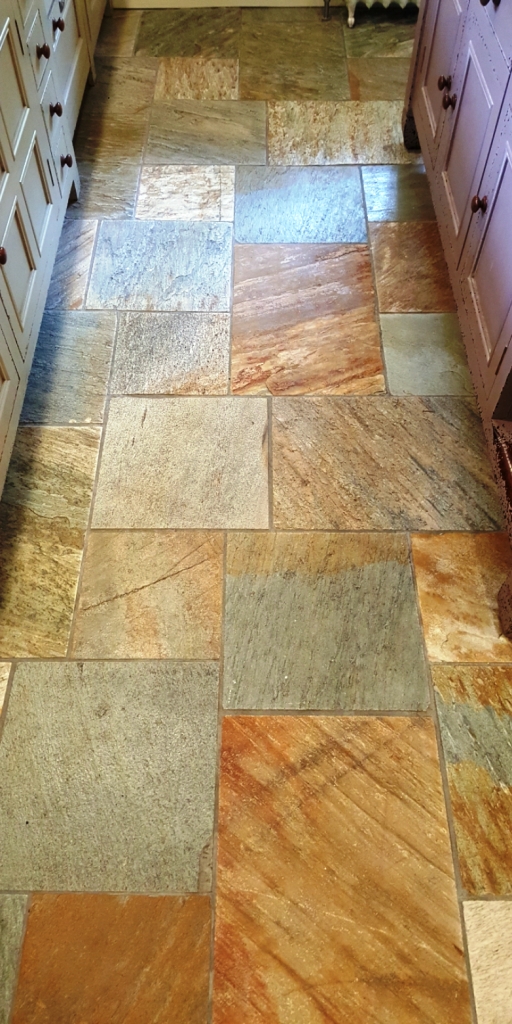
Multi-Coloured Sawn Slate Kitchen Floor Datchworth After Cleaning Multi-Coloured Sawn Slate Utility Floor Datchworth After Cleaning

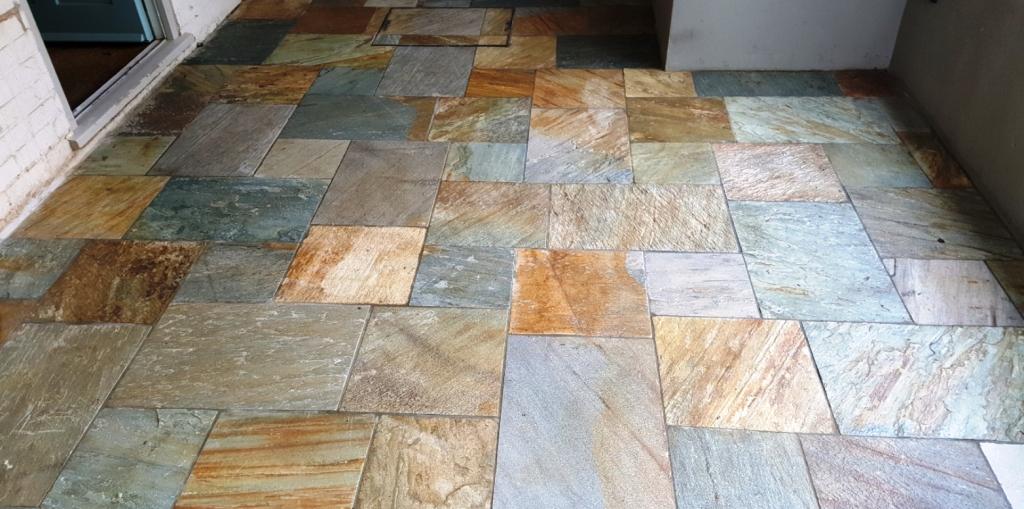
This two-day job was truly transformative for these Slate tiles. Just compare the before and after photos above – the customer was certainly very impressed with the speed and quality of the work. Another satisfied customer.

Multi Coloured Sawn Slate Play Room Floor Datchworth After Cleaning
 

Professional Renovation of a Dull and Lacklustre Multi-Coloured Slate Tiled Floor in Hertfordshire

Lacklustre Multi-Coloured Slate Tiled Floor Transformed in Datchworth Read More »

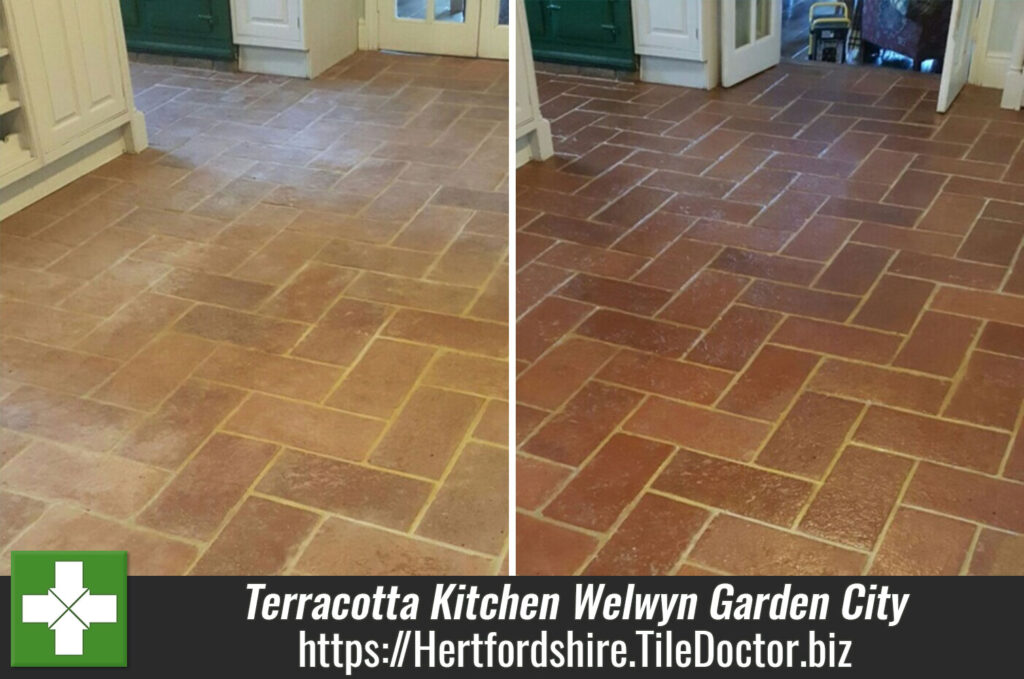
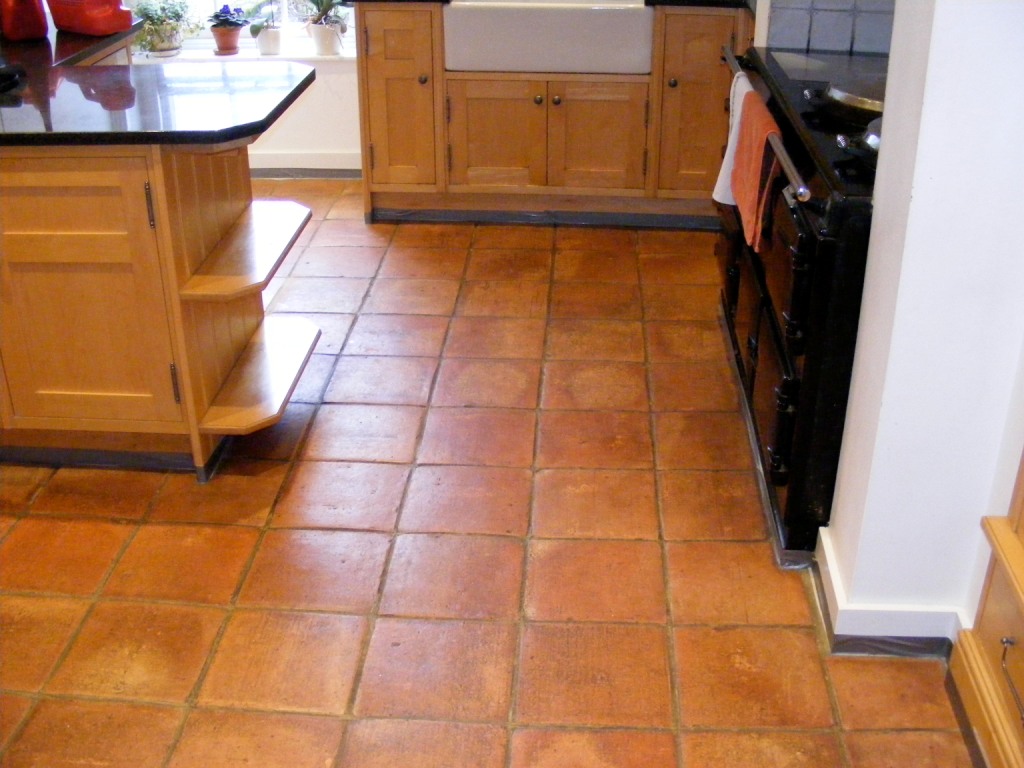
Traditional Terracotta Kitchen Floor Renovated in Welwyn Garden City

Traditional Terracotta Kitchen Floor Renovated in Welwyn Garden City

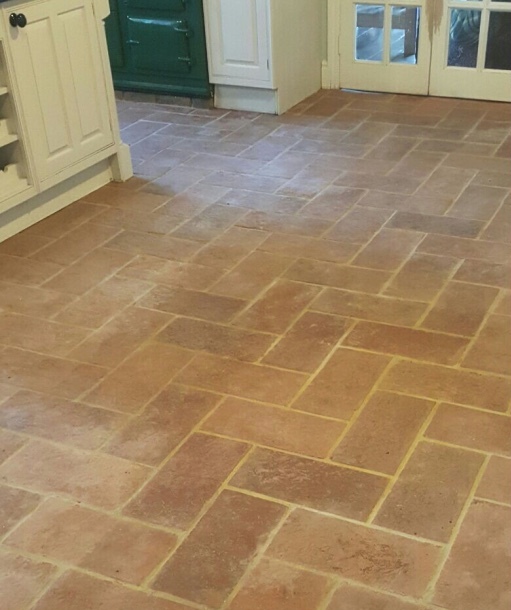
The pictures below were taken at a beautiful Hertfordshire Lodge located on the outskirts of Welwyn Garden City where the traditional Terracotta Kitchen floor had lost its appeal and was now in need of renovation.

Welwyn Garden City is actually a new town that was created in the 1920 with an aim to create a modern garden city, the architecture is therefore fairly modern.

Terracotta Lodge Floor Tile Before Cleaning in Welwyn Garden City

Deep Cleaning Kitchen Terracotta Tiles

As usual the first step before starting the cleaning process was to clear the floor of as move furniture as practical and use protective tape to cover the threshold edges, skirting’s and doors and use a protective sheet to the fixed kitchen units.

To deep clean the Terracotta tiles and remove any trace of old sealers and waxes present a strong dilution of Tile Doctor Remove and Go was applied to the floor and left to soak in for about ten minutes. Then the solution was agitated using detail brushes along the grout lines and edges and polypropylene pads.

Once done the now soiled cleaning solution was extracted from the floor using a wet vacuum and the tile and grout rinsed with fresh water.

This process removed most of the dirt and old coatings but more work was required so a further treatment using a strong dilution of Tile Doctor Pro-Clean which is a strong tile cleaner and sealer remove was applied and worked in using an orbital floor machine fitted with a scrubbing pad.

Again the soiled cleaning solution was removed using a wet vacuum and the tile and grout given a steam clean to remove any trace of cleaning product residue. The floor was then left for two days to fully dry out.

Sealing Terracotta Kitchen Tiles

On our return the floor was checked for dampness before we proceeded to seal the floor; sealing damp tiles can result in a patchy finish so this is always worth checking.

To seal we gave the Terracotta tiles a primer coat of Tile Doctor Colour Grow which is an impregnating sealer that brings out the natural colours in the tile and by occupying the pores of the clay tile it stops dirt becoming ingrained. This was then followed by six coats of Tile Doctor Seal and Go which works really well on Terracotta and adds a nice satin sheen finish. The floor now looks much healthier and has really lifted the appearance of the kitchen.

Terracotta Lodge Floor Tile After Cleaning in Welwyn Garden City
Before leaving we advised the customer to avoid commercial acid based cleaning products as these are not appropriate for sealed Terracotta tiles. We suggest using a low alkaline/neutral PH product such as Tile Doctor Neutral Tile Cleaner as this will maximise the life of the sealer and maintain the sheen of the tile.

Traditional Terracotta in the Kitchen Restored in Welwyn Garden City

Traditional Terracotta Kitchen Floor Renovated in Welwyn Garden City Read More »

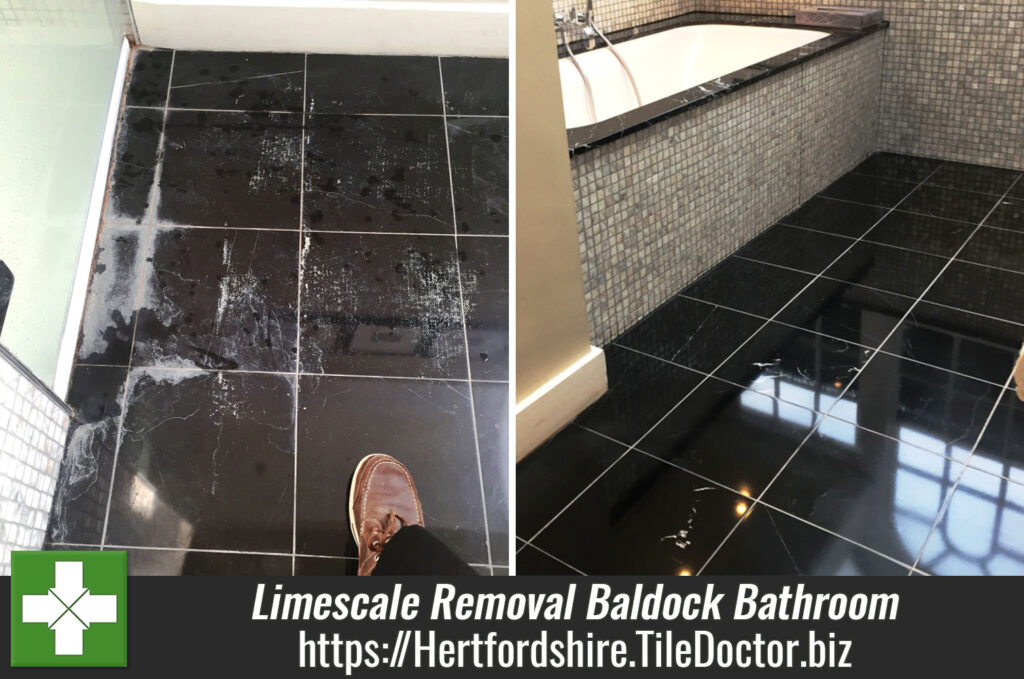
Removing Limescale from Polished Black Marble floor tiles in a Baldock Bathroom

Removing Limescale from Polished Black Marble floor tiles in a Baldock Bathroom

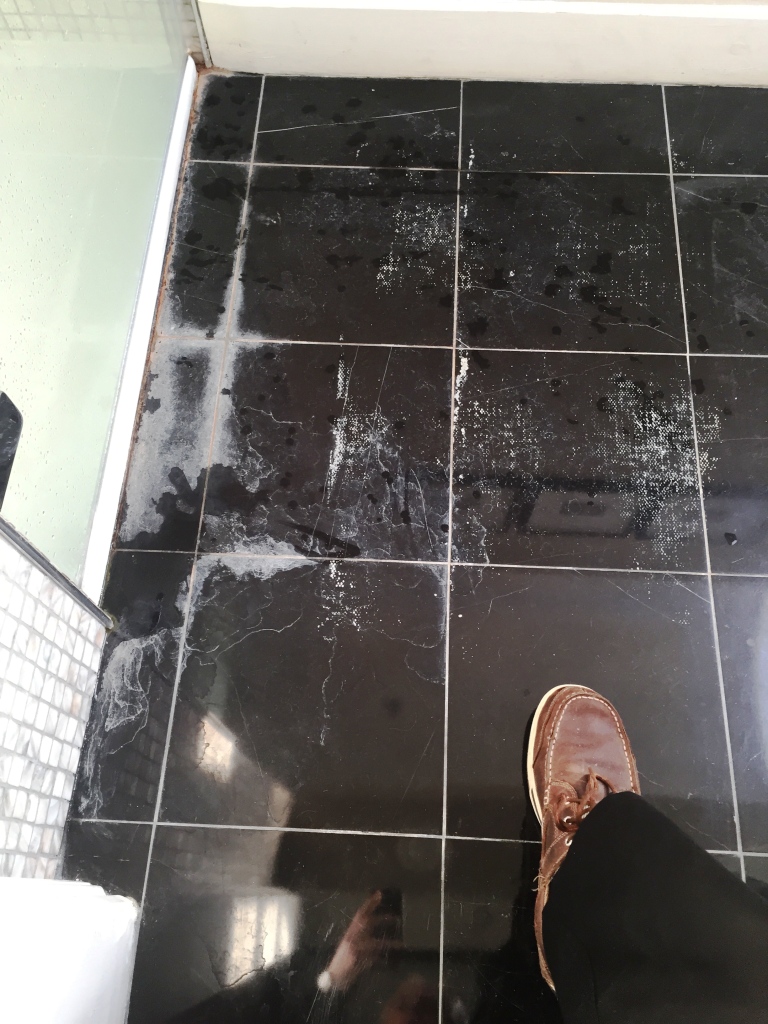
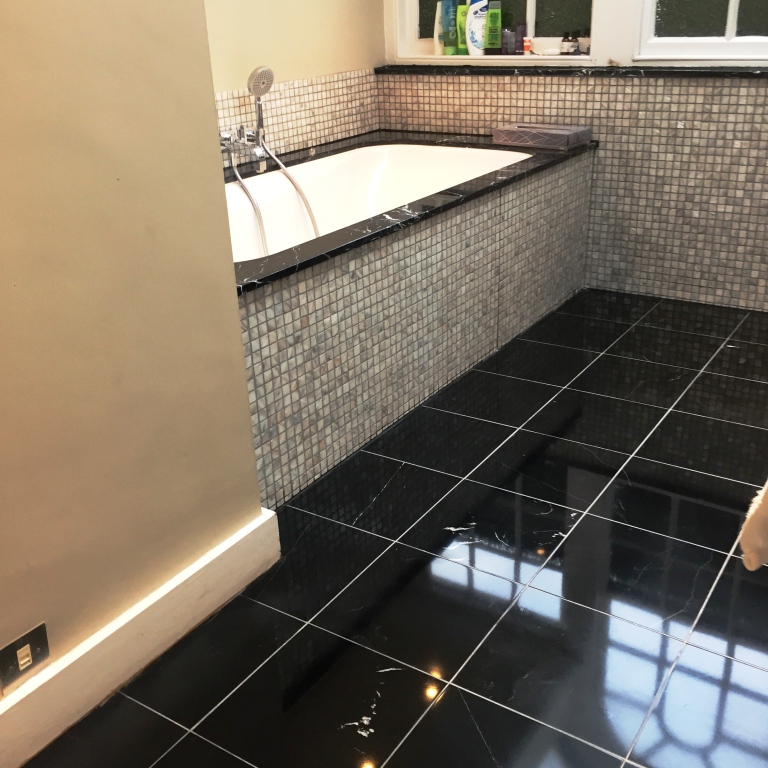
This customer in Baldock, North Hertfordshire has a beautiful Black Marble bathroom floor which unfortunately was far from looking its best due to a build-up Limescale. Normally this can be removed with an acidic cleaning product however Marble like all natural stones is acid sensitive would be damaged in the process.

Black Polished Marble Bathroom Floor in Baldock Before Limescale Removal
The only way to remove the Limescale would be to polish it off using a set of diamond pads which would also restore a high shine finish to the Marble floor tiles.

Removing Limescale from Polished Black Marble

The first step before starting the process was to cover the threshold edges, skirting’s and doors with tape to protect it from splashing etc. Next we used a medium dilution of Tile Doctor Pro Clean which is an alkaline tile and grout cleaner with hand brushes to clean-up the thin gout lines and remove any grit from the floor.

The floor was then rinsed with fresh water to remove the now soiled cleaning product and also steam cleaned to neutralise floor. The water was extracted from the floor using a wet vacuum.

Honing Black Marble to Restore Polish

To bring back the natural shine we honed the floor using a series of diamond-encrusted burnishing pads. Firstly, I applied a Coarse 400 grit pad to strip away what remained of the old sealer and Limescale, rinsing the floor afterwards. I then applied the Medium 800 grit and Fine 1500 grit pad to gradually close the pores of the stone which, in turn, restores the polished effect. Again each pad is used in combination with a small amount of water and any excess moisture is removed with a wet vacuum. The final 3,000 grit pad brings up a really deep shine and is applied with small amounts of water sprayed onto the tile.

Sealing Polished Black Marble Tiles

After drying the floor the Marble tiles were sealed with two coats of Tile Doctor Ultra-Seal which is a natural look sealer that doesn’t alter the appearance of the stone and protects it from staining by occupying the pores in the stone.

The last step was to buff the Marble tiles with a white buffing pad.

Black Polished Marble Bathroom Floor in Baldock After
The floor now looks fantastic and you can really see your reflection in the shine of the black Marble tiles.

Limescale Removed from Polished Black Marble Floor in Baldock

Removing Limescale from Polished Black Marble floor tiles in a Baldock Bathroom Read More »

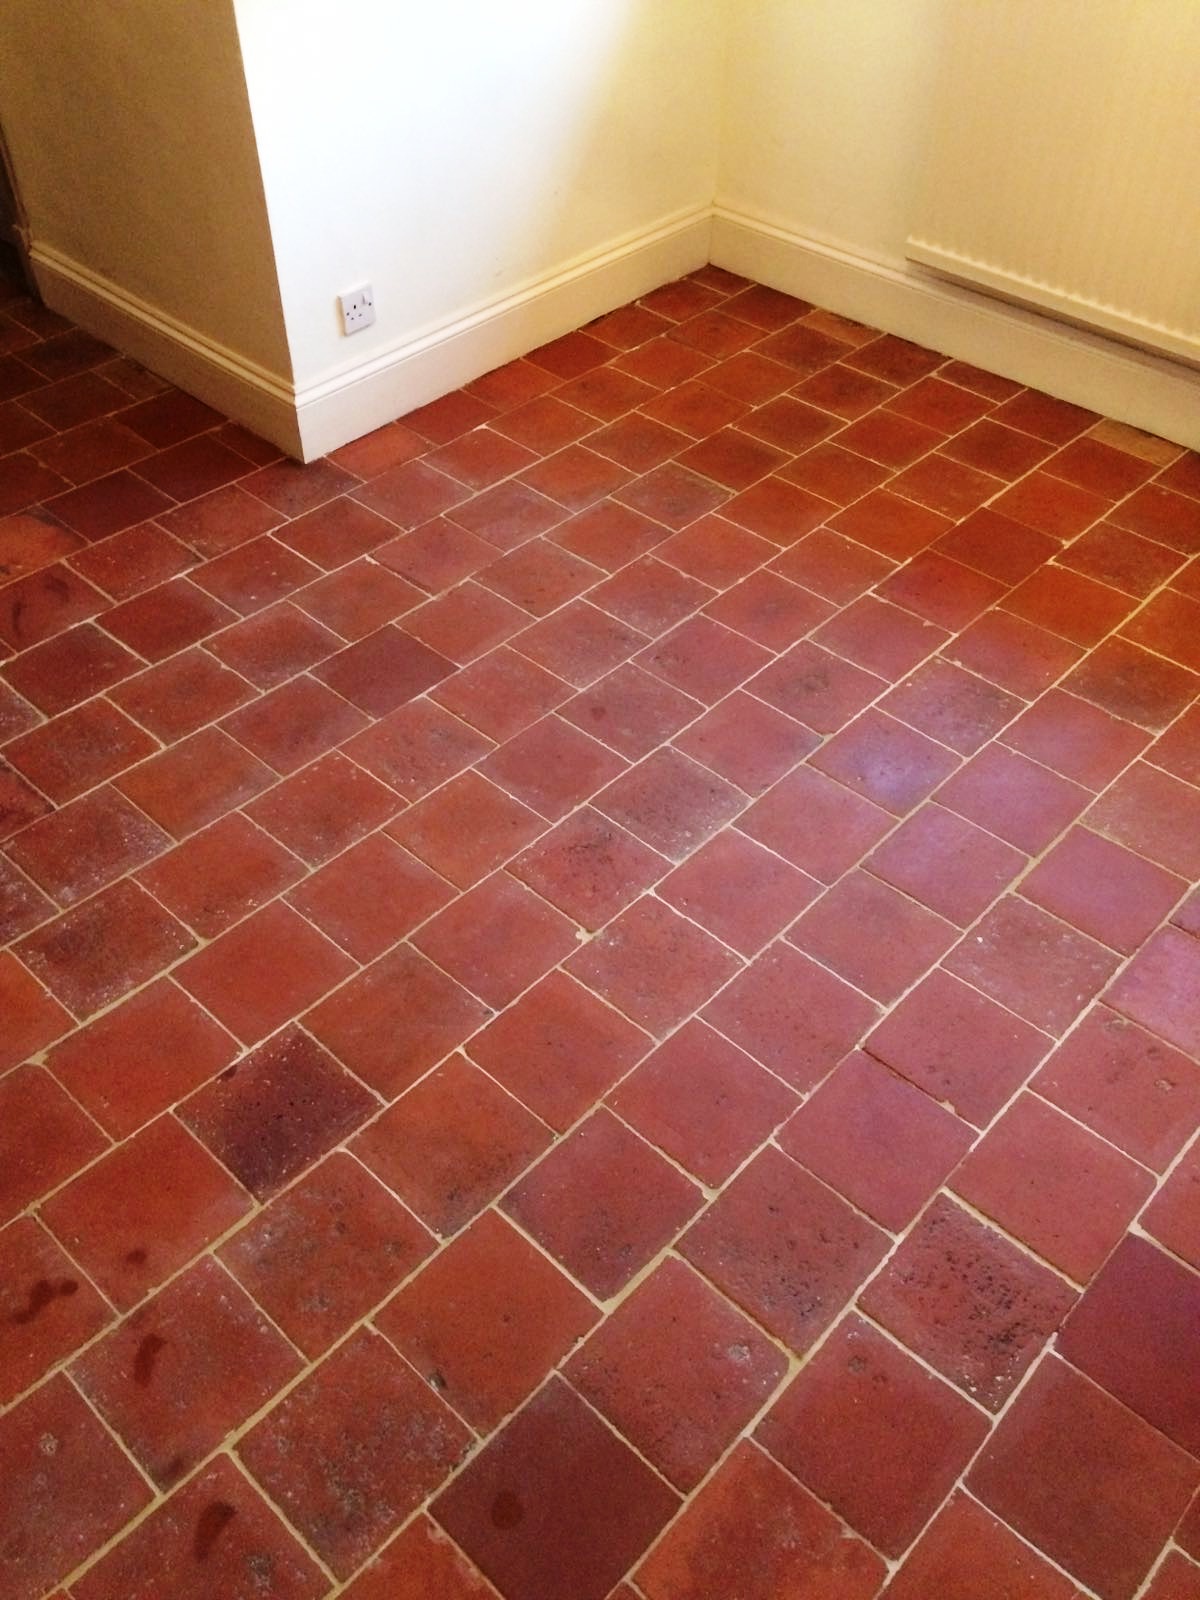
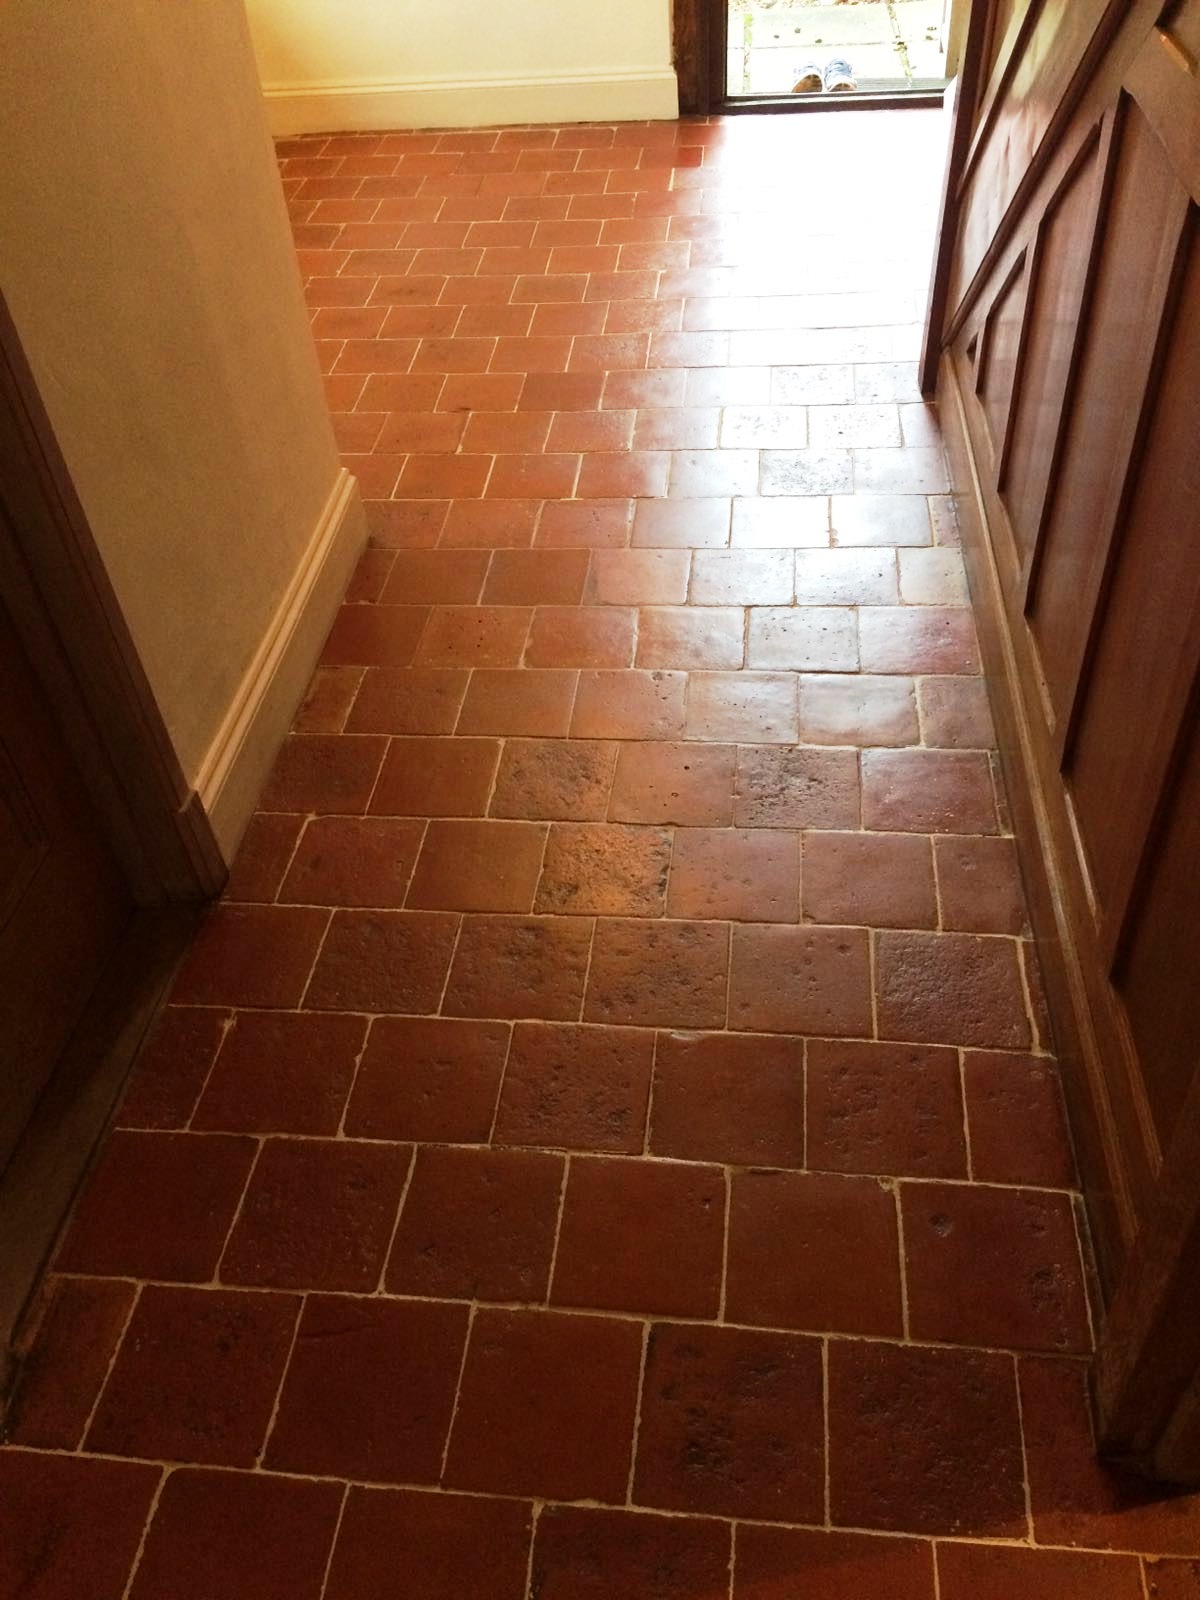
18th Century Quarry Tile Renovation near Hemel Hempstead

18th Century Quarry Tile Renovation near Hemel Hempstead

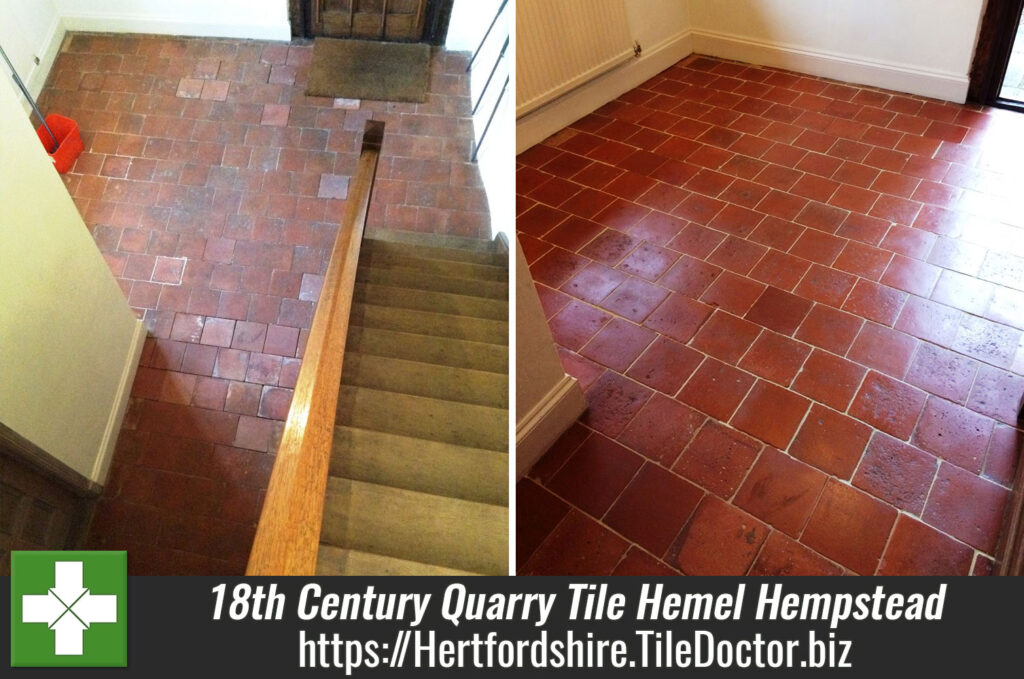
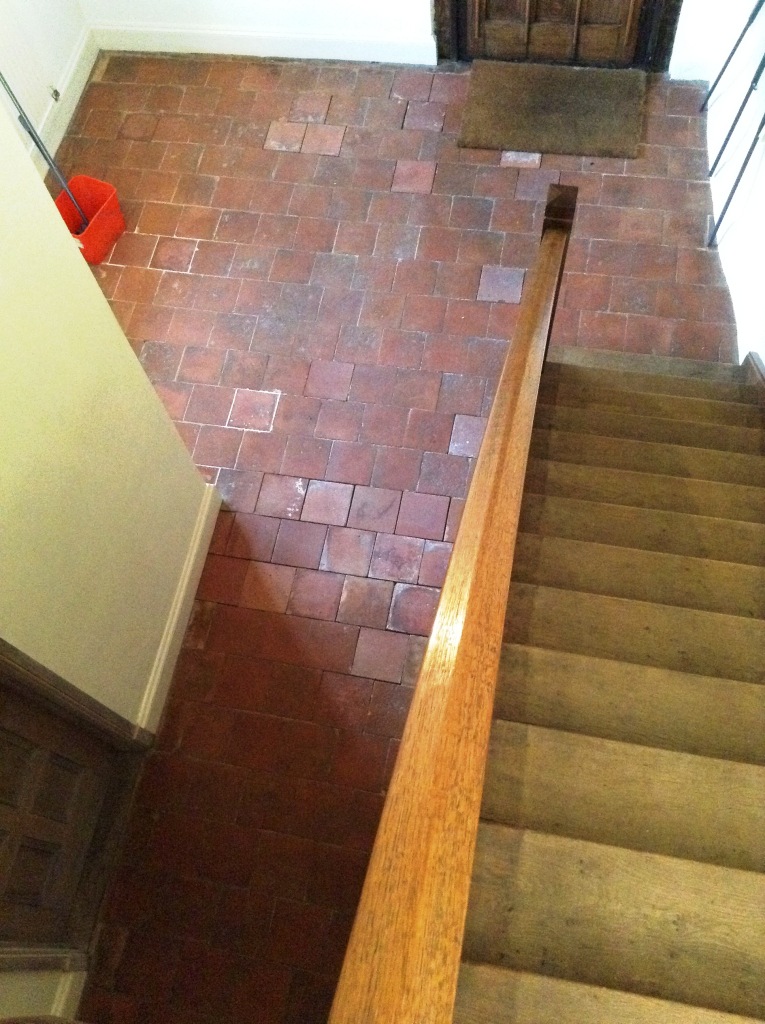
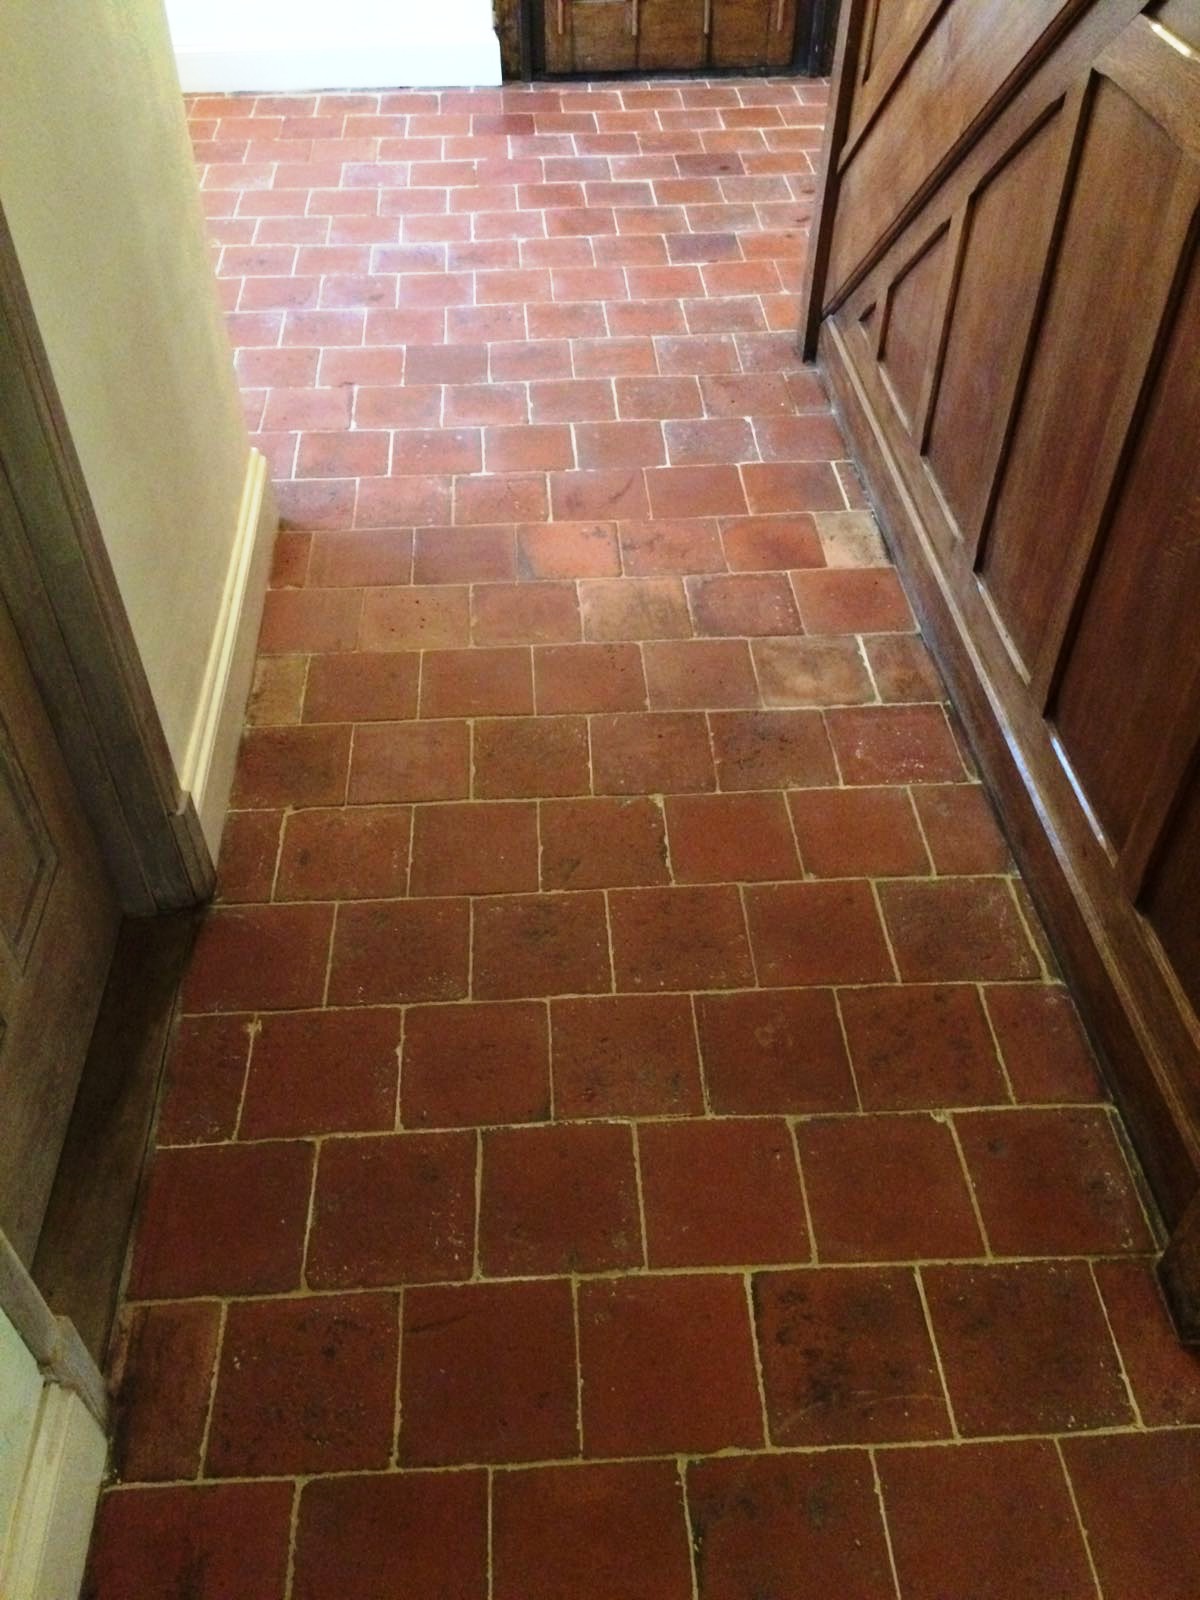
The photographs below are of a very old Quarry Tiled hallway floor taken at a beautiful 18th century farmhouse near Hemel Hempstead; the floor was believed to be original and the customer wanted it repaired and restored.

Old Quarry Tiles Before Cleaning Hemel Hempstead Farmhouse

Deep Cleaning 18th Century Quarry Tiles

Before starting the cleaning process we made sure to protect any vulnerable areas such as the oak panelling on the staircase and then set about repairing the broken tiles which were replaced with matching reclaimed quarry tiles.

Old Quarry Tiles Before Cleaning Hemel Hempstead Farmhouse
Once the replacements and new grout had set we made a start on deep cleaning the Quarry tiles and removing remaining old stubborn waxes and polishes by applying Tile Doctor Remove & Go combined 50:50 with Tile Doctor Nano-Clean which combine to form a very effective stripper and cleaner. The solution was left to soak into the tile for a good ten minutes before being scrubbed in with detail brushes and scrubbing pads fitted to a rotary machine.

The resulting soiled solution was rinsed off with water and extracted using a wet vacuum which allowed us to see the underlying condition of the tiles which indicated more work was required especially to the grout. To get the grout looking cleaner it was treated with a strong dilution of Tile Doctor Pro-Clean which was then scrubbed into the grout manually using a stiff grout brush; the soiled cleaning solution was then rinsed off and extracted using a wet vacuum and then the whole floor was given a further rinse and also a steam clean to remove any trace of product.

Old Quarry Tiles During Cleaning Hemel Hempstead Farmhouse Old Quarry Tiles During Cleaning Hemel Hempstead Farmhouse

Sealing 18th Century Quarry Tiles

It’s essential that tiles are bone dry before sealing so we left the floor to dry for a full seven days before returning. To get the best out of the floor I decided to seal the floor with two different but compatible sealers; first a single coat of Tile Doctor Colour Grow was applied which is an impregnating sealer that restores colour to the tile and protects it from stains by occupying the pores in the clay.

Once the Colour Grow had dried it was followed with six coats of Tile Doctor Seal and Go Extra which is a special acrylic based formula that promotes moisture vapour transmission which is essential for these old floors where no damp proof course was installed.

Old Quarry Tiles After Cleaning Hemel Hempstead Farmhouse
I’m pleased to say the restoration went very well and as you can see the quarry tiled hallway floor now looks fantastic.

Old Quarry Tiles After Cleaning Hemel Hempstead Farmhouse
 

Professional Restoration of 18th Century Quarry Tiles in Hertfordshire

18th Century Quarry Tile Renovation near Hemel Hempstead Read More »

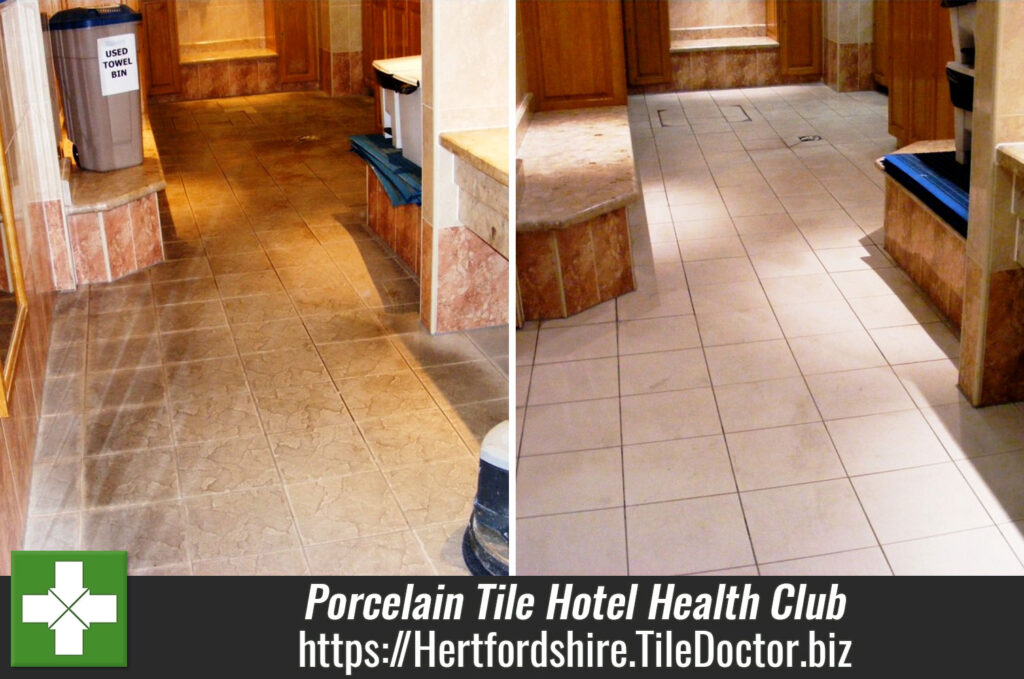
Porcelain Tile Deep Cleaning at a Hotel Health Club

Porcelain Tile Deep Cleaning at a Hotel Health Club

Some further photographs below of work we did at a London Hotel in the West End where we removed staining from the Limestone laid in reception. These photographs relate to the cleaning of a Porcelain Tiled floor laid in the Health Club changing rooms which although in good condition were in need of a heavy duty clean.

Health Club Porcelain floor tiles changing room before cleaning

Deep Cleaning Porcelain Tiles

Unlike stone Porcelain Tile is a relatively straight forward surface to clean. It does help however if you have the right tools and products for the job as household tools and products can struggle.

For this floor we applied a 50/50 mix of Tile Doctor Pro-Clean and NanoTech Ultra Clean diluted with three parts water to the dry surface. The solution was left on the surface to dwell for 30 minutes to allow it to penetrate the heavy soiling on the floor. During this time the product was scrubbed in using black polypropylene floor pads on a slow speed orbital scrubber. The soiled cleaning solution was extracted using a wet vacuum before rinsing with clean water.

A second clean using the Tile Doctor Grout Clean-Up was applied diluted with three parts water and the scrubbing process repeated. This was needed in order to penetrate deeper into the porcelain tile and also to remove any calcium (limescale) deposits from the surface. The soiled solution was extracted again using a wet vacuum and then each tile was carefully rinsed using a fan jet power wash to fully flush the tiles and finally wet vacuumed to dry.

Health Club Porcelain floor tiles part way through
You can see from the photographs the difference deep cleaning made to the Porcelain floor, not only did we manage to restore their natural appearance and texture but there was a significant improvement in the wet slip resistance of the tile surface. The work was all completed out of hours between 22.00hr and 06.00 hrs so that there was no disruption to the hotel or health club guests.

Health Club Porcelain floor tiles after cleaning
 

Deep Cleaning a Porcelain Tiled floor at a Health Club in London

Porcelain Tile Deep Cleaning at a Hotel Health Club Read More »

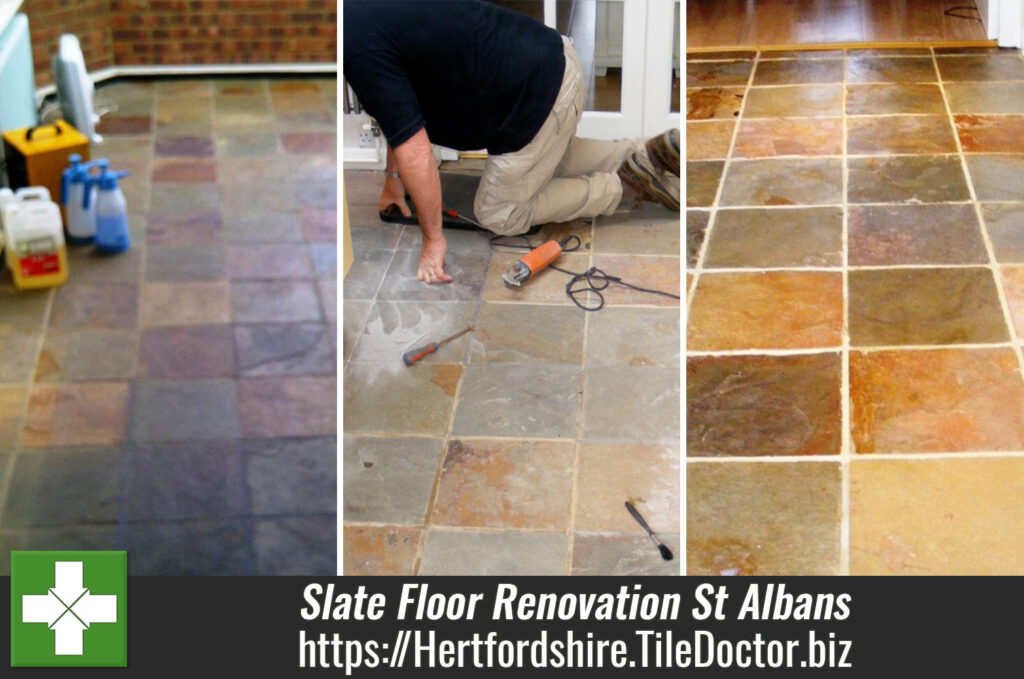
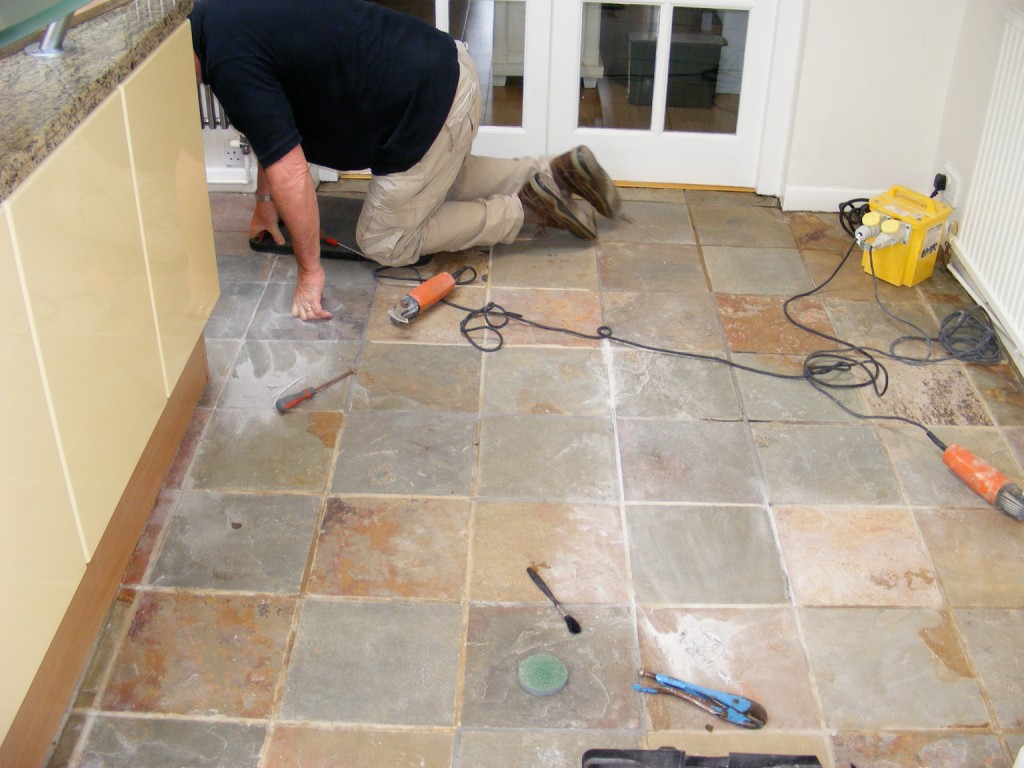
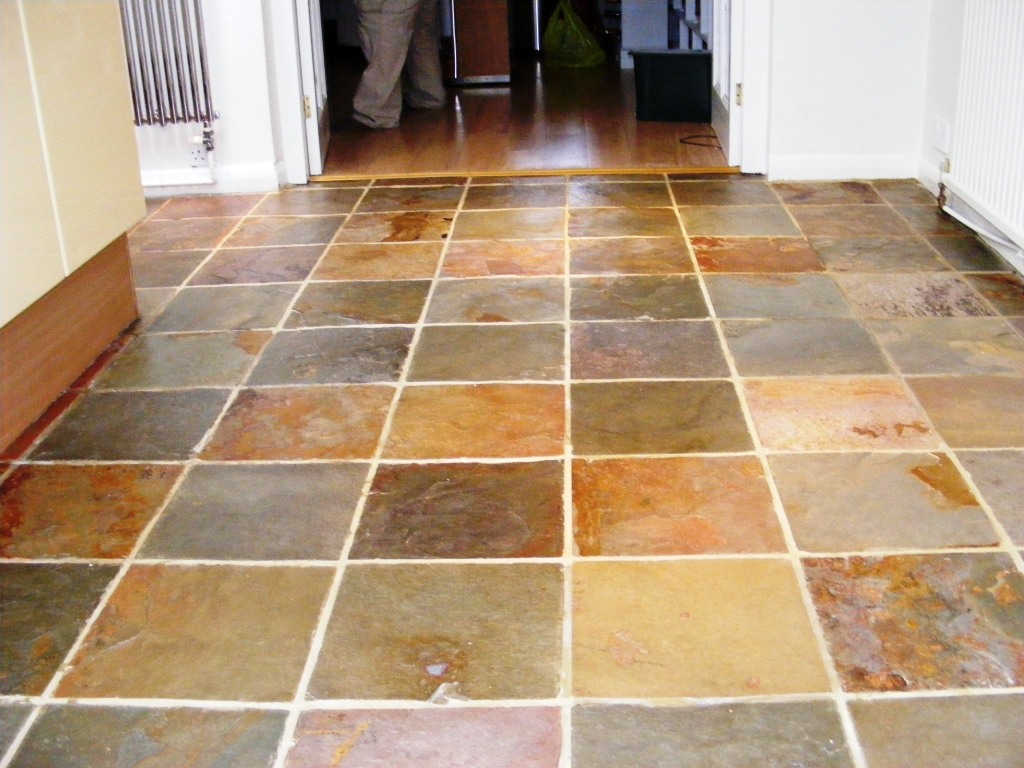
St Albans Slate Floor Renovation

St Albans Slate Floor Renovation

The Slate floor in the kitchen and conservatory of a house in St. Albans was laid around five to six years old and now required deep cleaning and re-sealing. Previously a grout repair had been carried out but unfortunately after the initial clean the grout applied was the wrong colour and needed to be replaced.

Slate floor before restoration

Cleaning the Slate Floor

The Slate floor was pre-cleaned using a diluted solution of Tile Doctor Pro-Clean mixed with Nanotech Ultra-Clean scrubbed with a buffing machines fitted with a polypropylene brush running at a slow speed. The dirty solution was removed using a wet vacuum, floor rinsed with clean water and left to dry.

It’s not a good idea to apply new sealer on top of a different product so it was necessary to ensure all the old sealer had been completely removed. Sealers are by nature stubborn to remove so it was necessary to apply Remove & Go (a product designed for the removal of sealers) which we left to dwell on the surface for an hour. Often a strong solution of Pro-Clean is sufficient but not in this case.

The dirty solution was removed with the wet vacuum and rinsed with water to remove any residues and neutralise the floor.

Removing Grout

To remove the grout we used a specialist “Oscillating Grout Tool”, if there was a large area to do we would normally recommend the user of an epoxy Grout Colourant however there wasn’t a great deal to remove so it was quicker to cut out the offending Grey grout and replace with a matching sandstone.

Grout removal and repair Cutting out with an Oscillating grout tool

Sealing the Slate Floor

We sealed the floor with a single coat of Tile Doctor Colour Grow which really helps bring out the deep colour from the slate. To finish and build up the lustre and richness of the colour we then applied seven coats of Seal & Go.

Finished Slate floor with new grout
All of the job took two full days and was ready for soft foot traffic after two hours of completion and fully dry in 24 hours. For maintenance we recommended the use of Tile Doctor Neutral Cleaner, diluted 1:30 with water and applied with a microfibre flat mop, rinse with water and then remove with a clean microfibre flat mop.

The customer was very pleased with the results and left the following comment:

We are delighted with the results achieved by the Tile Doctor on our slate floor. It looks like we have laid a completely new floor in our kitchen and conservatory! Rob was a true professional and we would thoroughly recommend the Tile Doctor to anyone considering using their services

Ms. S. Hiller, St Albans, Hertfordshire


Slate Floor Renovation in St. Albans

St Albans Slate Floor Renovation Read More »

Limestone Floor Cleaning at a Hotel in London

Limestone Floor Cleaning at a Hotel in London

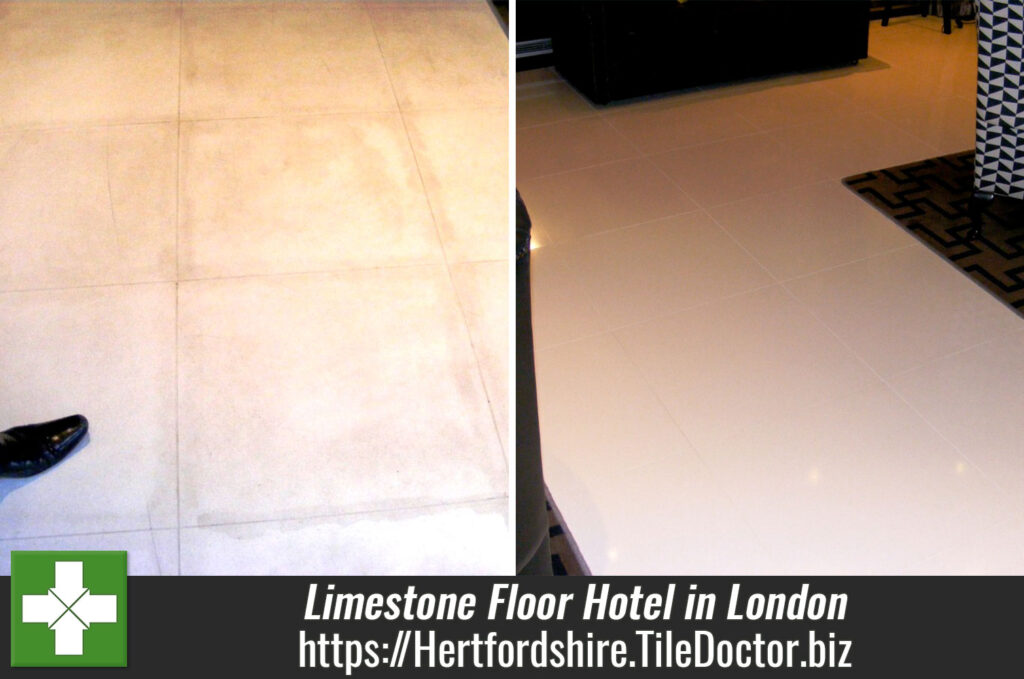
Details below of a Limestone floor installed in the reception of a Victorian hotel in London’s West end. The Limestone Floor had been cleaned incorrectly leaving very noticeable staining marks to the grout lines. We were asked to return the floor to its natural appearance and improve the finish from Matt to Polished.

Badly Stained Limestone Floor Hotel Reception

Cleaning the Limestone Floor

Working at night to minimise disruption for the hotel guests our first step was to clean the floor and grout with a dilution of Tile Doctor Pro-Clean. Pro-Clean is ideal for this purpose due to its alkaline formula, acidic products even those with mild acidity will damage the floor over time and can lead to small holes forming where the calcareous stone has been dissolved.

Limestone Floor London Hotel Reception before restoration
The next step was to burnish the floor using four stage diamond encrusted twister pad system. This is a labour intensive process where you scrub the floor using a buffing machines fitted with different pads; each pad is designed for a different purpose and will remove sealers, grind off ingrained dirt, smooth the surface as well as polish.

Polishing and Sealing the Limestone Floor

To obtain the requested highly polished finish the floor was then polished using Tile Doctor Shine crystallising powder which as well as providing a high shine also leaves a tough durable finish, ideal for high traffic areas such as this. We finished off the floor with a single coat of Tile Doctor Colour Grow impregnating sealer which was then buffed to a high shine finish.

Limestone Floor in London Hotel After Honing and Polishing
For regular cleaning we have advised the hotels maintenance team to use a 1-30 dilution of Neutral Cleaner applied with a microfibre flat mop, water rinsed and the dried with second clean microfibre mop.

Limestone Floor Cleaning at a Hotel in London

Limestone Floor Cleaning at a Hotel in London Read More »

Cleaning Mexican Terracotta Tiles, St Albans

Cleaning Mexican Terracotta Tiles, St Albans

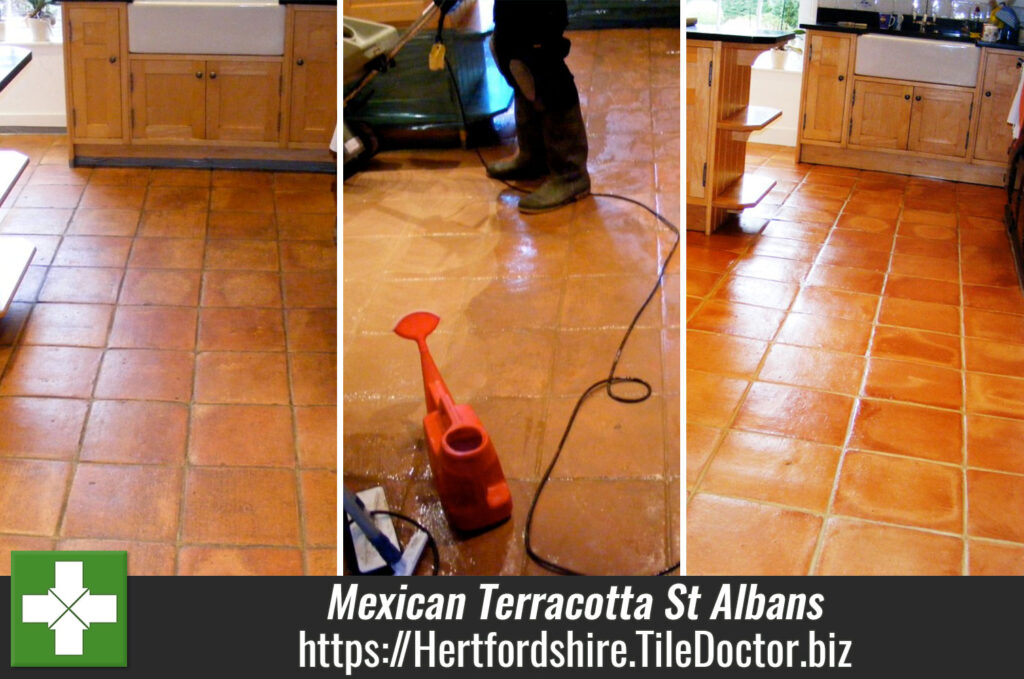
Mexican Terracotta tiled floor laid several years ago in the kitchen of a property in Wheathampstead near St Albans. It had originally been laid and sealed in the classic method with a wax and was becoming increasingly impossible to clean.

Mexican Terracotta before prepped for cleaning

Cleaning Mexican Terracotta Tiles

We started the cleaning process using a solution of Tile Doctor Pro-Clean in order to remove excess dirt and soil from the surface of the tile. This was followed by the application of Tile Doctor Remove and Go combined 50/50 with NanoTech Ultra Clean agitated with a brush fitted to a scrubbing machine running at slow speed. This worked to breakdown and remove the remaining wax sealer returning the Mexican Terracotta back to its original condition. The resulting solution was rinsed off with water and a cleaned with Neutral Tile cleaner followed by two further water rinses. A wet vacuum comes in very useful at this point for removing the liquids from the floor.

Mexican Terracotta Cleaning and wax removal Mexican Terracotta After cleaning ready for sealing

Sealing Mexican Terracotta Tiles

We left the floor to dry and returned some days later to seal. We started this process with a single coat of Tile Doctor Colour Grow which really helps to bring out the colour in the tile followed by six to seven coats of Tile Doctor Seal and Go. Terracotta is by its nature a very porous tile and so it’s not unusual for it to need seven coats.

Cleaned and Sealed Mexican Terracotta floor

Cleaning Mexican Terracotta Tiles in St. Albans

Cleaning Mexican Terracotta Tiles, St Albans Read More »

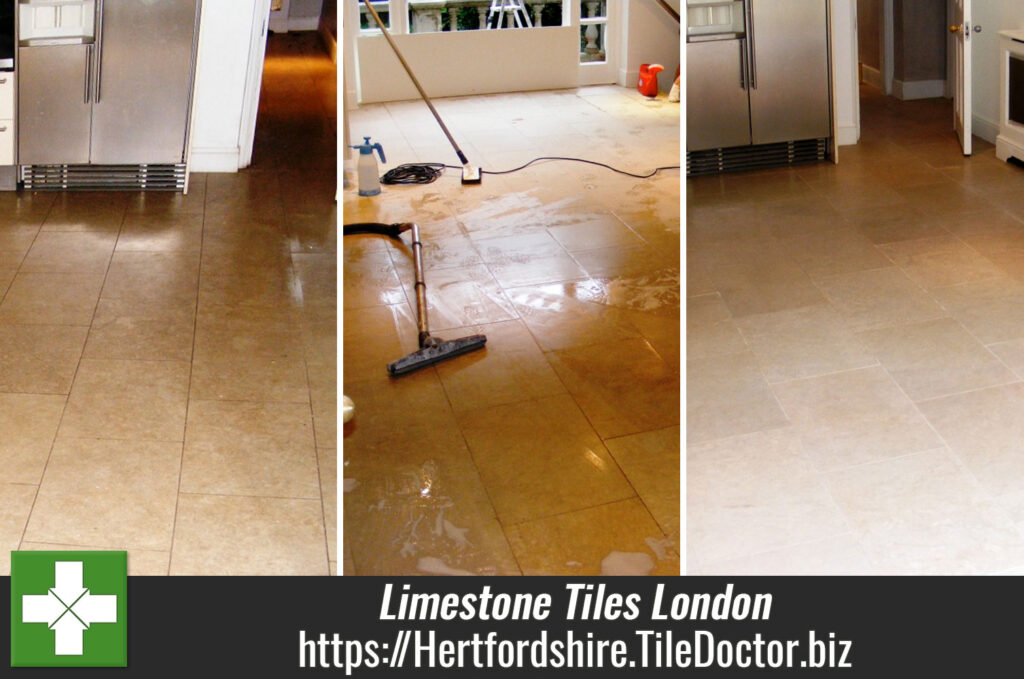
Cleaning Limestone Floor Tiles In London

Cleaning Limestone Floor Tiles In London

We were called in during some major house renovations to restore the Limestone Floor tiles fitted in the kitchen and utility room. This involved a good deep clean, burnishing and then sealing to restore the natural colour and appearance of the stone.

Limestone Kitchen Floor Tiles Before Cleaining Limestone Steps Before Cleaining

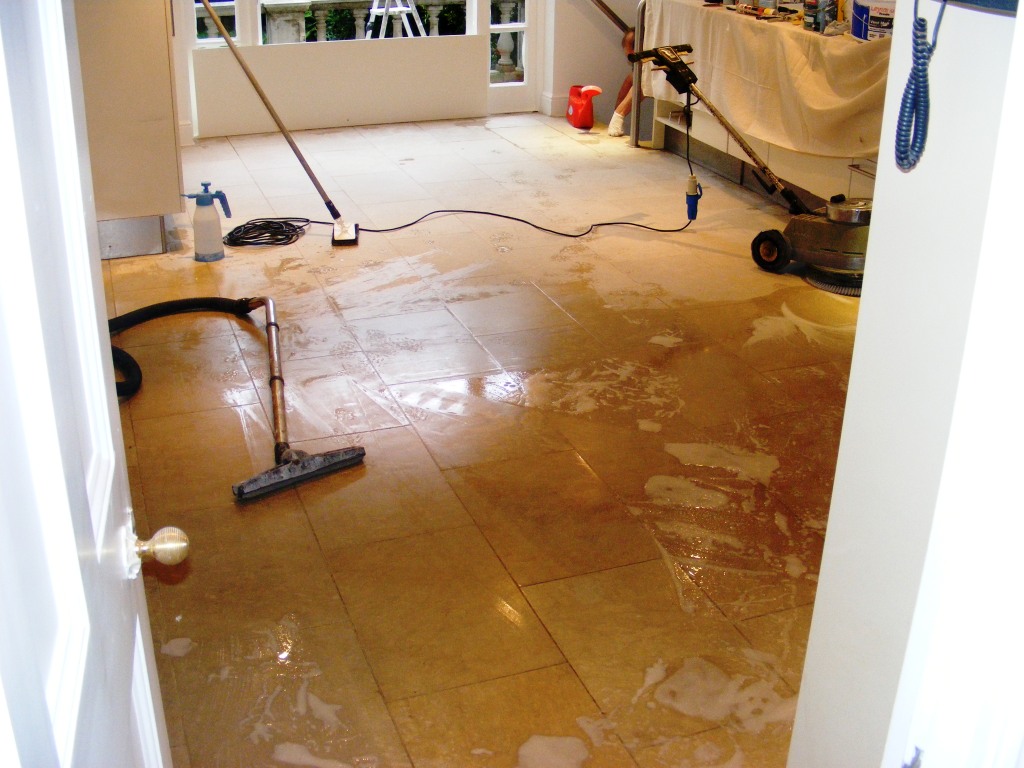
The floor was pre cleaned with a dilution of Tile Doctor Pro-Clean and NanoTech Ultra-Clean agitated with a slow speed machine fitted with polypropylene brush, the solution was removed with a wet vacuum rinsed with water and dried.

Limestone Kitchen Floor Pre-Clean
A couple of the floor tiles in the hallway were fractured so the next job was to replace them; this involves chopping out the tile and cleaning up the exposed area so new tiles can be installed and grouted.


Limstone Floor Tile Replacement Prep Limestone Tile Repair Prep
New Inserted Limestone Ready For Burnishing

The Limestone Tiled floor was then Burnished using the four stage Twister Burnishing pad set which removes topical sealers, ingrained dirt before finally polishing the floor into a high shine.

Limestone Tiled Floor Final Stage Sealed And Buffed
Once the final finish had been achieved the floor was sealed with two coats of Tile Doctor Colour Grow sealer which brings out the colour of the tile and provides a protective impregnating seal. The last step was to run a buffing machine over the floor to get that final finish.

Cleaned Limestone Tiled Kitchen Finished Limestone Steps Completed

Before leaving we advised the customer to clean the floor using a neutral frequent use cleaning product such as Tile Doctor Neutral Cleaner, other products can be acidic and can actually dissolve holes in the tile over time. The customer was very pleased with the work we did and left the following comment:

Very professional, high quality job. Rob and his team were a pleasure to deal with and worked hard to meet our time constraints. The floor is unrecognisable from what it was before!

Mr. B. Chapman, London, NW8

Limestone Floor Restoration in London

Cleaning Limestone Floor Tiles In London Read More »

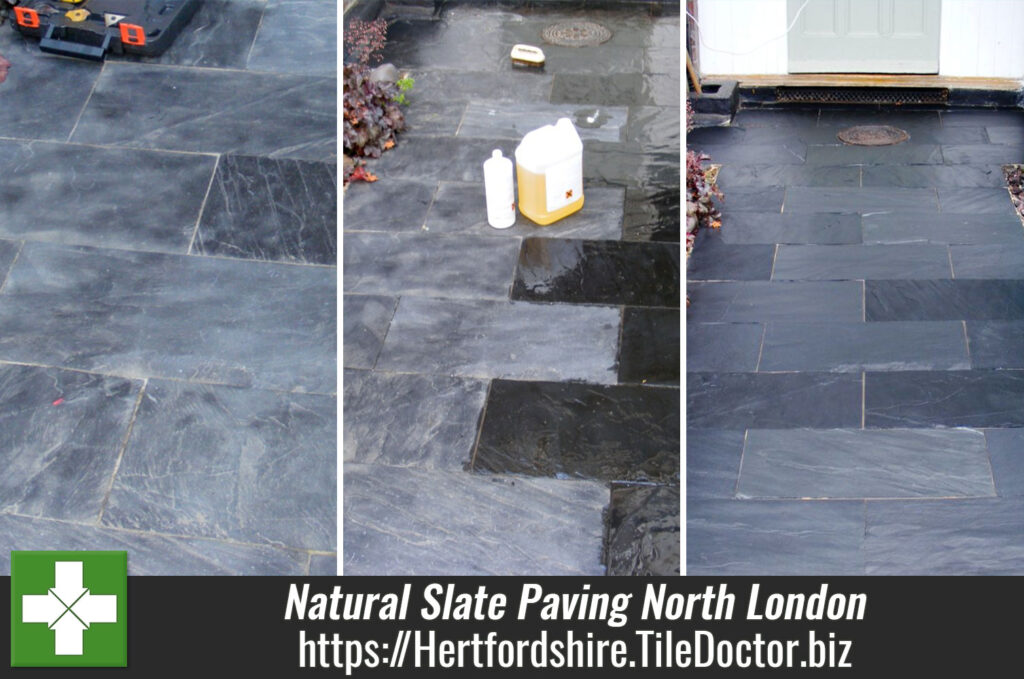
Cleaning Natural Slate Paving

Cleaning Natural Slate Paving

We were asked to take a look at a natural slate paving leading up to the entrance of a lovely old residence in North London. The slate path had only been recently laid, grouted and sealed and the owner was not best pleased with the results and a request was made to remedy the situation and return the slate back to its natural colour and appearance.

Natural Slate Path Before Cleaining Natural Slate Path Before Cleaining

We carried out a series of tests to ensure we could remove both the sealer and grout haze from the surface of the tile. It’s not a good idea to apply a different sealer on top of an existing product as the end results will be inconsistent and the products maybe incompatible. We cleaned up the tile, sealed it and left it to weather for a few days to demonstrate to the customer the durability of the finish.

Natural Slate Path Pre-testing Natural Slate Path Pre-testing

Cleaning Natural Slate Paving

All was well with the test and we got the green light to do the whole slate path. We started by cleaning the path with Tile Doctor Pro-Clean which was then washed off and allowed to dry. We then applied Tile Doctor Remove and Go mixed 50/50 with Tile Doctor NanoTech Ultra Clean; this is a really powerful combination which we left to dwell on the tile for an hour in order to soften up the current sealer and ingrained dirt. The solution was then removed and the slate tile washed down with more water.

Natural Slate Path Mid-Process
With the sealer removed we tackled the Grout Haze by using Grout Clean Up and a fair amount of elbow grease with stainless steel and polypropylene detail brushes.

Last step before sealing was to neutralise the floor with another rinse down, this time washing the tile with Tile Doctor Neutral Cleaner, it’s important that any remaining chemical is removed from the surface otherwise it may upset the sealer.

Sealing Natural Slate Paving

Finally once the slate had dried, we applied 3 coats of Tile Doctor Colour Grow and buffed off the last coat with a buffing pad to bring out the deep colour from within the Slate; the sealer was fully dry and path ready for normal use 12 hours. For maintenance we recommend using Tile Doctor Neutral Cleaner, diluted 1 to 30 with water applied with a microfibre flat mop, rinse with water and dry with second microfibre mop. The customer was very happy with the results and left the following message:

Robert’s communication was excellent and he always kept us informed on what to expect and the timescales involved. He was very reliable and punctual and the quality of his work was to a very high standard. We were very pleased with his work and overall service.
Mr. M. Vaughan, Alexandra Park, London

Natural Slate Path Cleaned and Sealed

Cleaning Natural Slate Paving in North London

Cleaning Natural Slate Paving Read More »

=================================

Hertfordshire Tile Doctor

================================= Read More »

Scroll to Top